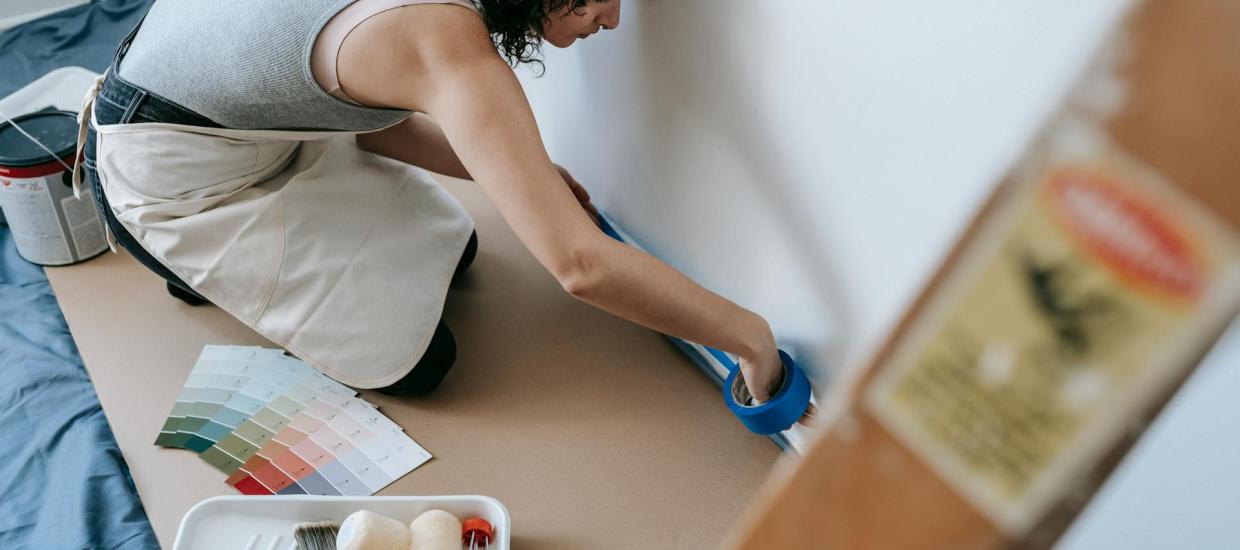
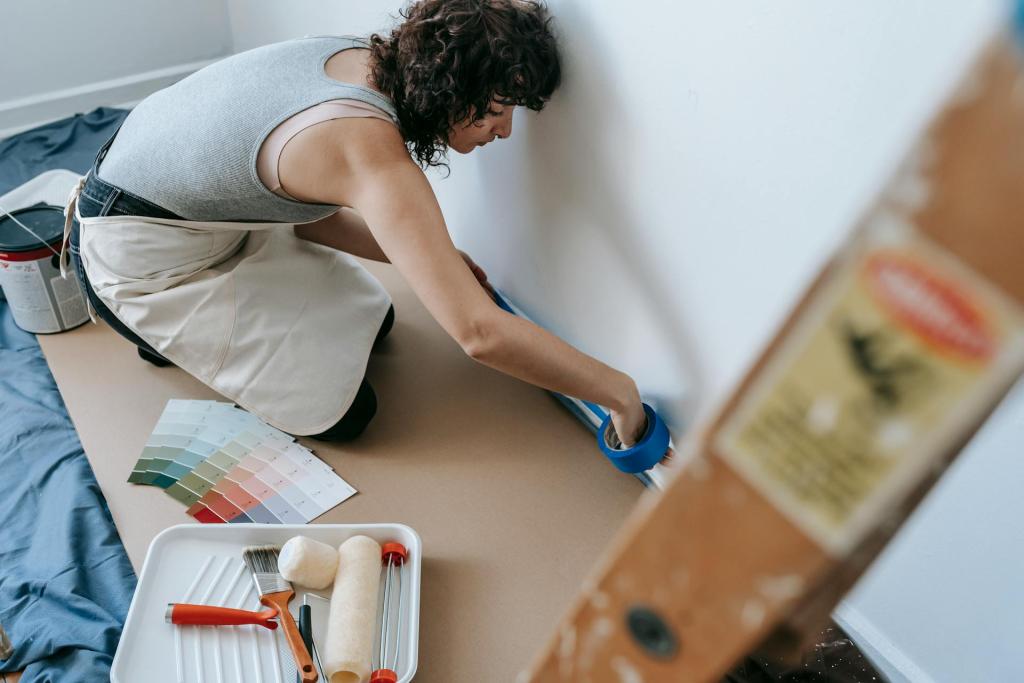
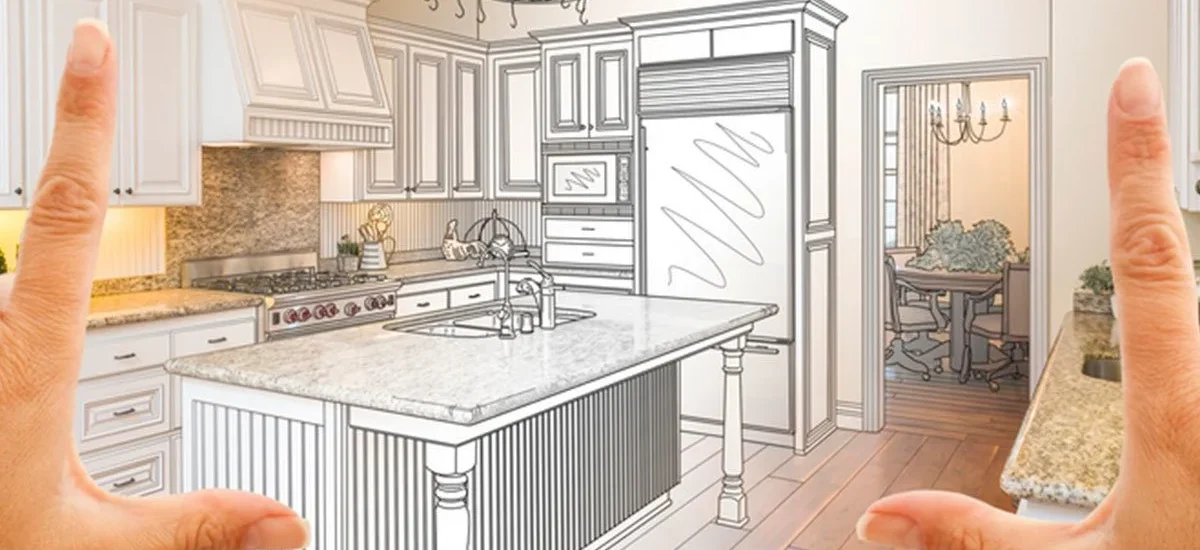
So you’ve decided that you are immune to the DIY madness sweeping the nation, and you’re ready to hire a contractor to finish your home improvement project or major renovation.
Whatever level of work you require, there are different contractors and professionals you need to consult with before hiring one. Here are a few tips on what to look for when preparing to hire a professional to complete your project.
Seek Personal Recommendations
Do you know a friend, relative, or coworker who has had a similar project done? Ask them who they used, if they’d recommend them, and how much the contractor or company cost. Oftentimes, personal recommendations are more reliable than online reviews.
If it sounds like a good fit, reach out to them. Being referred by a past client can also earn you a discount or a referral fee for the person who referred you.
Start Your Search Online
If you’re starting from scratch, a safe place to start is always Google. You can search by project type, like “plumbers” or “basement finishing” or “landscaping” in your zip code, and search that way.
Now, with the use of AI, you can quickly ask bots such as ChatGPT, Gemini, Claude, and many more for recommendations. However, always take the extra step to double-check the results, as these tools can hallucinate.
You can also use online directories, like Angie’s List or the White Pages, to look up local businesses that specialize in what you want to do.
Also, be sure to check the company’s record on the Better Business Bureau’s website to verify that no complaints have been filed against it.
Review Your Budget
When you find a person you think would be a good fit, schedule a time for them to come and provide an estimate or get a feel for your project. This will be a great opportunity to meet the contractor and ensure you’re comfortable with them.
However, before you meet them, have a strict budget in mind. Don’t be wishy-washy and say, “Well, how much do you think it will cost,” or “We were hoping to stay around $x.” Be firm, and know exactly what you’re willing to pay. Don’t lowball or be cheap. Just come in with a fair offer, and if you can’t reach an agreement, it’s time to consider a new contractor.
Don’t Be Tempted to Accept the First Offer
If you find a contractor you really like and who gave you a reasonable estimate, do not hire them on the spot. Although it’s perfectly fine to accept the first offer and work with that contractor, it’s not always a good idea to leap at the first opportunity.
Continue to interview a few other candidates to gain a well-rounded view of the options available. If contractors know there is competition, they will put their best foot (and offer) forward.
Do Your Homework
If you decide to hire a contractor, ensure you understand the entire scope of the project, including the completion timeline, the specific work to be done, the warranties or exemptions, and the payment schedule.
Be sure to sign a contract, even if it’s just a rough mockup that says, “X Company will complete work by X date for X dollars.” If the contractor is truly professional, they will already have a contract or agreement in their paperwork.
Hiring someone to do work on your home is a big step, and it can often be intimidating. In the end, if you do your homework and are willing to pay a true professional, the work will be done with minimal headache.
Want more videos like this one? Subscribe to our YouTube channel!
This article was originally published on March 17, 2016.
Before you start your next home project, ask yourself if it’s worth it to DIY or hire a professional.
You’re sitting on the couch watching your favorite home improvement channel, or you’re browsing the Internet and come across a great home project you’d love to create.
Maybe it’s a raised-bed garden, a beautifully built-in bookcase, or a wall tunnel for your cat.
Whatever it is, you’re probably saying to yourself, “That looks easy. I can do that.”
Hold up.
Before you make yourself into Tim “The Toolman” Taylor with your epic flub in home renovations, ask yourself if you’re really capable of getting the job done.
Here are a few questions to ask yourself:
Do I have the time?
Home improvement projects rarely go as planned and can be more time-consuming than they initially seem.
Nothing is as easy as the pros make it look, so make sure you have a realistic time frame in mind and that you can continue the project if something goes wrong.
If you don’t have the time (sorry, you really can’t finish your whole basement in a weekend), think about hiring a contractor.
Do I have the knowledge?
If you have extensive experience in plumbing, feel free to replace that toilet or relocate your shower.
You may want to consider taking a class or consulting a professional if the answer is no.
If you are familiar with electricity and understand codes and safety measures, then you can likely add lights or outlets safely without much concern.
However, if you find yourself thinking, “I need to YouTube this,” and it involves gas, fire, electricity, or water, the safe bet is to pay someone else to do it or invest in a good class that can show you how to do it safely.
Don’t let your ego be the reason your house floods or burns to the ground!
Do I have the patience?
This aspect is often underestimated, but the reality is that many people get frustrated with home projects and tend to leave them unfinished.
If you’re a couple starting a project, keep in mind that this may either be a bonding experience or a “You’re sleeping on the couch” experience. There tends to be no middle ground.
If you have little tolerance for things going wrong or for minor injuries you may acquire, consider hiring a professional and relax while someone else does the work.
Which is more expensive: Doing the work or hiring a professional?
Another important factor in deciding whether to DIY or outsource your project is determining if you can afford it.
Strangely enough, it often ends up being more expensive to do it yourself, as you may buy more product than you need, or you may mess up entirely and have to go purchase items again.
Also, you’re spending your time and energy, and time is money! Often, a contractor can complete the job in half the time you can, and they receive discounts on the products and appliances they need to get the job done.
While it may be less exciting than doing it yourself, you may save money in the long run. And you’ll be supporting local business by doing so!
This article was originally published on February 4, 2016.
When it comes to DIY projects, homemade coasters are one of the most simple, fun endeavors to take on! They’re excellent for beginners, appropriate crafts for kids, and they leave plenty of room for creativity. Functionally, coasters are also important to have at the lake house — especially if you’re often hosting guests for dinner parties or game day events. You can protect your furniture from spillage and stains from hot or cold drinks while showing off your style and creativity. Check out these fresh ideas for DIY coasters from several different bloggers!
Who would have thought Sharpie markers created these beautiful, abstract designs? To get started, all you need is a few Sharpie colors of your choice, isopropyl alcohol, and peel-and-stick black felt. First, color the tile to your heart’s desire with whatever mix of colors you choose. If you follow these instructions from One Little Project, the alcohol will create abstract swirls in your design, while the top coat seals it in. Other methods such as Jessica Welling Interiors involve an extra step, putting it in the oven.
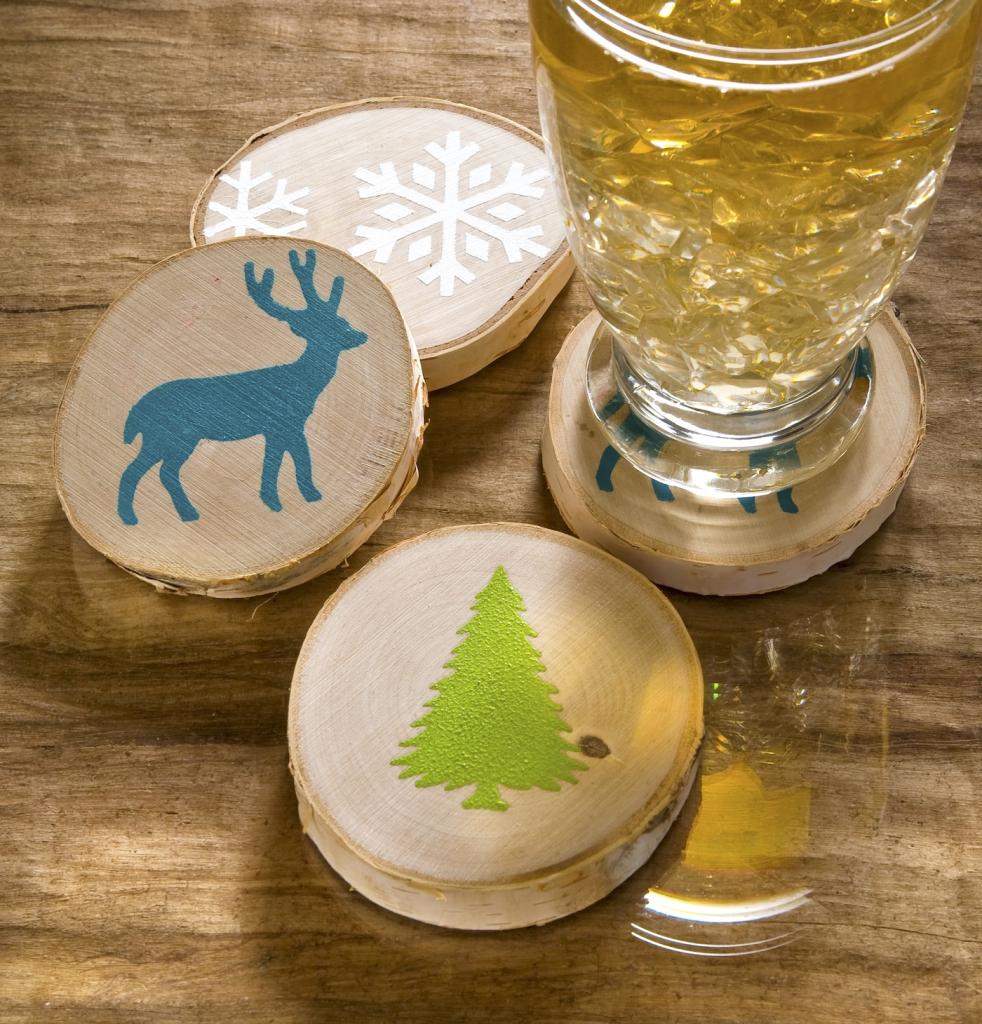
These DIY wooden coasters are perfect for any lake house since they integrate elements of nature into your decor. If you already have facets of biophilic design in your lake house, these wooden coasters will fit right in. After buying wooden slices at a crafts store like Michaels, the rest is up to you. In this outline from DIY Candy, the authors used acrylic paint to make cute winter-themed designs on each coaster. If you want to make DIY wooden coasters from planks of wood, check out these instructions from Fix This Build That. This method requires access to a saw, sander, and drill press planer, but the result is a series of sophisticated, matching coasters that integrate different shades of wood.
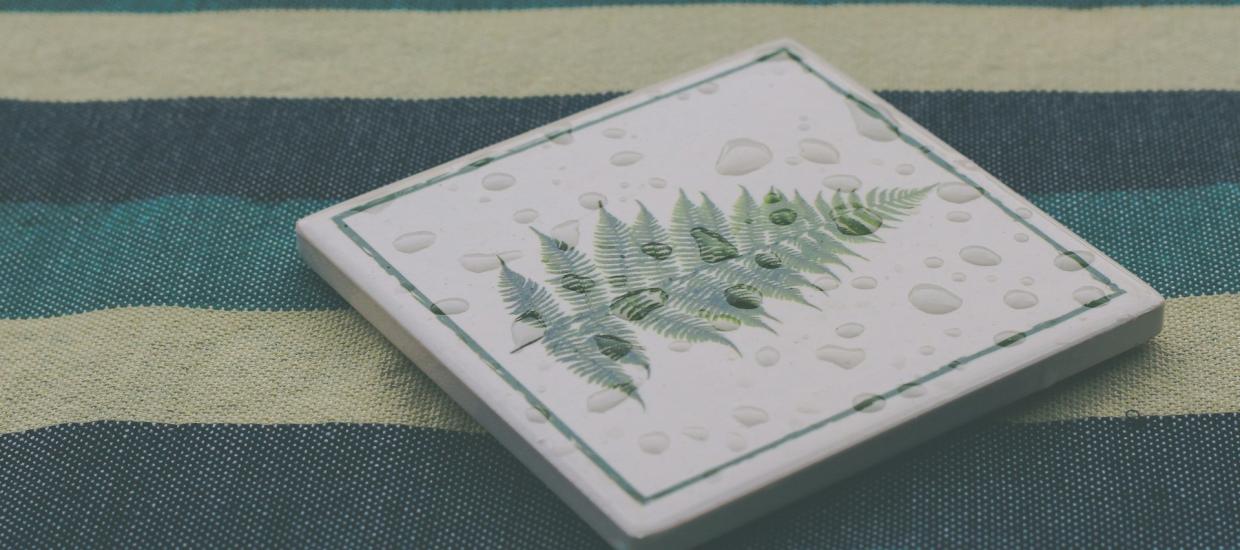
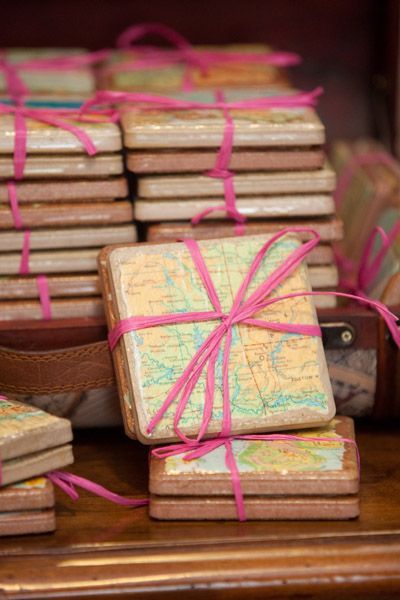
ModPodge is an essential ingredient for any crafter. Essentially a glue, finisher, and sealant in one, there’s no shortage of crafts you can make with this medium. One idea from the Mod Podge Rocks website involves applying paper to tiles using a paintbrush and Mod Podge. You can put anything you want on the surface—scraps of paper, maps of your lake area, magazine cutouts. It’s up to you to get creative! Just remember, you’ll want to use a resin spray as a final coat since Mod Podge is not waterproof.
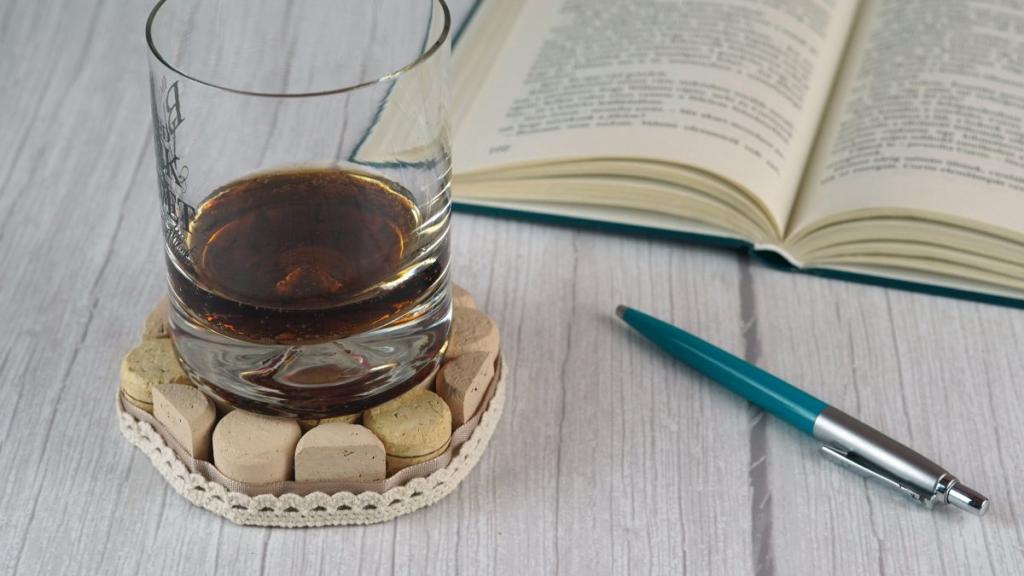
Do you ever have wine corks sitting around from a house party at the lake? Maybe you’re saving them in a drawer, or you have been meaning to recycle them. Now is the time to repurpose these cold corks for a DIY coaster. Using these instructions from Diys.com, you can create a chic set of coasters for your home. Besides several wine corks, all you need is a silk ribbon, glue gun, paintbrush, and cream acrylic. The end result is a set of coasters that looks both homemade and sophisticated
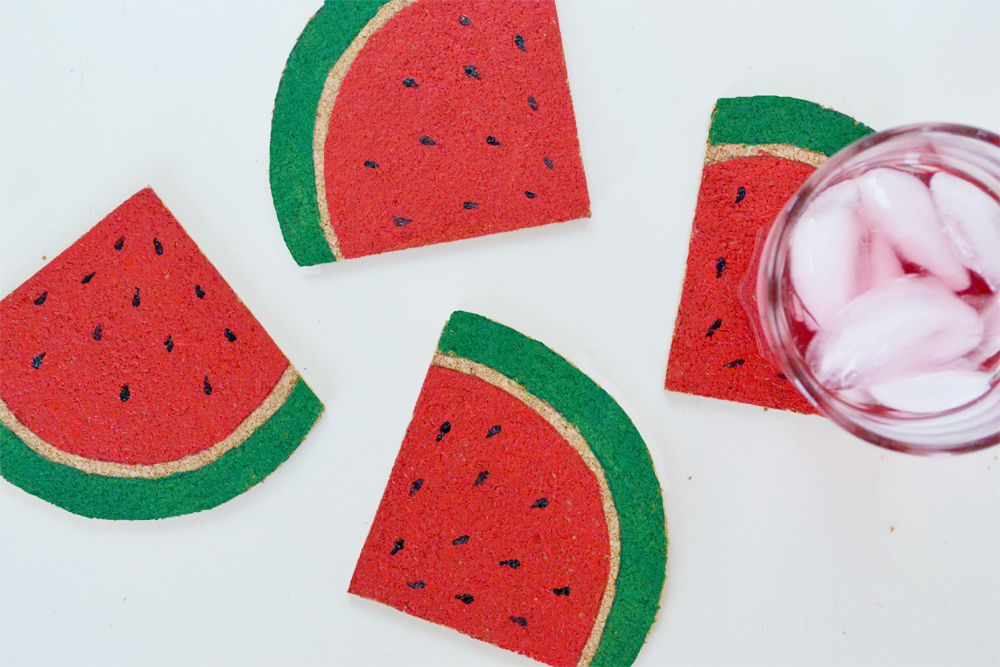
These adorable watermelon coasters are perfect for summer! By following these directions from Diys.com, you’ll spend less than $10 on materials. It only requires cork boards, red and green acrylics, and a few other simple tools. The simplicity of this DIY project also makes it perfect for kids. Using this same basic method, you could also create coasters specific to other seasons. Perhaps a cutout Christmas tree or dreidel over the winter holidays? Or a pumpkin at Halloween? Either way, you’re in for a charming new addition to your living room.
Overall, DIY coasters make fun projects, great gifts, and decorative pieces for your lake home. What’s not to love?
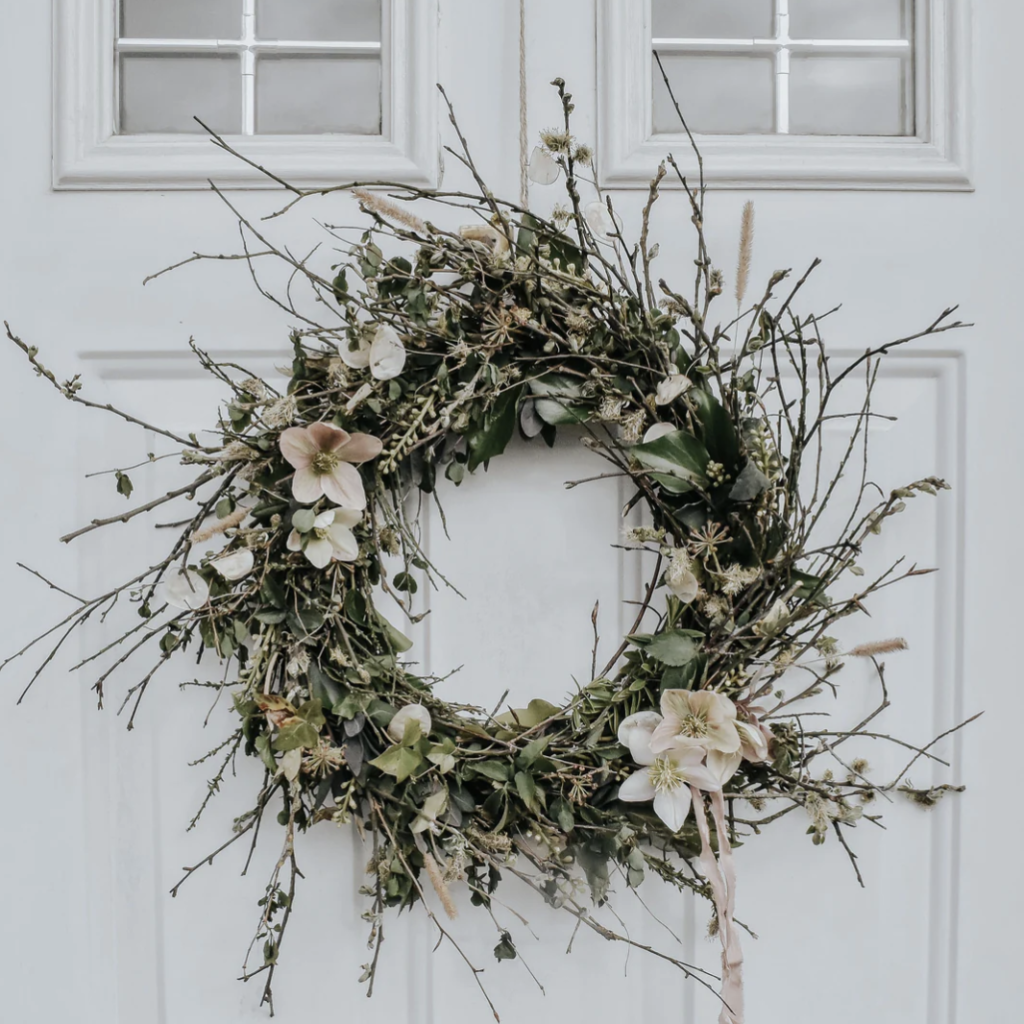
With March behind us, it’s safe to say Spring is finally in full bloom. One of the best parts about lake living in the Spring is the florals and greenery, making Spring the perfect time to get crafty. If you like DIYs or art projects, or if you love the lake lifestyle, this one is for you! Keep reading to learn how to craft the perfect foraged wreath for your lake home.
A foraged wreath screams Spring. Not only do you get to add your personal flare to your home with goods and materials collected right from your yard, garden, or shoreline, but it’s also a great way to spend more time with nature. Being outside and being in nature are known to aid in stress relief and mindfulness. Luckily, because you live on the lake, there’s plenty to do and find outside! That includes foraging. Making a foraged wreath is a good way to reuse and recycle goods in a unique, trendy way. This can be great to take on as a solo project and even better to involve your friends and family! With the world as your oyster, try to think outside the box and create something you never thought you would.
One of the many benefits of lakeside living includes easy access to foraged goods and materials. Materials like pinecones, flowers, stems, dried fruits or vegetables, or even leaves and roots can all be used to spruce up your home. When starting your project, it’s best to go into it with a different perspective. Try finding materials to find beauty in that you wouldn’t necessarily reach for. Or, you could try something totally new by upscaling materials. A few inspirations to draw from include pinecone flowers and dried fruit garlands. These can be quick and easy while adding fragrance to your home as well as bringing an interesting style element to your piece.
The trickiest part of this DIY is the assembly process and even that is easy! Before you start, you will need to ensure that you have a wire frame, gardening clippers or scissors, green wire, or something else to tie the foraged materials to the frame, and last but not least, you will need your foraged materials! If wanted, glue could suffice for the wire, though the wire will ensure a tighter hold and allow for a longer wreath life.
As said, assembly is quite easy. Follow these three simple steps for a successful foraged wreath!
First, piece together bundles of flowers, stems, and other foraged goods or greenery.
We suggest using the bigger pieces first, as they take up the most space and will be harder to adjust when the wreath is fuller.
Next, you will need to use either wire or some form of string to tie the bundles onto the frame.
It is a rule of thumb to separate each bundle by an inch or so to ensure a full wreath. This will also make the wreath appear more symmetrical.
Do this until the entire frame is covered.
Lastly, it is time to add the special touches.
Use flowers, pinecones, etc. to fill in the empty spots.
Taking care of your wreath is as simple as can be. Either you can choose to leave it alone as is, or you can periodically mist your wreath. If properly taken care of, a foraged wreath can last several months. Of course, this depends on the climate and temperature of your home. Wreaths in warmer climates tend to not last as long as those in colder climates. Similarly so, wreaths placed indoors tend to not last as long or tend to dry out faster.
A tip for wreath care to pay attention to in the beginning is the care of your cut stems and greenery. By immediately placing the cut stems in a bucket of water, you are preserving the wreath. Doing this allows for excess water to be absorbed before the assembly of the wreath. As we know, all living things need water to survive, so this is an easy and effective step to take. While doing so, make sure to aim the water towards the back end of the wreath or towards the cut ends of the stems.
As you can see, making a foraged wreath is a fun and easy way to add a personal touch of your lake home to your decor. Whether you choose to make something new or make something you know you’ll love, you are sure to spruce up your home!
A DIY is more than just a fun project to take on for a weekend. A DIY gives you a sense of pride and accomplishment. And there’s no better time than the present. Here is a compiled list of some fall DIYs that will be sure to stand out on your front porch this autumn.
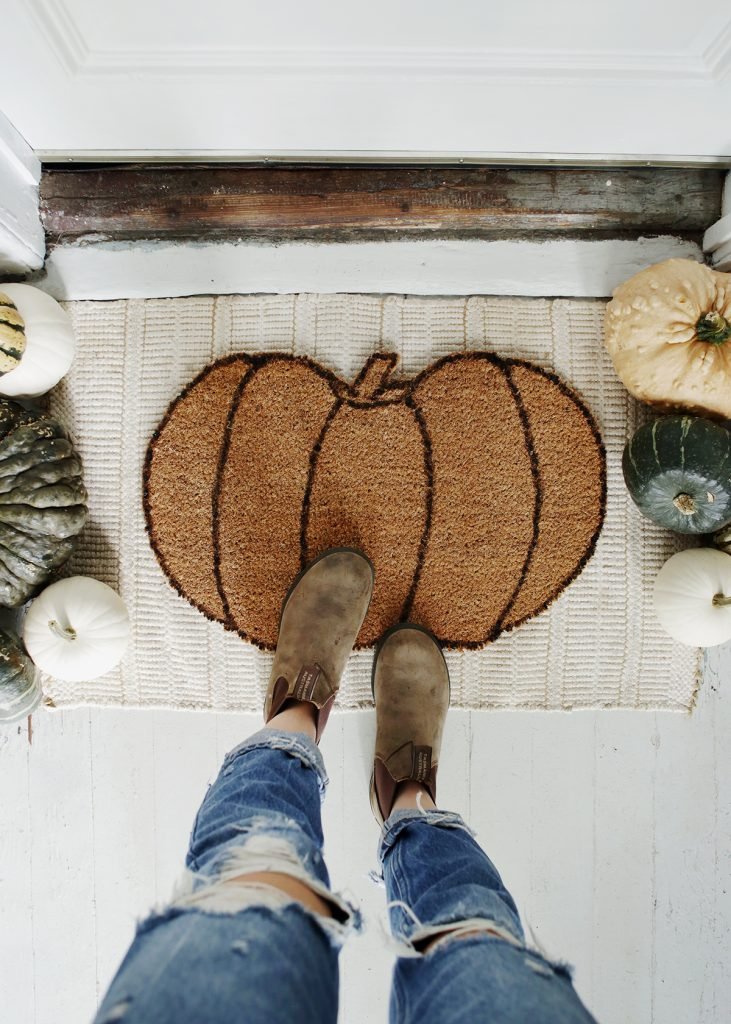
One thing every porch needs is a doormat. Despite its primary purpose of keeping dirt outside, it can also dress up your door. It’s one of the first things guests will see on your porch, so it’s best to make it welcoming and, in this case, festive! Check out this DIY pumpkin doormat to make this autumn.
Materials:
Doormat
Pencil
X-acto knife
Scissors
Paint
Paint Brush
Instructions:
The first step to making this festive doormat is to flip it upside down so that the bottom of the mat is facing up. From here, you will sketch your pumpkin on the back of the mat. You can do this freehand or by using a reference photo. Once you’re happy with the drawn shape, take your X-acto knife and cut off the edges so that the mat is in its pumpkin shape. Then, you’ll flip the mat over, right side up, and clean up any messy edges with scissors. Finally, creativity comes in! Use your imagination and paint the mat. It can just be an outline of the pumpkin so the natural mat shows, or you can use any color that will match the rest of your porch décor.
Chrysanthemums, also called mums, are a staple fall flower because of their vibrant red, orange, and yellow hues. Mums are sturdy flowers that will last throughout the fall season. One easy way to step up your mum game is to place them in a unique planter. What is more unique and autumnal than a pumpkin? Read these next steps on how to plant your mums in a pumpkin to dress up your flowers.
Materials:
A Mum
A Pumpkin Large Enough for the Mum
Knife
Large Spoon
Sharpie Marker
Potting Soil
Ribbon
Instructions:
Your first step for this planter is to select your pumpkin-chrysanthemum combination. There is little rhyme or reason here, so pick what you like! It can match your other porch decorations or simply complement them. The one rule is to make sure your mum and pumpkin are proportional to each other and that the mum can fit inside the pumpkin. To get started, remove the mum from its pot and set aside. From here, grab your pumpkin and draw a circle around the stem using the plastic planter from the mum as a stencil. Now, cut the top of the pumpkin open where you drew a circle.
Once open, take the time to remove the guts and seeds using a large spoon. With this step, you want to take out the majority, but whatever little bit is left will just be turned into fertilizer. Be sure to save those seeds for roasting! Next, add the soil into the pumpkin so that the bottom of the mum will sit an inch below the opening. Now, the fun part. Plant the mum into the pumpkin and water it. You can stop here or decorate it with ribbon. Be sure to water it every other day and enjoy your new planter!
This DIY is no small feat, but it makes a big impact. With this fanciful leaf arch, you will be the talk of the block. It may be a more time-consuming project, but it only has four materials you’ll need.
Materials:
PVC Pipe
Chicken Wire
Garland
Zip Ties
Instructions:
Build an arch with PVC pipe based on how big your arch needs to be to fit your porch. Attach three pieces of chicken wire to form the square arch shape with zip ties while ensuring it doesn’t stick out too far. Then, fill in with strands of garland, attaching with zip ties. The number of strands is dependent upon size. However, you will likely need at least 20. Continue to add until it is at your desired fullness.
Wreaths are a porch necessity for all seasons. However, the trends are often changing on what kind of wreaths are becoming more popular. So, rather than a traditional round wreath, consider a hanging pine cone door hanger for this fall season.
Materials:
Pine cones, preferably real
Eye-Bolt Screws
Ribbon
Stapler
Instructions:
This DIY works best with natural pine cones you can scavenge from the forest or your front yard. First, take your pine cones and screw your eye bolts into their tops. Depending on your cones and screws, you might be able to do this by hand, or you may have to use a drill first. Screw it in until the eye hook touches the cone. Now, you have to visualize how the pine cones will lay. You will want them at staggered lengths rather than one bunch. So, lay out the pine cones at the varying lengths you want. Next, cut your ribbon to the desired length plus two inches for tying room for each pine cone.
Thread your ribbon through the eye hook, leaving one inch on the other side. Fold the inch onto the longer portion and staple them together to secure the pine cone. Repeat for all pine cones. From here, gather your ribbon-hung cones and lay them out how you visualized them. This is best done with the longest in the back and the shortest in the front. Once it looks how you like, staple all ribbons together near the top to make one hanging bunch. Now, cut the tops above the staple to make them even. Add a loop at the top with more ribbon, still stapling the two ends to the existing ribbon. Finally, use the remaining ribbon you have to decorate! You can add a bow near the top where the bunch will hang or at the top of each pine cone to add playful layers.
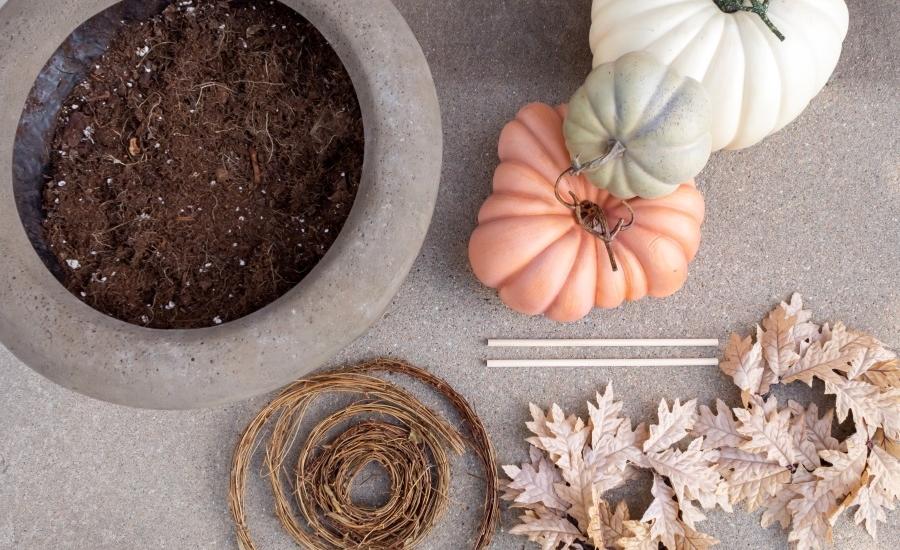
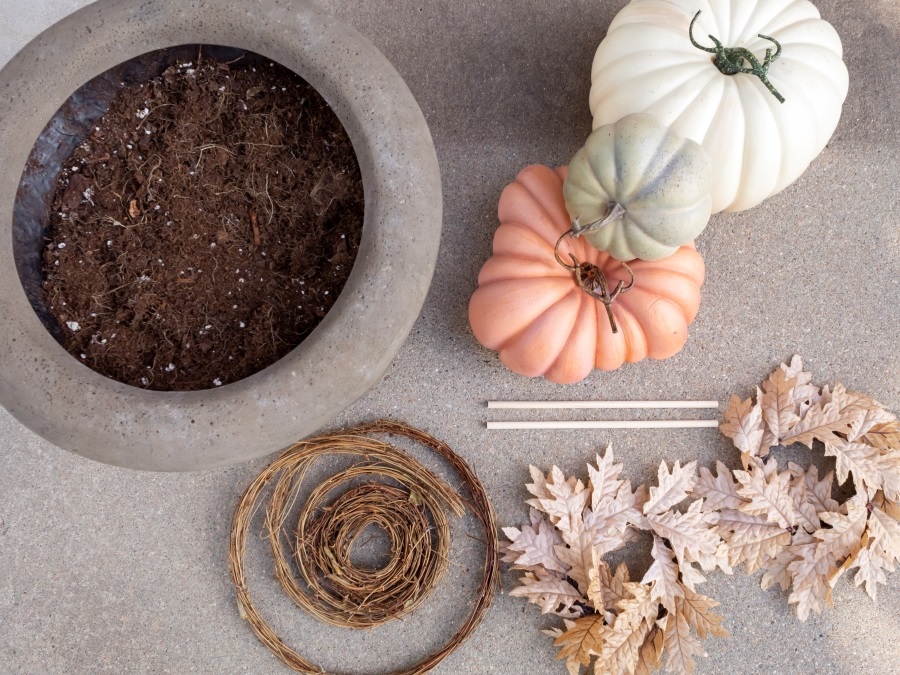
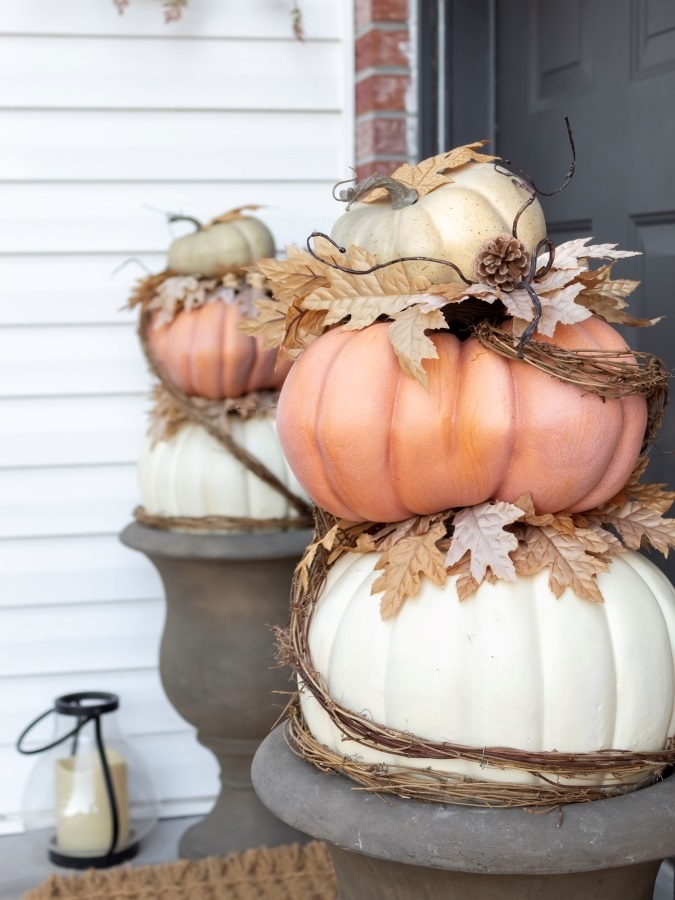
If that archway was a little too extravagant, try this DIY topiary. It will give a similar effect on a smaller scale. This is a perfect touch to a porch, especially for those who don’t have a green thumb. You can customize this project with different pumpkins, leaves, and garlands. You could even use jack-o-lanterns and spiderwebs for a Halloween theme.
Materials:
Urn Planters
Potting Soil
Three Different Size Plastic Pumpkins
Wood Dowels
Hot Glue Gun
Glue Sticks
Drill and Drill Bits
Faux Fall Leaves
Grapevine Garland
Instructions: First, fill your planter with the potting soil. Next, you can begin preparing your pumpkins. Take the largest pumpkin and drill a hole in the bottom of it, big enough to insert the wooden dowel but not too large. You want it to fit snuggly on the dowel. Now, put the pumpkin dowel down into the soil. It’s time to add leaves! Remove the stem on the pumpkin simply by pulling or cutting it off. Then, use a hot glue gun to attach some leaves to the top of the pumpkin. You’ll want them to appear as if they’re lying on top of and falling off the pumpkin.
Now repeat! Drill another hole into the top of the bottom pumpkin so that it can hold the dowel of the next pumpkin. Drill and add the dowel to the second pumpkin, stack, add leaves, and do it a third time for the top pumpkin. Lastly, wrap the now-built topiary with grapevine garland to give it a rustic feel. Ta-da! New topiary! Make two and add them on each side of your door for a symmetrical effect.
Any of these DIYs are sure to impress. When you have guests over, and they ask, “Where did you get that?” You’ll be able to say, “Oh, I didn’t buy it. I made it!” It seems like an ideal conversation starter and something sure to boost your pride. Pick one out and work on it today!
– Instructions: Flip the doormat upside down, sketch a pumpkin shape on the back, cut the edges to create the pumpkin shape, flip it back, and paint the pumpkin with your desired design
– Instructions: Screw eye bolts into the tops of pine cones, arrange them at staggered lengths, attach ribbons to the eye hooks, staple them together, and create a hanging bunch with the pine cones.
– Materials needed: Urn Planters, Potting Soil, Three Different Size Plastic Pumpkins, Wood Dowels, Hot Glue Gun, Glue Sticks, Drill and Drill Bits, Faux Fall Leaves, Grapevine Garland.
– Instructions: Fill the planter with potting soil, drill holes in the pumpkins, insert wooden dowels, add leaves to the pumpkins with a glue gun, stack the pumpkins, and wrap the topiary with grapevine garland for a rustic touch.
You might ask why it would be necessary to waterproof a rug. Our answer? You live on the lake! The lake lifestyle inherently calls for outdoor activities—swimming, kayaking, exercising, and much more. But even though outdoor living is a lot of fun, it can also cause a big mess. This is especially true for families with young children. Rugs quickly absorb rain and water, making them more susceptible to the eventual growth of mold and mildew. This can be unsafe and cause unpleasant odors at your lake home, but you can prevent it. Waterproofing rugs can help preserve flooring, reduce mold and mildew, and it’s quick and easy to do!
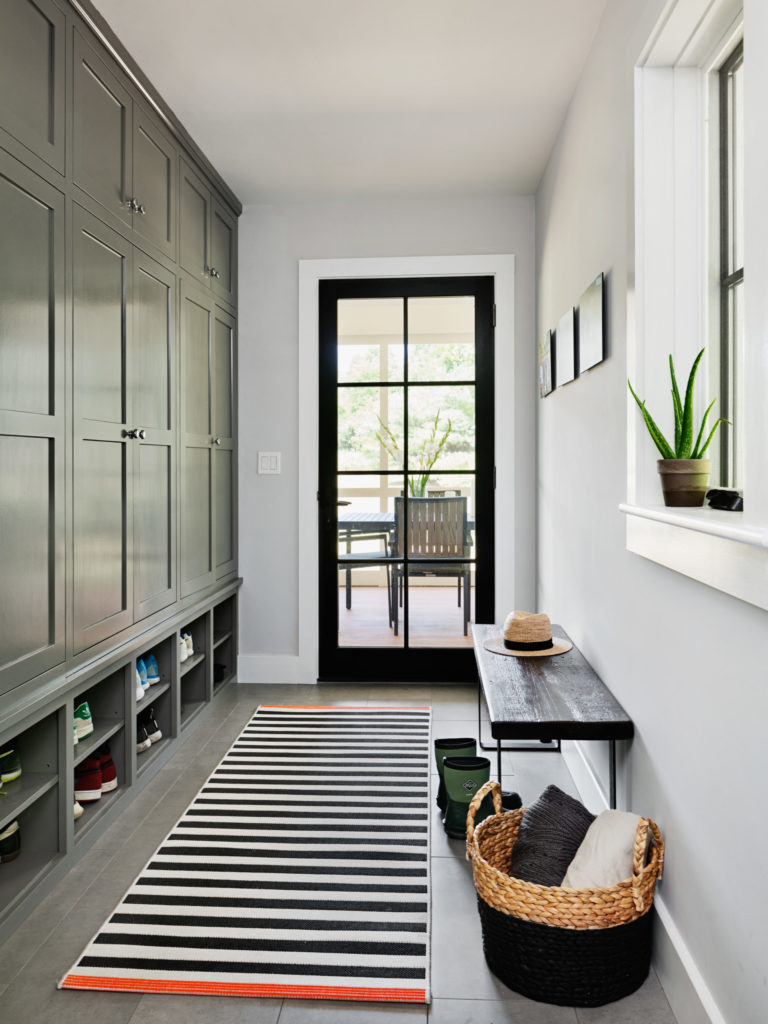
It is best to waterproof rugs in areas of your home that typically get a lot of foot traffic. This includes mudrooms and entryways where people come and go with wet shoes, umbrellas, and coats. It’s also smart to waterproof rugs in your lake home’s bathrooms and laundry room. These areas are known for having humid conditions—along with wet feet and clothes.
Waterproofing your rugs doesn’t have to be complicated. First, you want to consider what areas of the rug to focus on. The upper fibers, underside, and any padding layers underneath are all important. Keep in mind that the underside is just as important as the top of the rug when it comes to waterproofing. As water can easily seep through the entire rug, you want to ensure that every area is sealed. This way, you won’t have to worry about unwanted mold or mildew.
There are several ways to waterproof a rug—all quick and relatively easy to DIY. Waterproofing techniques include rug pads, fabric seal sprays, and adhesives.
Fabric Seal Spray
This must be sprayed to prevent liquids from soaking into the rug. Not only does this help prevent rug stains, but it also helps keep the fibers from unraveling and thread slippage. Some safe and reliable options include sprays such as Scotchgard or Thompson.
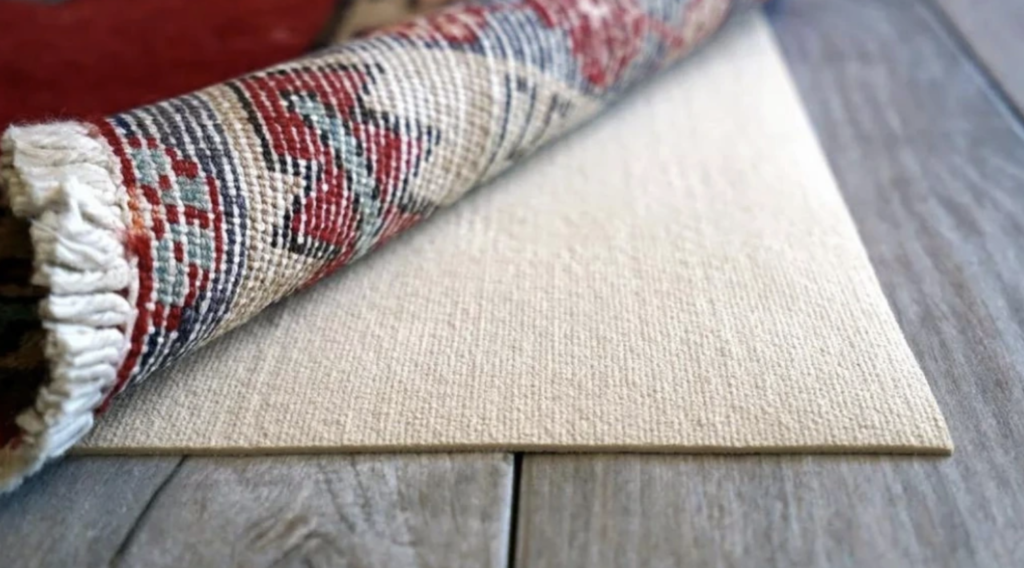
Rug Pad
Rug pads help prevent unwanted water or humidity from being absorbed. The pads are placed and attached to the rug’s underside using a heavy-duty silicone adhesive. You can purchase rug pads at most hardware stores, and trustworthy options include Anchor Grip and Cloud Comfort.
Silicone Adhesive
Adhesives should be used in accordance with the rug pad that you select. Remember to choose a strong, heavy-duty adhesive that will last. For example, Loctite Clear offers a reliable and durable silicone adhesive that will endure heavy use.
Now that you know how to waterproof your rug, it’s time to test it! It is best to wait a full 24 hours before testing the rug to ensure the waterproofing layer is dry. To test, you will only need about a cup of water. Slowly pour the water onto the top surface of your rug.
If it works, you will see the liquid bead up and run off the surface.
If the rug absorbs the water, allow it to dry, and add a second coat of sealant spray.
So now you know how quick and easy waterproofing your rugs can be. It’s an excellent and beneficial way to prevent odor, reduce the risk of mold and mildew, and preserve your flooring while enjoying the lake lifestyle.
From small DIY projects to major overhauls, there are many upgrades homebuyers can do to elevate ROI:
Improve Curb Appeal
Install Metal Roofing
Refinish Hardwood
Switch to LED
We look back at old homes and like to think of them as well-loved, but houses tend to reflect the scars of time. From dents in the wall to oil spots and scuffed hardwood, most properties desperately need a facelift. So grab the caulk gun and sanding paper as we discuss four DIY projects to improve your home’s return on investment (ROI).
Curb appeal is the attractiveness of a home derived from its aesthetic value. Put simply, what does the average passerby think of your property from the street view? Are your hedges trimmed, your exterior freshly painted, and your flowers blooming? Curb appeal encompasses more than these few ideas, but most upgrades bring at least 50% ROI. Landscaping improvements such as planting new trees or garden beds can yield a 50% ROI and a jump in resale value by 14%. Power washing your driveway removes the grunge and costs less than $500. Not all upgrades cost a fortune; new light features, doorknobs, and small porch plants can cost under $200.
These don’t always work out, though. Not all buyers are looking for an intricate garden to tend to, and not everyone desires the maintenance that a pool requires. Costs associated with curb appeal changes depend on the property and modifications made, and you can check out some of our ideas INSERT INTERNAL BLOG LINK HERE.
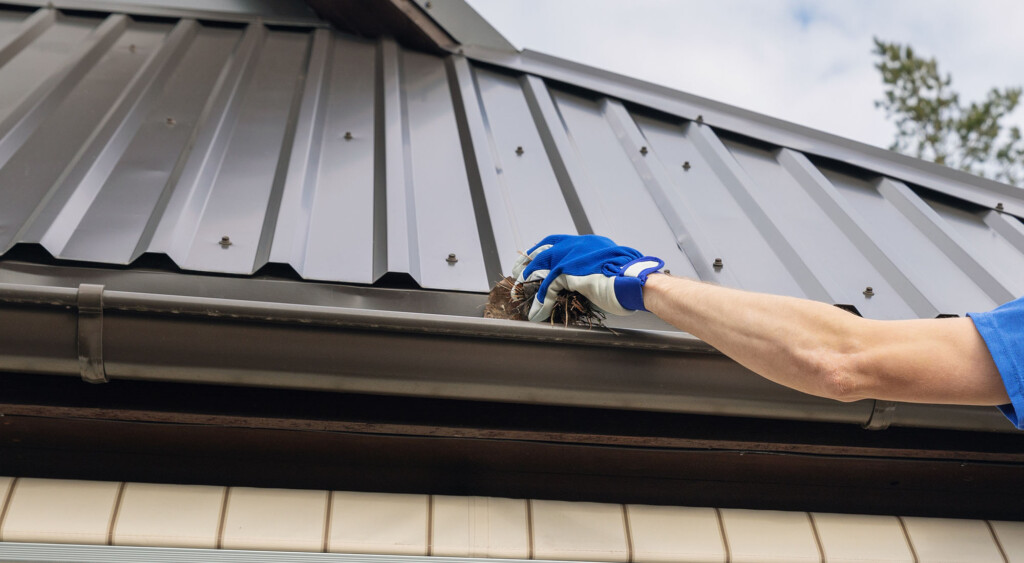
Our next DIY project is no small task. Over the past few decades, the popularity of metal roofing has risen exponentially, and the market expects to hit $33.5 billion by 2030. The low-maintenance alternative boasts longevity well over the classic asphalt shingle lifespan of 12–20 years, as metal roofs last up to 70 years. Of course, depending on local conditions and weather events, homeowners must also replace asphalt shingles often. But metal roofing, whether shingles or trays, helps homebuyers in the long run with its energy-saving properties. By its nature, this product reflects UV rays and, on average, saves between 10–25% on cooling costs. Likewise, lightning strikes upon a metal roof drastically reduce the risk of nature-borne house fires. And for those concerned with sustainability, most metal roofs are constructed with at least 25% recyclable materials.
Costs of swapping to a metal roof range between $5,000–$20,000 but average a 61% ROI alongside added benefits.
When installing flooring, hardwood and tile instantly elevate any space as long runners tend to increase perceived depth. In fact, Professional Builder suggests that hardwood floors increase a home’s ROI by 70–80% and a 2.5% boost to the overall sale. But over the years, scratches and knicks formed in the hardwood degrade its luster. More cost-effective alternatives exist, such as vinyl or laminate, but many homebuyers prefer genuine hardwood. Don’t just take our word for it. In 2019, the National Association of Realtors conducted a Remodeling Impact Study revealing that 27% of realtors suggest refinishing hardwood before putting your home up for sale. If you want to do a DIY project for your refinished hardwood, expect to spend between $800–$2,000, dependent on quantity and desired finish. Still, this remains more cost-effective than replacing the flooring entirely — often at three times the price!
LED bulbs are a cost-effective lighting choice with several benefits. Americans spend, on average, at least 15% of their electricity bills on lighting, per the U.S. Department of Energy — but LED bulbs slash those numbers. Because they put off minimal heat, energy spent on cooling is reduced, and households retain an average of $225. Like many of the other DIY projects on this list, switching to LED bulbs is an investment in longevity. LED bulbs last approximately 30,000 hours, whereas incandescent bulbs only last 1,000 hours.
These DIY upgrades to improve ROI on your home only scratch the surface of potential ideas. So, whether you’re a DIY expert or just starting, there’s always something you can do.
So you’ve bought the lake home with a stunning view, and now you’re ready to tailor the interior to fit your needs. Renovations are an excellent way to increase your home’s value and incorporate unique features. However, sometimes unexpected problems arise, but fear not—you can easily stick to your renovation budget with some strategic planning.
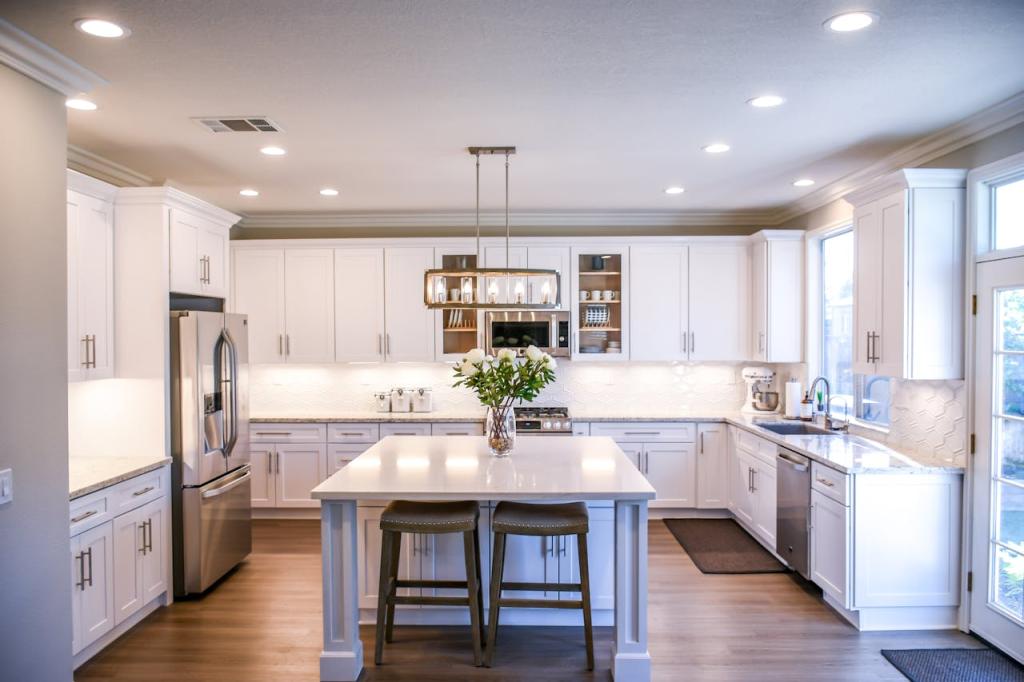
Dazzling images of your dream kitchen and master bedroom swirl through your head. And you’ve scrolled through dozens of Pinterest boards to finalize whether you want quartz or marble countertops. However, not all materials are created equally, and it’s crucial to note price points before sketching out renovation plans. Plus, you must factor in the cost of labor.
As Dwell contributor Kate Reggev points out, the more you plan, the fewer changes you make later and the less money you spend. So, it’s important to detail every renovation you want to integrate—even the minuscule ones. As Imran Hamidi, principal at Laing + Simmons East Group, explains, extensive planning forces you to ponder which additions enhance the value of your home. If you research thoroughly, you can avoid needless spending and stick to your renovation budget.
When you are eager to move into your lake home, it can be tempting to rush the renovations. However, it’s essential to explore your options before coming to a decision, especially during the bidding process. When selecting a contractor, many renovation experts advise reviewing bids from at least three contractors to make an educated decision.
Although selecting the cheapest contractor may seem economical, you could save less than you expect. Quality matters and an inexpensive contractor might end up leaving tasks unfinished. Home Advisor recommends hiring a contractor with a good reputation, noting, “When it comes to home renovations, you have to spend money to save money.” Additionally, Family Handyman contributor Rachel Broughman suggests researching what others have paid for similar renovations. She proposes not selecting the most or least expensive contractor but finding the median between the two.
Additionally, consider hiring a contractor with fixed rates. As NAB (National Australian Bank) explains, “It could be worth the extra you pay to know exactly what you have to pay for upfront—and make it much easier to stick to your budget.” This way, you won’t have to scramble to readjust your budget later if unexpected issues arise.
If you’ve watched HGTV long enough, you know renovation horror stories. Although many homeowners encounter minimal renovation issues, it’s paramount to safeguard against potential problems. Electrical or plumbing issues can lurk behind perfectly painted walls and go undetected until the demolition process. Most experts recommend setting aside 15-20% of the contractor’s renovation cost to confront these unexpected issues. This amount may sound like a hefty sum, but it guarantees these repairs won’t sink your budget. Plus, if you do not encounter any problems, you will have extra funds to invest in renovations you might have initially shelved.
Unless you have extensive renovation experience, you should leave the plumbing to the professionals. However, there are some basic renovations anyone can accomplish. Most contractors will charge you for any extra work, so taking care of minor repairs in advance can help you stick to your renovation budget. For example, you can easily fill in holes in the wall or nail down loose floorboards. Furthermore, Chris Dossman, a real estate agent in Indianapolis, says that removing and discarding your old carpet can significantly cut labor costs on the installer’s bill. Then, when the contractor comes in, they can focus on major repairs.
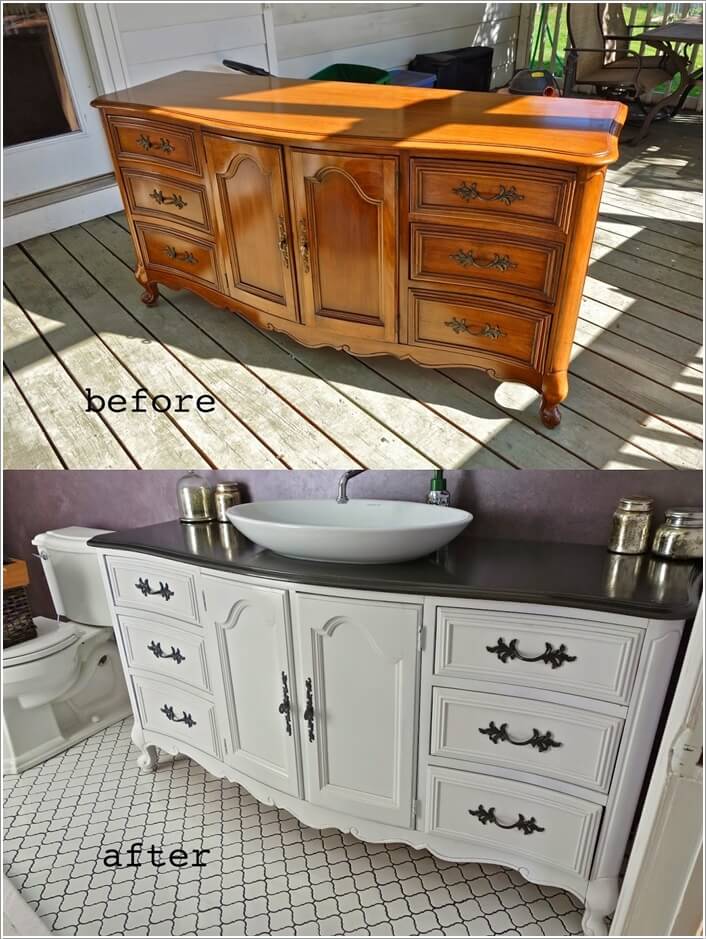
You can take on design-oriented projects like painting rooms or repurposing furniture. With countless DIY videos on the internet, you can spruce up your home and avoid an expensive trip to the furniture store. Lake Homes Lifestyles also has helpful DIY tips to get you started.
Splurging does not equal excess when you’re increasing your home’s value. Reggev pinpoints windows, appliances, and doors as a few key examples of where you can splurge and gain revenue in the long run. To decide when to splurge, Hamidi recommends splitting your budget into needs and wants, with essential items falling under the needs category. The needs—such as adding an extra bedroom or bathroom—will increase your lake home’s value if you decide to sell it. On the other hand, an outdoor waterfall might be a unique feature, but it isn’t guaranteed to enhance your home’s marketability. Therefore, it would be better to cut that expense than the extra bathroom—and having your renovations categorized simplifies this decision.
According to Zillow, you should spend no more on each room than the value of that room as a percentage of your overall house value. For example, a kitchen generally accounts for up to 15 percent of a home’s value. So if your lake house is worth $500,000, you wouldn’t want to spend more than $75,000 on the kitchen. Also, consider undertaking several renovations simultaneously. For instance, if you decide to replace your home’s flooring, it would be better to install the new flooring throughout the entire house. It is easier for laborers to accomplish all of this at once, saving you more money in the future.
There’s nothing like enjoying a breathtaking lake view in a home perfectly tailored to your taste. With these five tips in mind, you have the necessary tools to stick to your renovation budget and turn your lake house into your dream home.
No matter how fast-paced and automated our world gets, there’s something about the holidays that makes us want to take it slow and go the homemade route. Whether you’re making grandma’s pumpkin pie recipe or creating your own garland, you can’t replace the feeling of doing it from scratch. Of course, you could go buy these items from the store and save some time and effort. But imagine your family and guests visiting for the holidays. You are sharing the joy of the season together—and perhaps cups of apple cider or hot cocoa. Then they look over at your pumpkin centerpiece or handmade wreath and ask, “Wow, where did you get that?” And you respond, “Oh no, I made that.” If this is your idea of an ideal holiday, check out our top picks for DIY holiday decor!
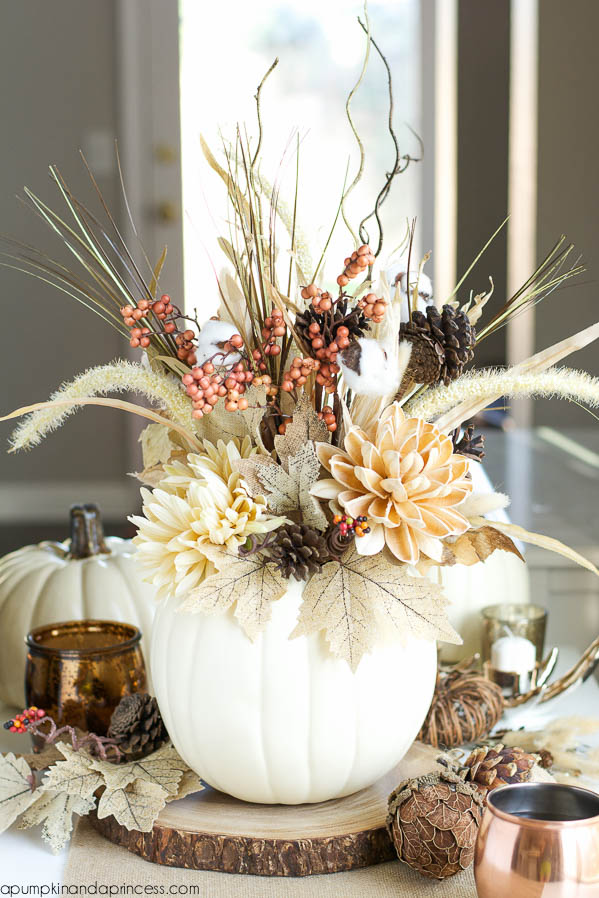
Crisp fall leaves, bright berries, soft flowers, textured pine cones, and a smooth pumpkin—this centerpiece is the epitome of the fall season. Plus, you can add variations to it throughout the season to adapt it to any holiday gathering. It’s the ideal finishing touch to your autumn table setting.
Materials
Styrofoam block
Fall stems
Faux pumpkin
Hot glue
Instructions
Using a knife, cut the top stem off your pumpkin. Make sure the hole is large enough to fit your styrofoam inside. Glue the styrofoam inside of the pumpkin, then arrange your fall stems inside. For variations and more pumpkin centerpiece ideas, visit A Pumpkin & A Princess.
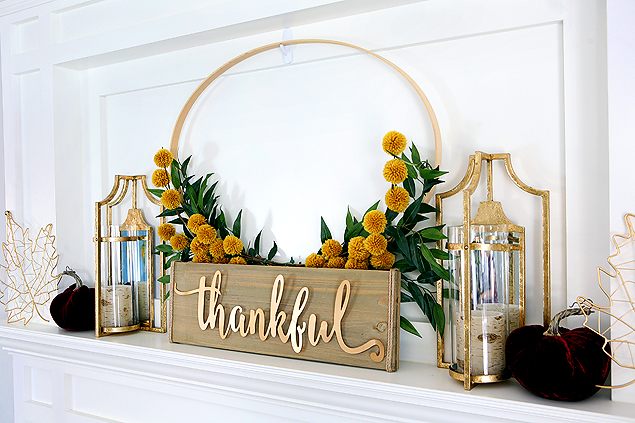
The holidays are a time to set aside our everyday stresses and remember the reasons we have to be thankful. With playful fall stems and an elegant script, this DIY holiday mantelpiece will complement any decor style. Plus, it will remind guests of the real meaning of the season.
Materials
18” x 27” embroidery hoop
Mustard spray paint
Fall stems
Sign
Hot glue
Instructions
First, spray paint your embroidery hoop and allow it ample time to dry. Then, glue your stems around the sides near the base. Secure your finished hoop on the mantel, then place your sign in front. Enjoy your new mantelpiece!
Pine cones are a great way to bring the outdoors in and emphasize the winter season while still granting your lake home a timeless aura. This pine cone wreath complements numerous decor styles, from farmhouse to modern. Plus, you can customize it to go with your fall, Thanksgiving, winter, or Christmas decor. Talk about a four-in-one!
Materials
A 14″ wire wreath
Door wreath hanger (optional)
Hot glue and hot glue sticks
Battery-powered LED fairy string lights
60-75 pinecones, sorted into 3 even groups of large, medium, and small
Instructions
First, wrap the wreath form with twine until it is completely covered (this will help the glue stick). Next, glue the large pine cones to the outside ring of the wreath form. Then glue the medium pine cones to the next circle, closer to the center. Finally, glue the small pine cones on the most inward ring of the wreath. Creative variations include adding evergreen cuttings, red berries, string lights, and more. For more details, check out A Piece of Rainbow.
Do you love putting a twist on an old classic? This DIY holiday tree can serve as a unique alternative to the traditional Christmas tree, and its rustic look wonderfully complements the lake home aesthetic. Plus, you can use sticks and logs from your own backyard to create the tree, making it an eco-friendly option.
Materials
7 Silver Birch logs (30-40 mm diameter)
6 meters of jute rope
Ornaments
Instructions
Arrange the logs in a tree shape and keep space between them. Knot the middle of your rope onto the top log. Then, keeping it taut, tie it onto every log at the ends of the log, forming a triangle. Hang your tree onto the wall and add your ornaments and decorations.
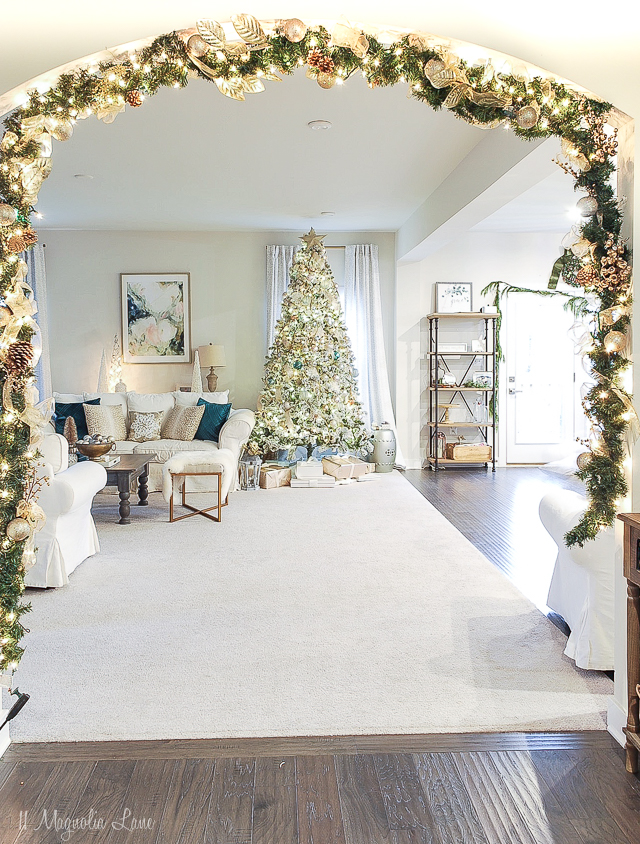
Calling this garland expensive might seem like a misnomer since you can create it for a low price. However, when your lake home guests take in its sparkle, elegance, and glam, they will hardly think it was crafted on a budget. Although it looks complex, this Christmas garland is quite easy to make and will transform your home into a mini Hallmark movie in no time.
First, spread your garland out on the floor. Secure all your embellishments to the garland by using wired wood picks. Then, wrap the ribbon around the garland. Feel free to wire some loops together and cut shorter pieces to tuck into certain sections. Leave some ribbon hanging on each end. Secure to the wall with two large anchor hooks and some command strips on the side. For more details, visit 11 Magnolia Lane.
We hope these pieces enhance your holiday gatherings with friends and family. Cheers to all things merry and bright—and from our lake home to yours, Happy DIY Holidays!