Types of Wood for Grilling/Smoking

Photo courtesy of realtree.com

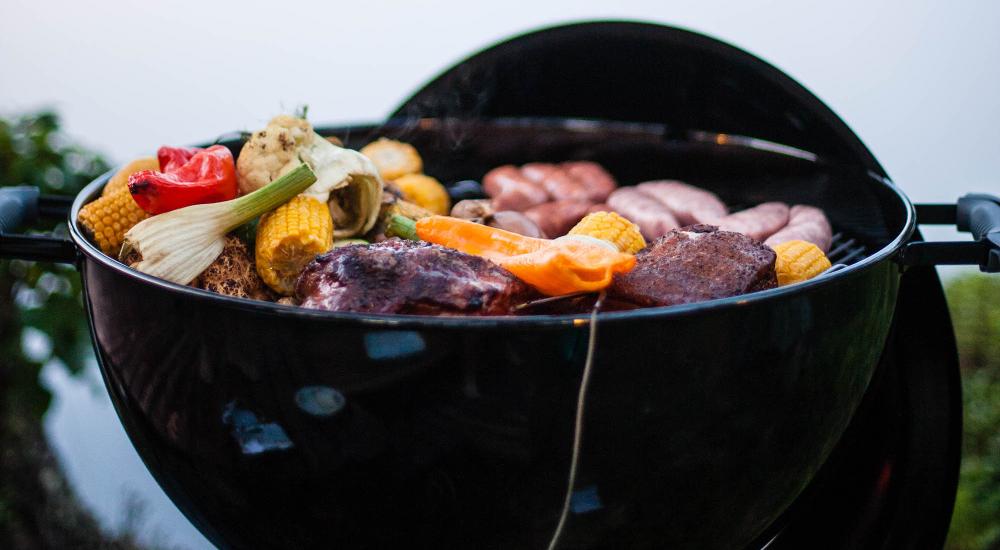
One of the greatest joys of summer at the lake is grilling delicious recipes in the backyard. While hardwood coal and gas grills are reliable and consistent heat sources, they’re not the secret to flavorful meats. Emma, an experienced home cook from the Puget Sound region, says, ” What produces the unique flavor of grilled food is the wood. When planks of wood are set over a source of heat, they release smoke that emits a specific flavor.” However, the wood you choose depends on your meat and desired flavor profile. For instance, hickory gives off strong, rich flavors, which is perfect for steak, but the light flavor of cedar is excellent for swordfish. At Lake Homes, we’re here to help you identify which types of wood are best for your grilling needs.  

Hickory

Photo courtesy of northforkbison.com

When cooking meats for longer periods, hickory is one of the most popular choices. Its strong flavor, similar to bacon, pairs excellently with beef, pork, and chicken. It adds a unique, dark color to these meats. Smoking, grilling, and BBQing with hickory are most common in the midwest and south due to the prevalence of the hickory tree in this region. In fact, most of the 18 species are native to Eastern North America. The pecan tree is a type of hickory tree that cooks sweeter flavors and burns for shorter periods of time. However, be careful with how long you keep meat on the grill. Too long, and the hearty flavor will turn into bitterness.

Oak & Walnut

Photo courtesy of theshopsatwillowpark.com

Because they are both heavily flavored woods, oak and walnut create similar flavor profiles for your meat of choice. Both of these woods produce an intense smoky flavor when grilling at the lake. Most commonly, oak and walnut work best with tough game meats like deer, which won’t be overpowered by the stronger wood. Like hickory, the meat can become bitter if overdone. The meat will also develop a dark brown coloring quickly, so with this cooking method, be sure to keep an eye on it, so you get that nice, crispy flavor.
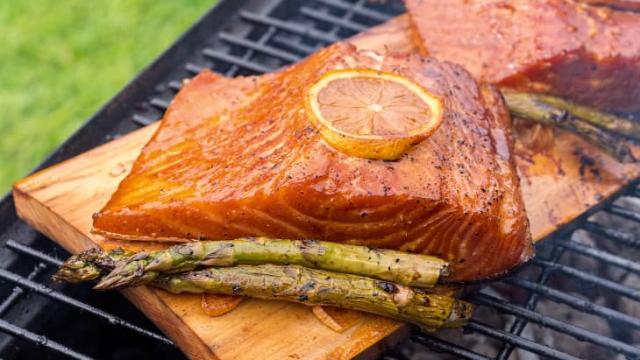
Cedar

Photo courtesy of beginnergrilling.com

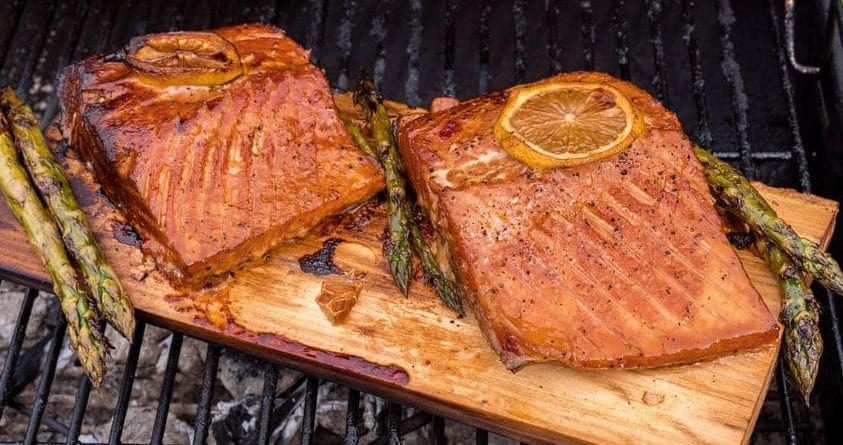
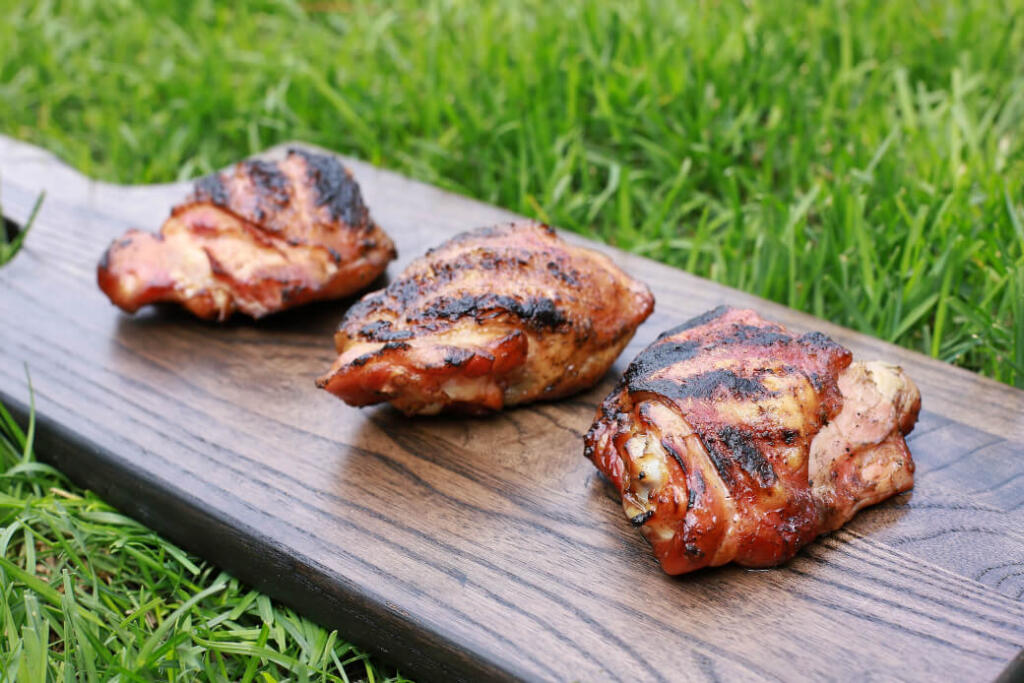
Grilling on cedar wood is not a novel concept. In fact, its roots are in Northwest Native American culture. Tribes in the Pacific Northwest would catch and tie the local Alaskan sockeye salmon to a wooden plank, then let the smoky cedar flavors absorb into the fish. But before starting to cook, there’s one essential precursor you can’t forget. “You have to dampen the plank first,” says Emma, “That’s what helps the smoke come out. Otherwise, it could spontaneously burst into flames.” Just soak the plank a few hours ahead of time to avoid an unfortunate accident. In addition to salmon, cedar is also excellent for cooking white meat such as chicken and pork. The gentle cooking process helps these meats to keep their juicy qualities, making for a flavorful meal.

Alder

Photo courtesy of thecollectiveoutdoors.com

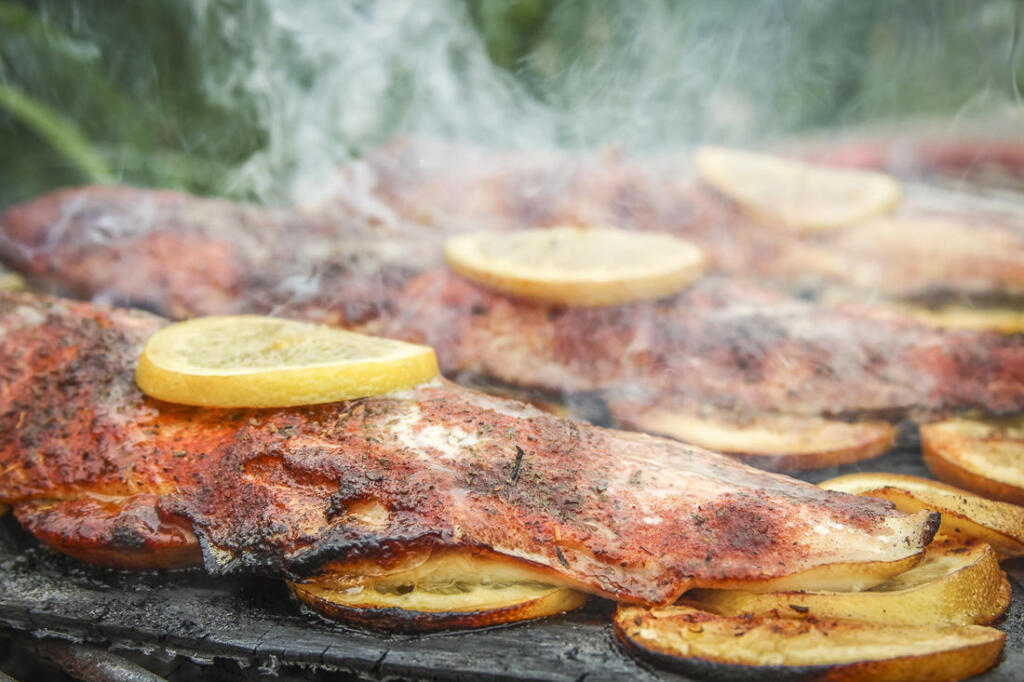
Alder wood is known for its combination of a light smoky taste with some hints of sweetness. Compared to hickory and cedar, the decreased intensity of the smokiness makes alder wood an excellent choice for fish such as tilapia, smelt, tandoori shrimp, and trout. The alder wood’s sweetness also doesn’t overwhelm the lighter taste of seafood or vegetables. So, if you’re up for some delicious fish tacos or tuna salad for lunchtime at the lake, alder wood is a perfect choice.

Applewood

Photo courtesy of dishnthekitchen.com

In addition to cherry wood, apple wood is the most commonly used fruit wood used for cooking. It’s excellent for delicate foods such as fish, but they also do well with pork, lamb, and beef because each of these meats is well complemented by its light, sweet flavor. In short, applewood’s combination of smoky and sweet flavors provides a well-balanced palette. It adds a hint of sweetness to meats that would be absent with other grilling woods. 

Whether you’re cooking pork on applewood or BBQing on hickory, the best part of grilling in the summer is having fun with family and friends. Emma comments, “My family and I would always get smoked salmon in Seattle. The regional-specific flavors always remind me of home.” With the smell of smoky meat and the sounds of lighthearted conversation filling the air — and, of course, a delicious plate of food in front of you — we hope you enjoy creating these lasting memories at the lake.

Grilling Out this Memorial Day

hamburgers cooking on a grill in front of American FlagThis weekend, Americans across the country will celebrate Memorial Day, to honor those who died while serving in the nation’s armed forces.

What better place to celebrate life, liberty and the pursuit of happiness than on the lake, surrounded by our loved ones and this country’s natural beauty?

If you are hosting a Memorial Day barbecue on the lake, here is a checklist to help you get started with your preparations.

Clean up Your Act!

Spring is the perfect time to give your grill a good scrub-down. This is true even if you haven’t used the grill since last fall. Give it a good cleaning to remove dirt, dust, grime and other things you don’t want on that first burger of the season.

If you can remove the grill grates, soak them in a bucket, or plastic tub, of hot water and dish soap, then give them a good scrub.

Rinse thoroughly with a garden hose before putting them back in.

Scrub the grill hood and inside walls to remove any build-up. If your grill uses propane or natural gas, make sure all the jet ports are clean and free of gunk or debris.

Give me fuel, give me fire…

Take a careful look at that half-empty bag of charcoal in the garage.

Will it REALLY be enough? If you can’t say for sure, better safe than sorry.

Grab a fresh bag of charcoal and make sure there’s plenty to go around. Unless you use self-lighting charcoal, make sure you have lighter fluid, too.

If you use a propane tank, make sure there is enough propane. If you don’t have a gauge attached, here’s an easy trick to find out how much propane is left in your tank.

Still shopping for your grill this season? Click here for tips on finding the grill of your dreams.

Serving Guides

Keep these serving guidelines in mind when you’re planning the menu.

  • For boneless meat, such as hamburgers, most experts recommend between 1/3 and ½ pound of meat per adult.
  • For meat with bones, such as ribs or chicken wings, plan for somewhere between 12 and 16 ounces per person.
    • This breaks down to approximately four to six ribs, depending on the type, and 10 wings.
  • Side dishes vary, depending on how filling they are. For most dishes, experts recommend four to six ounces per person.
  • With a side salad, go for one big handful per person.
  • When in doubt, round up. It’s far better to have leftovers than to run to the store in the middle of your barbecue because you ran out of  something!

Get a Solid Head Count

While this seems like a no-brainer, it goes hand in hand with making sure you have enough food.

If you’re just feeding your immediate family, this isn’t a problem. On the other hand, if you invited all your friends, family and coworkers, you might have more guests than you can handle!

It may seem like overkill, but treating your barbecue like an invitation-only event can save your it.

Don’t be afraid to divvy up the side dish duties, either.

Most guests are happy to bring a dish. If you insist on buying everything, even a modest back yard barbecue can easily run upwards of $300.

Make sure you have plenty of parking for your event, too.

If you can, tell people where to park in your invitation. That way you won’t see their tire tracks in your front lawn through the month of June.

Get the Tools for the Job!

From a first-timer to a veteran grillmaster, everyone needs the tools for the job. Make sure you have each of these before you get started.

  • Basic tools: Metal spatula, metal tongs, basting brush, barbecue fork, butcher knife, barbecue scrub brush
  • Advanced tools: meat thermometer, gloves, bottle opener, meat tenderizer, meat shredder
  • Specialty tools: Shish kabob skewers, corn on the cob skewers, squirt bottle
  • Other equipment: Paper plates, disposable cups and silverware, outdoor garbage can, paper towels, tin foil, serving utensils, cooler

Turn up the Music (to a reasonable level)

Having some patriotic jams can make you the life of the party this Memorial Day.

If you don’t fancy yourself a DJ, online music services like Sirius, I Heart Radio, Spotify, and Pandora typically have all-American stations and playlists for Memorial Day.

When outdoors, remember to keep the volume down to a reasonable level as sound can carry great distances across the lake.

Just because you love rocking out to Lynyrd Skynyrd doesn’t mean the rest of the neighborhood wants to (even if they should.)

Have a “Worst Case Scenario” Plan for the Weather

No matter how much we plan, Mother Nature doesn’t always cooperate with our outdoor party schedule. Have a contingency plan in case it gets rainy, or worse.

If the sky opens up, don’t panic!

Most grilled dishes can be cooked inside, on your stove or in the oven. Make sure you have adequate seating for everyone, and put a movie on.

A little rain is no reason to cancel your celebration!

Remember the Reason for the Season

Memorial Day is a day of remembrance for all those who gave the ultimate sacrifice in the service of the United States.

Don’t forget to honor them during your event. Be sure to thank any veterans or members of the military for their service to our country.


Using Your Charcoal Grill as a Smoker

Here you are going to learn how to offer tasty smoked meats to your family and your friends without having to purchase an expensive smoker. Just use your regular charcoal grill!

Fuel

To begin, you will need your charcoal grill, lightable material such wood or charcoal, a way to light this material, a dripping pan, a pan of water and an oven-safe type of thermometer.

The pans used for this project can be the cheap aluminum pans and can be bought from any store.

You will also need several hours and of course, your meat.

Building Your Fire

Begin by removing the cooking grate from your grill and building your fire on one side. If its windy, it is very important that your fire be on the windward side, which means it needs to be on the side that the wind is blowing against.

ribs on a grill

This is important because the airflow is everything when you are smoking the meat.

Assembling Your Smoker

Next you will place the dripping pan on the other side of your grill, opposite the fire.

Put the grate back on the top of the grill. When your coals are white you are ready to begin cooking.

Fill the water pan to a little more than half full. Put it over the fire. This will add in the moisture to the air inside your grill.

Place the meat over the dripping pan with the thermometer next to your meat. Put the lid on your grill.

Airflow

Depending on the type of grill you have, you will need to set the vents so the airflow will come under the fire and out over the meat.

It will draw the air through your fire, over your water pan, and then over the meat before it exits the grill.

Adjust your vents to maintain the smoking temperature of 200 to 250 degrees Fahrenheit.

Running Your Smoker

While your food is cooking, you need to keep the grill lid closed. However, you will need to keep an eye on your fire, as well as the temperature.

You will need to also periodically add in more burning coals to the fire.

Once you get a grasp on the process,  you should not have any problems keeping your temperature right.


Now all you will need to do is wait a few hours then enjoy your tasty, fall-off-the-bone smoked meat!

Summer Grilling: Properly Cooked Meat

Grilling is always a great way to pass the time with friends and family. However, there are plenty of things to consider when hosting a barbeque.

These aspects of grilling will ensure that you keep everyone safe during the fun get-together.

Temperature recommendations should be taken seriously. Proper cooking temperatures ensure that all the bacteria on a piece of food are destroyed.

You will need to make sure you have a thermometer handy to check for correct internal temperatures reach before serving any meat.

flaming grill on a lakeside beach Beef

Do not depend on the color of the meat as it can be misleading.

You need to make sure that once the meat is cooked that it stays warm. If you do not plan to serve your food right away, refrigerate cooked beef immediately.

Beef should be at least 145 degrees on the inside before it is served.

Chicken

Chicken is pink when it is raw and turns white as it cooks. However, just because it is white does not mean it is safe to consume.

The internal temperature of chicken should reach 165 degrees, at least.

No matter if the chicken is on the bone, cut into strips, or are boneless chicken breasts, you will need to ensure to take the temperature of all the chicken pieces.

Pork

Pork will also turn white when it is completely cooked.

You will need to ensure that you use the thermometer to check that the temperature of the meat reaches at least 160 degrees.

Fish

Most people will cook the fish until it is flakey. This does not mean that it is done.

At times the temperature may be cooler than it should be even though it is fork tender. It is important to always test fish.

The fish should reach at least 140 degrees before it is consumed. Great, hearty and less flakey fish for grilling include:

  • Tuna
  • Amberjack
  • Halibut
  • Swordfish
  • Haddock
  • Mahi Mahi
  • Salmon
  • Grouper
  • Cod
  • Catfish

Vegetables

No grilling get together is complete unless you have vegetables off the grill as well. One safety tip that is crucial is that you never cross contaminate.

This means do not use the same cutting board and knife that you did when you cut the meat. Doing so will transfer bacteria and blood to the vegetables.

Make sure to wash your hands to also ensure that you are not cross contaminating the vegetables.

Also, coat the vegetables with oil to ensure that they do not burn while they are on the grill.

Most people wrap the vegetables with aluminum foil and add in the seasonings with fresh garlic in the package.

When the meat is half way done, add the vegetable package to the grill. This will ensure that the vegetables are done when the meat is.

If you are unsure if the vegetables are done, use a fork to test the tenderness of the vegetables.

For a handy guide on grilling and food preparation and safety, check out this convenient poster by clicking here.


5 Go To Burger Recipes for Summer Grilling

What is a barbeque without grilled hamburgers? Listed here are five amazing burger recipes that you can use to kick up the meal for the family and friends. From spicy to classic, these recipes will offer great tasting food that your guests are sure to enjoy.

To make it fun, you can always make it a burger sampler and competition. Reduce the recipes and make each type of burger into sliders, have everyone try each type, then find out which burger is the favorite!

1. Grilled Ketchup with Onions and Yellow Pepper

grilling burgers by the lakeSmoky, spicy and tangy, this great recipe offers a great-tasting burger that has a unique taste. The grilled bell peppers and onions add even more of a charred flavor to any burger.

Ingredients:

  • 3 Pounds of Roma Tomatoes – Cored, Halved
  • ½ Cup of Malt Vinegar
  • 4 tsp. of Salt
  • 2 tsp. of Spicy Pepper Sauce
  • 1 tsp. of Allspice
  • 1 Bay Leaf
  • 1 Cinnamon Stick
  • 1 Medium Sized Onion – Cut into ½ inch Rounds, Separate Rings
  • 1 Yellow Bell Pepper – Cored, Seeded, Cut to ½ Inch Strips
  • 2 Tbsp. of Oil
  • 1 ½ pounds of Ground Beef
  • Pepper
  • 4 Buns

Directions:

  1. For the tomato ketchup, heat up the grill pan to a medium-high heat. Grill the tomatoes with the skin side down until it has dark grill lines. It will take about five minutes.
  2. Flip them over and cook for 10 minutes. Chop them to pieces.
  3. Transfer the tomatoes to a sauté pan. Stir in the sugar, vinegar, salt, allspice, bay leaf, spicy pepper sauce, and cinnamon stick.
  4. Sauté it until it is almost dry.
  5. For the burgers, sprinkle the onions and the peppers with ½ teaspoon of salt and toss it with 1 tablespoon of oil.
  6. Grill the onions and the peppers until they are charred and softened. Flip only once. It will take about six minutes.
  7. Cook the burgers and then top it with the ketchup and the onions.

2. Upscale Slider Burgers

These taste amazing and will leave people wanting more. This recipe is very easy to do and you will have an easy recipe that packs a great flavor.

Ingredients:

  • 6 Slices of Pancetta
  • 1 Pound of Ground Beef Sirloin
  • Salt
  • Pepper
  • 2 Tbsp. of Oil
  • 6 Slices of Gruyere
  • 6 Mini Buns – Toasted
  • 3 Tbsp. of Stone Ground Mustard
  • 6 Cornichons

Directions:

  1. Preheat your grill to 400 degree Fahrenheit. Line a baking sheet with some parchment paper, and then spread the pancetta slices on it. Bake until crisp. It will take about 10 minutes.
  2. Divide the beef into six portions and then into patties. Sprinkle it with salt and pepper.
  3. Oil the grill, and cook the patties for five to seven minutes on each side until it is done.
  4. Add the Gruyere slices on the patties. Cover them with the lid so that the cheese melts. Remove them from the grill.
  5. Assemble your burgers on the buns with the crisp pancetta.

3. Latin Macho Burger

If you like jalapenos, then you are going to love this burger. From onions and jalapenos to brown sugar and adobo seasoning, this burger offers a punch of flavor.

Ingredients:

  • 12 Ounces of Ground Beef
  • 8 Ounces of Chorizo
  • 1 Tbsp. of Adobo Seasoning
  • 3 Large Yellow Onions – 1 Sliced Thin, 1 Grated
  • Salt
  • Pepper
  • ½ Cup of Minced Jalapeno
  • ½ Cup of Brown Sugar
  • ¾ Cup of Mayonnaise
  • 2 Red Bell Peppers – Roasted
  • 6 Potato Rolls – Split
  • 6 Slices of Cheese

Directions:

  1. Mix the chorizo, beef, adobo, and the grated onion in a large mixing bowl. Form it into six patties. Refrigerate them for 30 minutes.
  2. Heat the oil in a large pan on medium-high heat. Add in the sliced onions and the salt and pepper. Add in the jalapeno peppers and the brown sugar. Sauté until the onions are completely caramelized. Make sure they are soft.
  3. Puree the mayo and the red peppers in a food processor or a blender until creamy. Season the mixture with salt and pepper.
  4. Heat the grill on high. Grill your patties until they are cooked to desired degree.
  5. Spread about one tablespoon of red pepper sauce on both sides of the bread. Lay the burger on the half and then top it with the caramelized onions.

4. The Classic Burger

This is a recipe for those who want a simple, classic, cheeseburger. There is not much seasoning in the recipe so the focal point of the flavor is on the meat, so make sure you buy high quality 80/20 or 70/30 ground beef.

Ingredients:

  • 1 ½ Pounds of Ground Beef
  • Salt
  • Pepper
  • 1 ½ Tbsp. of Oil
  • 4 Slices of Cheese
  • 4 Buns – Split, Toasted
  • Burger toppings of your choice (lettuce, tomato, pickles, mayonnaise, mustard)

Directions:

  1. Divide your meat in 4 equal portions. Form patties from it. Push the middle down to form an indention. Season both of the sides of the burger with some salt and pepper.
  2. Heat the grill on high. Brush your burgers with the oil.
  3. Grill your burgers until it is brown.
  4. Add the cheese to the tops of the burgers on the last minute of them cooking to melt the cheese.

5. Cheese Stuffed Grill Burgers

Because you can never go wrong by adding more cheese to any recipe! This is another recipe in which not a lot of seasoning is needed, but on the inside you will find melty, cheesy, goodness!

Ingredients:

  • 2 Pounds of Ground Beef
  • 1 tsp. of Salt
  • ½ tsp. of Pepper
  • 8 Ounces of Cheese – Your Choice

Directions:

  1. Mix the beef with salt and pepper in a large mixing bowl and form it into 8 balls. Press the cube of cheese into the center of the balls.
  2. Cover the cheese with the meat.
  3. Form the balls into hamburger patties.
  4. Grill the burgers until they are done.

Grilling out and cooking burgers at the lake is an All-American tradition enjoyed by many every summer. Keep in mind that burgers are great blank canvases, so don’t be afraid to have fun and experiment with your own recipes!

Head out to the lake, and light up the grill with your friends and family this weekend! And while you’re at it, give some of these great summer cocktail recipes a try.


5 Delicious Grilling Recipes You’ve Never Tried (But Should)

Spring is just around the corner and before you know it, everyone will be firing up their grills to enjoy the warm weather. Here are 5 delicious grilling recipes you’ve never tried (but should).

1. Fire it up the tropical way:

The next time you are carving a pineapple for your family, don’t toss those pineapple skins, grill fish on them! This is a brilliant way to infuse tropical flavor into your local catch of the day!

2. In a glass:

If you’re looking for a creative backyard beverage, why not try Smoked Lemonade! Sound complicated? It is as simple as halving lemons and sitting them on the grate of your smoker while you smoke your meat. Juice the smoked lemons, add water and sugar, and enjoy your innovative smoked refreshment.

3. Fire it up the sweet way:

Take banana splits to a whole new level by slicing a whole banana down the middle, and stuffing the peel with marshmallows, fruit, walnuts, and graham crackers. Cover in tinfoil and stick it on the grill. You could eat this delicacy as is, or top with ice cream to cool off at the end of a hot day.

4. Whole Grain:

I, for one, had no idea that you could bake bread using a grill. This recipe uses less than 10 ingredients and makes two large loaves. It would be ideal to pair with whatever else you are planning to grill, or simply buttered with your morning coffee.

5. Fire up the Fruit!

Cilantro – Lime grilled Watermelon is top of my list for Labor Day, and possibly every summertime weekend. Combining south of the border flavors with fruity watermelon is sure to create a treat that is both savory and nostalgic.

Follow Lake Homes Realty on Pinterest and see all these recipes and more!