Lake Home for Sale? Weigh These Open House Pros and Cons

Open houses are a continual topic of debate in the real estate industry. Many sellers question who benefits most from them, and if they’re worth the time, the money and the exposure.

The bottom line is simple: the more actively your home is marketed, the better your chances of finding a buyer sooner rather than later. However, it’s important to consider the number and frequency of open houses from both sides of the argument.

Pro: Increased Exposure

Getting the word out about an open house means ramping up your home’s visibility. Your real estate agent might employ the use of online ads and social media marketing or opt for increased signage and flyers.

No matter the specific efforts, promoting an open house puts your listing in front of a wealth of consumers, including those most likely to show interest in a home like yours.

In lake real estate, these marketing efforts will expand beyond potential buyers in the immediate area.

They should specifically target those consumers located in the places most frequently shopping your lake.

Possibly the best exposure your listing can receive is word of mouth, be it among your extended social network or with real estate professionals.

Reaching other agents is particularly beneficial, as their clients have usually already been vetted as qualified buyers.

Con: Limited ROI

Preparing for an open house is a lot of work.

Some real estate agents encourage homeowners to enlist the help of a professional home stager, often at their own expense, to ensure the property is walk-through ready.

Staging recommendations often include removing clutter, moving personal items (like family pictures) to storage, rearranging the furniture and perhaps adding artwork or new accents. Luckily, none of these should break the bank.

However, if your lake home is located far away from your primary residence, these minor suggestions can add up to a big expense and significant hassle should you need to hire additional professional services to carry them out.

More than half of buyers found their homes on sites like LakeHomes.com, according to National Association of Realtor home buyer statistics for 2017. Another 30 percent of buyers who ultimately bought said their real estate agent found the home for them.

Only 7 percent of buyers found the home they eventually purchased by attending an open house or seeing a yard sign for the listing. The numbers suggest open houses yield smaller direct returns on investment, although they often support other marketing efforts.

Pro: Up-Close and In-Person Viewing

Sure, the home itself is important when shopping for lake real estate, but pictures can only do the lake so much justice.

Open houses give potential buyers the opportunity to visit the home and experience the lakefront’s personality for themselves.

Some lake home buyers prefer secluded, peaceful hideaways, while others favor communities with friendly, nearby neighbors and lots of group activities. Photographs alone can’t always convey these character traits.

For lake view and lake access properties, or those not directly located on the water, an open house also allows prospective new owners to see how far the property is from the nearest boat launch or access point.

Con: Lots of “Lookers,” Not Many “Buyers”

As previously mentioned, many lake home buyers come from distant cities or out-of-state, rather than from down the street. Consequently, chances are that the right buyers will NOT attend your open house.

Most likely, open house attendees will consist of curious neighbors, lookie-loos and buyers who are just starting to think about investing in lake property.

And even if the event draws in dozens of these guest,  such foot traffic may benefit your real estate agent more than yourself.

Unfortunately, none of your open house’s patrons could choose to buy your property, but it’s possible that one or more of them may choose to work with your agent in the future.

Additionally, because many lake properties are sporadically occupied, hosting an open house may invite burglars and vandals looking to scope out any valuables and locate points of entry.

Making sure the property is sufficiently protected may be a costly expense for homeowners who do not already have home security systems and other security hardware such as video monitoring and numerical code door locks.

Ultimately, it’s up to you as the seller to determine whether the benefits of hosting an open house outweigh the cons. But before making your decision, be sure to consult your local lake real estate expert for more information about what works best in your lake market.

Most Commonly Forgotten Moving Tasks

Moving can be a stressful affair.

From closing on the property, packing, transporting, unpacking and everything in between, it is easy to forget some of the most important jobs associating with a move.

Take a moment to familiarize yourself with these most commonly missed moving tasks to help ensure your next move goes a little more smoothly.

Address Change

Putting a change of address is something a lot of people, surprisingly, forget.

U.S. postal service logo

In the past, residents would have to go to the post office to file a formal change of address. Today, address changes can be filed from the comfort of your own home.

Though the task can be completed after you have moved, it may be easier for you to get your mail squared away before leaving your old address.

On your phone, laptop or tablet, visit the U.S. Postal Service website where there is an easy and quick change of address form.

The form provides spaces to put your new address and when mail should start being forwarded to that address. You can also mark whether the residence will be permanent or temporary.

A lake home that serves as your primary residence in the summer qualifies as a temporary change of address.

Contact Utility Companies

When moving into a new home, your utilities will need to either be canceled or transferred. This depends on where your new home is located.

Some companies only operate in certain areas so it is important to determine whether your current provider services your new address.

If not, these companies may be able to provide an alternative servicer in the area to whom you can take your business.

In the event that information cannot be provided, websites like InMyArea provide databases of service providers that serve your zip code.

It may also be possible, if your new home is part of a homeowner’s association, that a list of preferred companies is provided.

Before cancelling your utilities and your current address, it is a good idea get final readings and reports to keep for your personal records.

This is the time to settle up any unpaid balances with these companies, as well.

Also, you should strive for utilities such as water, electric and gas to be connected at your new residence on the same day.

Smoke Detectors and Emergency Exits

Once in your new home, check that all smoke detectors are in working order. Be sure to check that all batteries have been changed.

Additionally, discuss a fire escape plan with your family. This discussion should include determining a family meeting place and what to pack in an emergency go-bag.

Change the Locks

High on the priority list is changing the locks.

key in door lock with house keychain

Though this may seem trivial, your family’s safety is number one. You never know how many people have copied keys to your new home.

Protect yourself and your loved ones by eliminating the chance that the previous owners, or other unwelcome guests, might try to gain reentry into the house.

Update Important Documents

It is important to ensure that all significant documents are updated with your new address as soon as possible.

These documents include your diver’s license, voter and car registration, insurance, student loans and professional memberships or licensing boards.

Subscription service services and mailing lists should be updated, as well.

Moving into the next home of your dreams may be a little nerve wracking, but checking these items off your to-do list will help ease that stress, even if only by a little.

Try reading our “Tips to Make the Moving Process Easy” and “Moving on a Budget” articles for more advice and tips.

5 Steps to Take When You’re Ready to Sell Your House

key in door lock with house key chain

Your home is likely your largest investment.

When it’s time to sell, you’ll want your investment to impress buyers and earn top dollar.

A real estate agent can suggest ways to make the process go smoothly, but all homeowners can take some basic steps even without professional help.

Here are five important steps to take when you’re ready to sell your house.

1. Declutter

Remove knickknacks, toys and other belongings that clutter the rooms in your house to make the spaces seem larger and more open.

Buyers will also have fewer distractions as they walk through the home.

Don’t plan on shoving your clutter into closets, though, because potential buyers will open closet doors as they tour your house. If you have a lot of clutter and find it hard to get organized, consider temporarily renting storage space for some of your belongings.

2. Repair damaged items

If you have small issues, such as holes in walls or lights that don’t work, now’s the time to fix them.

To get an idea of what you need to repair, walk through your home and imagine yourself as a buyer, or walk through with a friend you can trust.

Are there defects that you’ve learned to overlook but that would catch your attention when seeing them for the first time?

You’ll also want to make sure you correct major issues that a buyer may not see immediately, such as problems with the heating and cooling system, before you put your home on the market.

A potential buyer will probably hire a home inspector before closing. If the inspector finds problems, the sale could be put on hold until they’re resolved.

3. Deep clean

Go beyond your weekly cleaning routine.

Every surface a potential buyer sees is a surface that needs to be clean. Messy spaces could send the message that you don’t take care of your home, and it could make potential buyers wonder what else is wrong with the property.

A deep cleaning means shampooing carpets, washing windows and cleaning tile grout throughout the house.

Pay special attention to bathrooms; make sure fixtures are sparkling and wipe out any dirt rings or mold patches.

Keep up the cleaning routine while your home is on the market. If you’re pressed for time, consider hiring a weekly cleaning service.

4. Plan pleasing scents

You probably don’t want buyers who enter your home to catch lingering odors from last night’s dinner.

For a nicer aroma, add fragrances around the kitchen and throughout your home.

The smell of freshly baked cookies is pleasant for many buyers. If you prepare a batch just before a showing — and offer them to the buyer and real estate agent — you could make your home stand out.

There’s no need to worry if you’re not much of a baker.

A few well-placed sticks of cinnamon or citrus fruit, such as oranges, can also produce a refreshing scent.

In fact, a 2013 study published in the Journal of Retailing and reported by the Wall Street Journal determined that a simple orange aroma encouraged buyers to spend more money at a home decor store, compared with other scents.

5. Stage your home

Your decor expresses your personality, but home shoppers may have different tastes.

Consider changing the decor to appeal to a large number of buyers. This practice is known as “staging,” and it could mean you rearrange furniture, tone down dramatic wall paint with more neutral colors or even rent new pieces of furniture until the home is sold.

In a 2015 National Association of Realtors report on home staging, 52 percent of buyers agents reported that their buyers were willing to increase the amount of money offered for a staged home compared with a similar property.

You could ask your real estate agent for design suggestions and stage your home on your own. Or if you’d prefer a professional home stager, your agent may be able to suggest someone.

You can also contact the Real Estate Staging Association for names. The survey showed the median amount homeowners paid for staging services was $675.

Take note of these five steps to get your home ready to sell before you put it on the market. The effort you make repairing, cleaning and staging can pay off big when a buyer makes an attractive offer on your house.

Margarette Burnette is a staff writer at NerdWallet, a personal finance website. Email: mburnette@nerdwallet.com. Twitter: @margarette.

NerdWallet is a Lake Homes Realty / LakeHomes.com content partner providing real estate news and commentary. Its content is produced independently of Lake Homes Realty and LakeHomes.com.

Repairing a Hole in Drywall

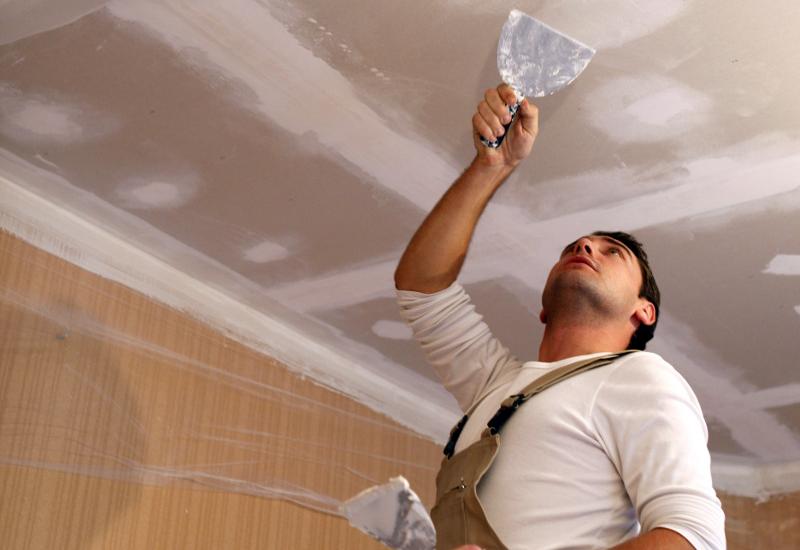
man repairing drywall on ceiling

Holes in drywall can be repaired fairly easily, with a minimal amount of equipment and work. Most homeowners can accomplish this with just a few tools.

Drywall is also referred to as plasterboard, wallboard or sheetrock.

Follow these steps in order to repair and conceal drywall holes of all different sizes.

Repairing a Large Hole: 4 to 6 Inches

You can get ready-made patches for drywall. These are available in different home supply centers and hardware stores.

Most offer a “peel-and-stick” type and most patches also have metal backing for additional strength.

If the hole was caused by door knob or other high-speed object, a patch can certainly hide it. However, it may not be strong enough to hold up if there is another impact. If that is the case, then you will need to get a new piece of drywall.

To install a drywall patch, follow these steps.

  1. First, clean the edges around the hole. Trim away any loose or frayed pieces using a utility knife.
  2. Shape or cut the patch carefully in order to fit your hole. Be sure to leave a border of extra backing around the patch in order to attach it to the wall that surrounds the hole.
  3. Clean and then dry the hole, to allow for maximum adhesion. If there are any greasy areas, you can clean them with some tri-sodium phosphate, found in the paint section of a hardware store. You can also just use soapy, warm water. Get the drywall damp enough to clean, but not soaking wet.
  4. Apply the patch to the wall, and smooth out the taped edges with a putty knife.
  5. Use a wide blade putty tool in order to spread a very thin layer of compound over the area.
  6. After it is dry, gently sand the patch to blend it into the wall and repaint.

Repairing Medium-sized Holes: 2 to 4 inches

If the hole is small, you may not need to use a patch. Instead, you can just use some joint compound, also found at a hardware store.

To apply:

  1. Clean up the area using a utility knife, and then trim away or press back any loose bits that are hanging down.
  2. Wet the repair area using a spray bottle. This will help the compound stick to the wall. This step can be skipped if you are using a non-water-based compound.
  3. Once your wall is clean and just a bit damp, apply a good amount of the compound onto a putty knife. Using a wider putty knife will produce a smoother result. Fill the hole and make sure there aren’t any gaps. It’s fine it it sticks out a little – that’s what the next step is for.
  4. Smooth out the compound using a putty knife. Hold the blade at roughly a 30 degree angle from the drywall, and pull it towards you in just one steady motion.
  5. Sand gently afterward, and repaint the section of wall if necessary.

Repairing Small Holes: Less than 2 inches

Smaller holes are very easy to repair, and can be unnoticeable if done correctly. You can use either non-shrink drywall compound or spackle.

  1. Clean up the area that needs to be repaired. Trim away the edges.
  2. Wet the area very lightly.
  3. Using a liberal quantity of the compound or spackle and a putty knife, cover the small hole and fill it in.
  4. Ensure that you smooth out the edges to blend it to the wall.
  5. Sand it down and paint over as needed.


4 Easy to Miss Items to Look for When Shopping for a Lake Home

There are lots of people in the world who would simply jump at the chance to purchase a lake home, but like purchasing any piece of property, it should never be rushed.

It is advised that you should consider a home inspection for your potential lake home, before you decide to splash the cash on your dream retreat. This will ensure that you will get the maximum value from your investment and will not live to regret the decision to purchase the lake home. So if you are considering purchasing a lake home, then you should look for the following things in a home inspection for a lake home:

The Water Counts

A lot of people don’t consider checking the actual lake when they are purchasing a lake home, which is probably one of the biggest mistakes that you can make. It may seem like only water to you at first, but there are certain water lots, which you don’t want at all with your lake home. Check to see how much waterfront footage you have on your lake, which should ideally be 100 feet or more.

Unsplash: house facing waterDoor Facing the Water

If you were living in the city, you would want to have curb appeal with your home. But, when you are living on a lake, all you should care about is pier appeal.

Check to see if there is a main door facing the lake, since you are going to want to see a whole lot of lake in your lake home. This means that every room in the house should provide you with a view of the lake, whether it is the kitchen, the dining room or the bedroom. A lake home without a great view of the lake from all rooms is less than ideal.

Topography is Essential

Not many people know this, but when you are living at a lake house, you have to consider the topography of the water lot as well. If you are going to go swimming and floating, then you should have a flat lot, which means that the water in the lake will not be deep.

If, however, you want to take your boat out every day, then you would need a steeper lot, which would mean deeper water. It may seem as a simple choice, but it all counts towards the appeal of your lake home.

Docks Are Important

lake dockIt is also important to check the quality of the docks. Make sure that boards aren’t missing or loose and there are no jagged nails.

Living on the lake is a lifelong dream of most people and it is one of the best ways to spend your retirement days in comfort and relaxation as well.