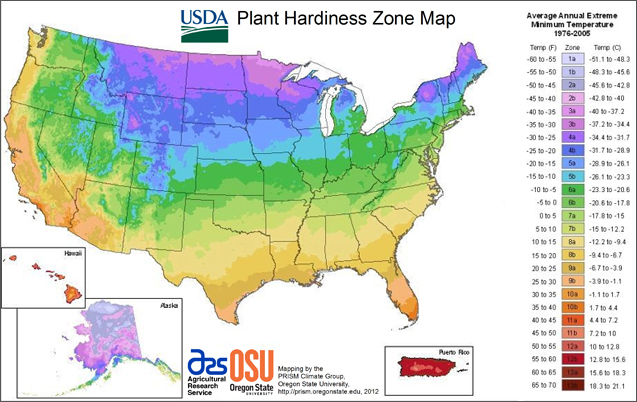
As any gardener will tell you, the key to having a successful garden is choosing the right plants and knowing when to plant them. To make these decisions, gardeners first look to the plant hardiness zones for guidance. A hardiness zone is a geographic area that divides certain regions based on the average minimum rainfall per year. Pol Bishop, a landscaping expert from Fantastic Gardeners, simplifies, “gardening zones essentially use temperature to determine plant survivability.” By understanding the average temperature in your region, you can make well-informed fundamental gardening decisions.
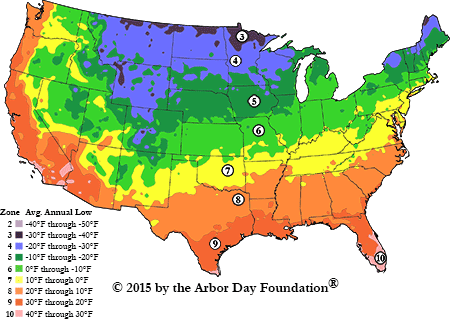
Peter Miller, founder of Gardening Stuffs, comments, “I’ve been in the garden landscape space for 15 years now, and I know how important it is to identify which plants will survive the adverse climate of your region. In gardening, you can adjust your soil type and its PH levels as well as the amounts of sun and shade, but you won’t be able to control the temperature in your garden.” While our first article in the series focused on the southernmost zones in the U.S.– zones 7-9– we’ll now highlight zones 4-6. This range of zones encompasses mid-America and most of the east coast. If your lake house is in these regions, the information and tips provided will help your lakeside garden thrive.
Key Characteristics
In zones 4-6, the average minimum temperature is between -30 and -5 degrees Fahrenheit. As such, one of the hallmark qualities of these zones is that each season has an actual ending and real beginning. Unlike this area’s northernmost and southernmost counterparts, neither winter nor summer lasts too long in these zones. The seasonality is clear-cut. Kevin Espiritu, the founder of Epic Gardening, comments that these zones capture the “traditional gardener in a classic farming routine.” There’s a certain luxury that comes from planting for the next season in the preceding one, and gardeners can take advantage of warm days to plan. There’s even the exciting possibility of a Fall garden.
Helpful Hints
While the plant hardiness zones are useful, they do not tell a region’s full story. This is because the zones only capture average minimum temperature without considering rainfall, elevation, and subclimates. In the Western U.S., sunset zones are a more precise system because they take a region’s latitude, the ocean’s influence, rainfall, humidity, wind, elevation, and microclimate into account. However, since sunset zones only apply to the west, the hardiness zones are currently the most standardized tool for the whole country.
Given this limitation, gardeners should take it upon themselves to consider additional factors that may impact their plants’ survival. For example, those further west receive less rainfall, and those further east get more rain on average. Scott Fanello, a writer for Total Gardner, advises those in drier areas to use greywater to compensate for lack of rainfall, and he urges easterners to make the most of their rainy climate. Regardless of these subclimate-specific differences, a similarity across zones 4-6 is the forgiving weather. This similarity leads to longer growing times during the spring and summer months. To work with this, Fanello mentions that greenhouses can be fun, but they aren’t essential. He also notes that just like zones 1-3, mastering cold frame gardening will be helpful in zones 4-6.
Plants That Thrive
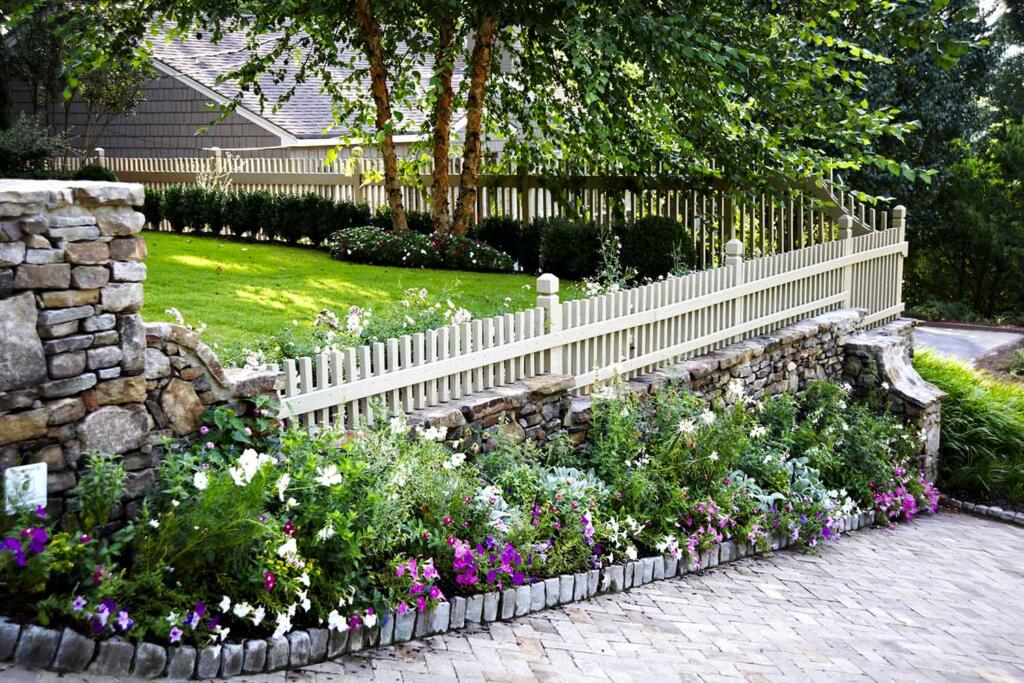
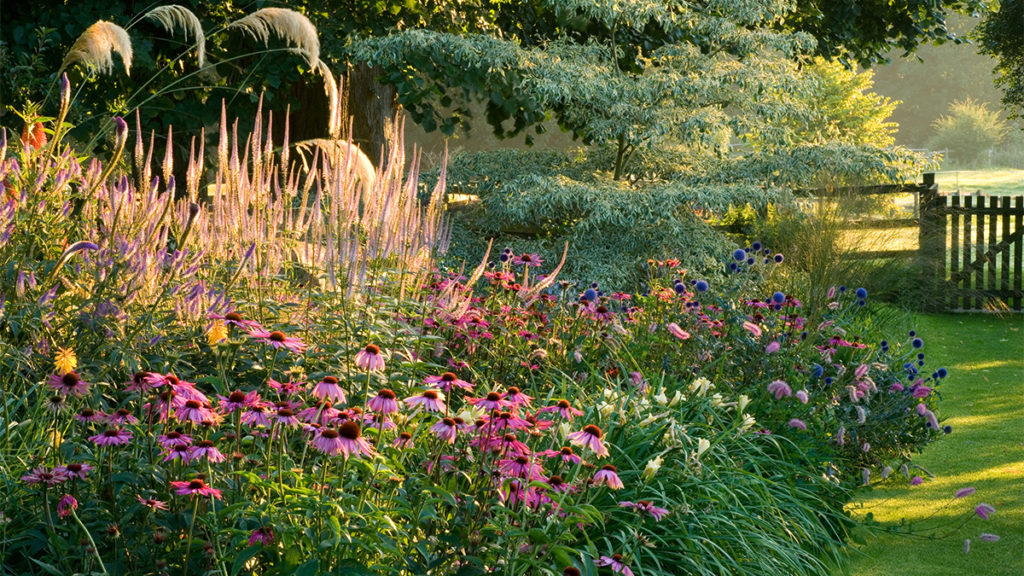
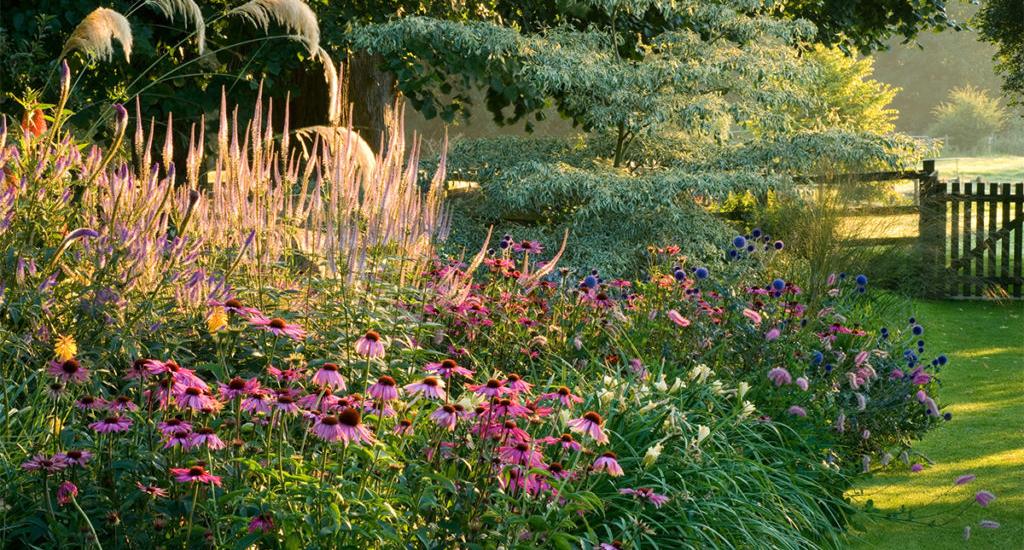
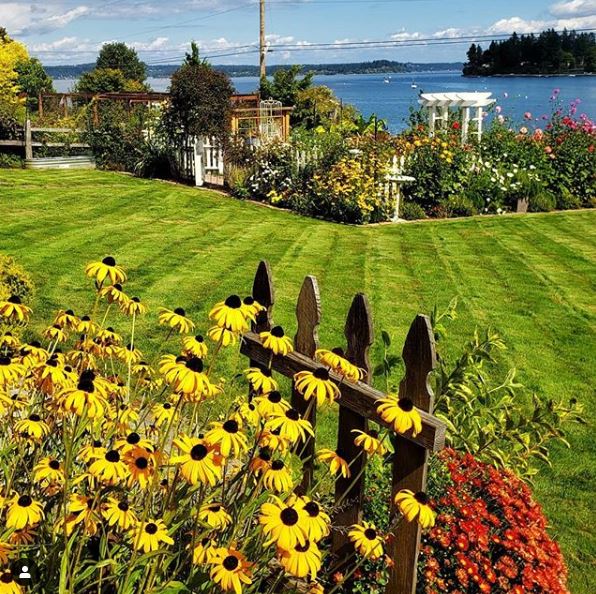
Because the weather conditions are ideal for gardening, several types of plants can thrive in zones 4-6. However, some differences are dependent on the specific zone. In zone 4, flowers such as goldenrods, daisies, and petunias will thrive. Plus, the bright color combination is a nice bonus. Landscaper, gardener, and writer Melanie Musson advises filling pots and baskets with petunias for a warm, English-countryside look. If you want to plant trees by your lake house in zone 4, consider a sugar maple. The dynamic, orange-brown tones will look vibrant in the Fall. In zone 5, Musson notes that Agastache will quickly prosper, and they’ll also attract hummingbirds to your garden. As for trees and shrubs, flowering dogwoods and Japanese yews are perfect for zone 5. In zone 6, Musson recommends planting hostas. These perennials love the evenly moist soil in this zone, and their leaves are beautiful all season long. Musson also adds azaleas and rhododendrons to the list of plants that will flourish in zone 6. She shares, “they make for low-maintenance shrubbery that boasts a stunning bloom period.”
If your lake house falls into one of these three zones, we hope you take advantage of the naturally ideal gardening conditions and find a new perennial to plant this season!