DIY Porch Decorations for Fall

A DIY is more than just a fun project to take on for a weekend. A DIY gives you a sense of pride and accomplishment. And there’s no better time than the present. Here is a compiled list of some fall DIYs that will be sure to stand out on your front porch this autumn.


Pumpkin Doormat
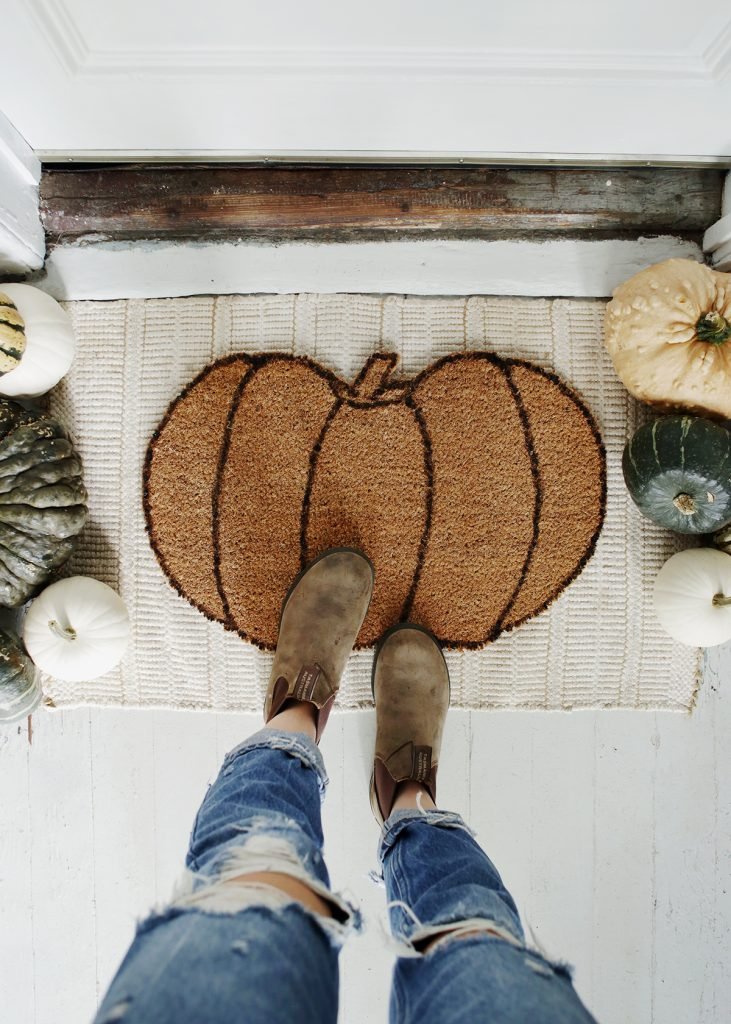
Pumpkin Doormat
Courtesy of The Merry Thought

One thing every porch needs is a doormat. Despite its primary purpose of keeping dirt outside, it can also dress up your door. It’s one of the first things guests will see on your porch, so it’s best to make it welcoming and, in this case, festive! Check out this DIY pumpkin doormat to make this autumn.

Materials:

  • Doormat 
  • Pencil 
  • X-acto knife 
  • Scissors
  • Paint 
  • Paint Brush 

Instructions:

The first step to making this festive doormat is to flip it upside down so that the bottom of the mat is facing up. From here, you will sketch your pumpkin on the back of the mat. You can do this freehand or by using a reference photo. Once you’re happy with the drawn shape, take your X-acto knife and cut off the edges so that the mat is in its pumpkin shape. Then, you’ll flip the mat over, right side up, and clean up any messy edges with scissors. Finally, creativity comes in! Use your imagination and paint the mat. It can just be an outline of the pumpkin so the natural mat shows, or you can use any color that will match the rest of your porch décor.  

Mums in a Pumpkin Planter
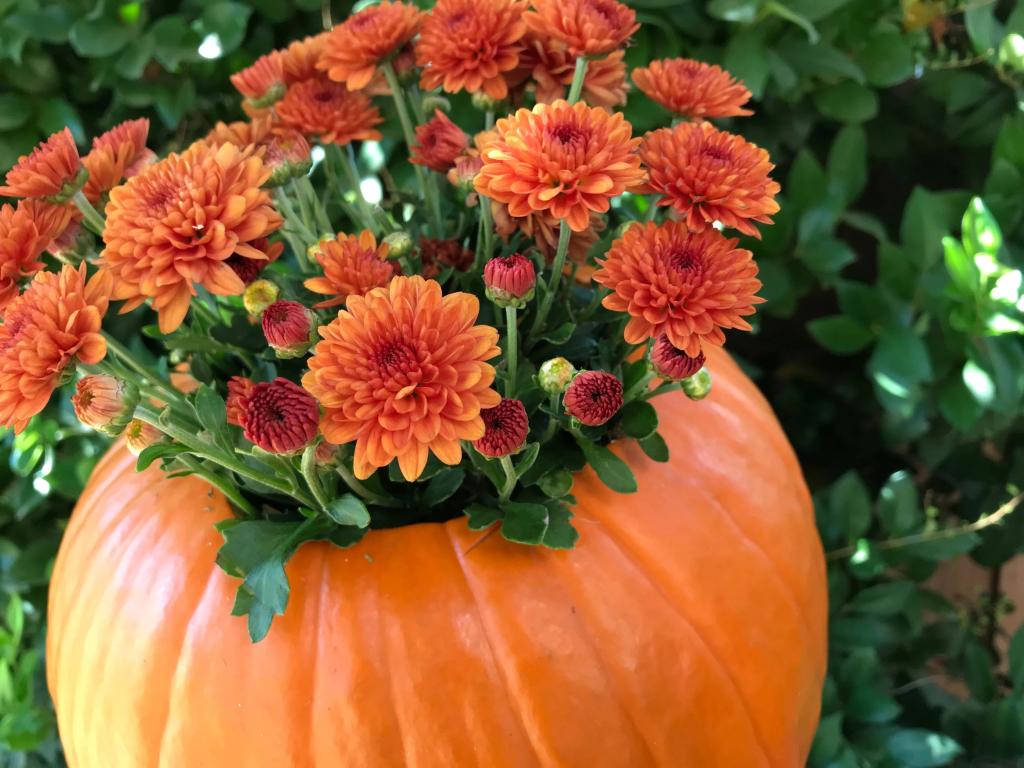
Mums in a pumpkin planter
Courtesy of Simple Sojourns

Chrysanthemums, also called mums, are a staple fall flower because of their vibrant red, orange, and yellow hues. Mums are sturdy flowers that will last throughout the fall season. One easy way to step up your mum game is to place them in a unique planter. What is more unique and autumnal than a pumpkin? Read these next steps on how to plant your mums in a pumpkin to dress up your flowers.

Materials:

  • A Mum 
  • A Pumpkin Large Enough for the Mum 
  • Knife 
  • Large Spoon 
  • Sharpie Marker
  • Potting Soil 
  • Ribbon 

Instructions:

Your first step for this planter is to select your pumpkin-chrysanthemum combination. There is little rhyme or reason here, so pick what you like! It can match your other porch decorations or simply complement them. The one rule is to make sure your mum and pumpkin are proportional to each other and that the mum can fit inside the pumpkin. To get started, remove the mum from its pot and set aside. From here, grab your pumpkin and draw a circle around the stem using the plastic planter from the mum as a stencil. Now, cut the top of the pumpkin open where you drew a circle.

Once open, take the time to remove the guts and seeds using a large spoon. With this step, you want to take out the majority, but whatever little bit is left will just be turned into fertilizer. Be sure to save those seeds for roasting! Next, add the soil into the pumpkin so that the bottom of the mum will sit an inch below the opening. Now, the fun part. Plant the mum into the pumpkin and water it. You can stop here or decorate it with ribbon. Be sure to water it every other day and enjoy your new planter! 

Autumn Leaf Archway

Fall archway on decorated porch
Courtesy of Macy.Blackwell on TikTok

This DIY is no small feat, but it makes a big impact. With this fanciful leaf arch, you will be the talk of the block. It may be a more time-consuming project, but it only has four materials you’ll need.

Materials: 

  • PVC Pipe
  • Chicken Wire
  • Garland 
  • Zip Ties

Instructions:

Build an arch with PVC pipe based on how big your arch needs to be to fit your porch. Attach three pieces of chicken wire to form the square arch shape with zip ties while ensuring it doesn’t stick out too far. Then, fill in with strands of garland, attaching with zip ties. The number of strands is dependent upon size. However, you will likely need at least 20. Continue to add until it is at your desired fullness. 

Pine Cone Door Hanger
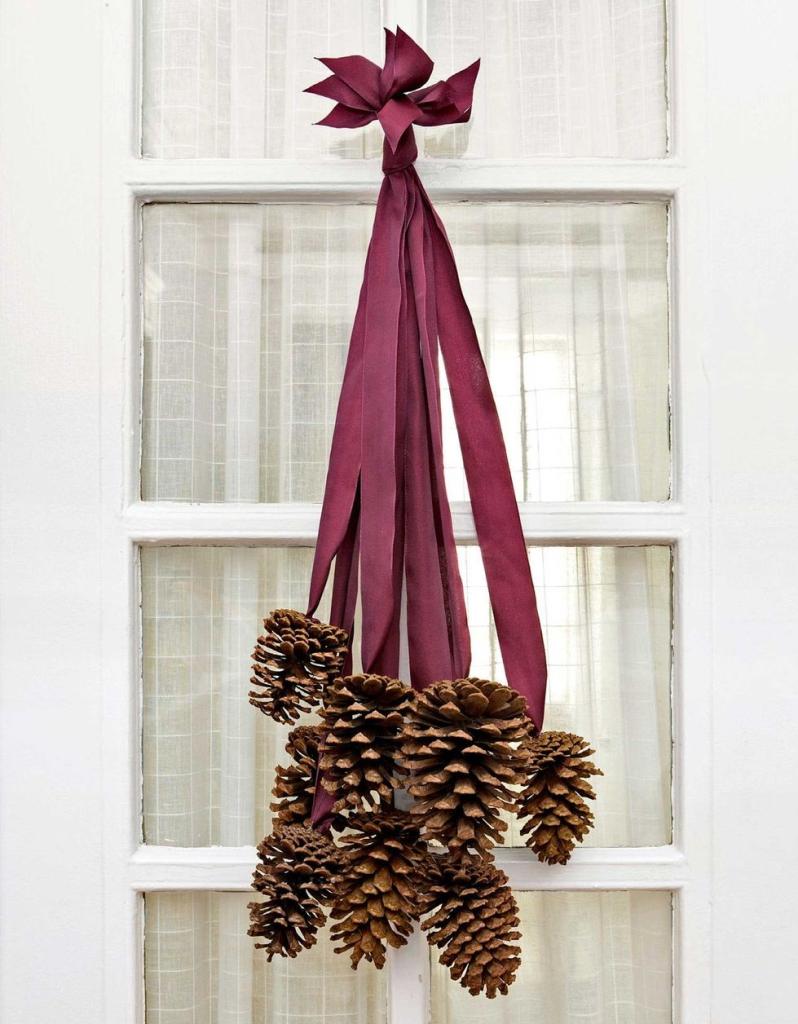
Pine cone door hanger
Courtesy of Country Living

Wreaths are a porch necessity for all seasons. However, the trends are often changing on what kind of wreaths are becoming more popular. So, rather than a traditional round wreath, consider a hanging pine cone door hanger for this fall season. 

Materials: 

  • Pine cones, preferably real 
  • Eye-Bolt Screws
  • Ribbon 
  • Stapler

Instructions:

This DIY works best with natural pine cones you can scavenge from the forest or your front yard. First, take your pine cones and screw your eye bolts into their tops. Depending on your cones and screws, you might be able to do this by hand, or you may have to use a drill first. Screw it in until the eye hook touches the cone. Now, you have to visualize how the pine cones will lay. You will want them at staggered lengths rather than one bunch. So, lay out the pine cones at the varying lengths you want. Next, cut your ribbon to the desired length plus two inches for tying room for each pine cone.

Thread your ribbon through the eye hook, leaving one inch on the other side. Fold the inch onto the longer portion and staple them together to secure the pine cone. Repeat for all pine cones. From here, gather your ribbon-hung cones and lay them out how you visualized them. This is best done with the longest in the back and the shortest in the front. Once it looks how you like, staple all ribbons together near the top to make one hanging bunch. Now, cut the tops above the staple to make them even. Add a loop at the top with more ribbon, still stapling the two ends to the existing ribbon. Finally, use the remaining ribbon you have to decorate! You can add a bow near the top where the bunch will hang or at the top of each pine cone to add playful layers. 

Three Pumpkin Stacked Topiary
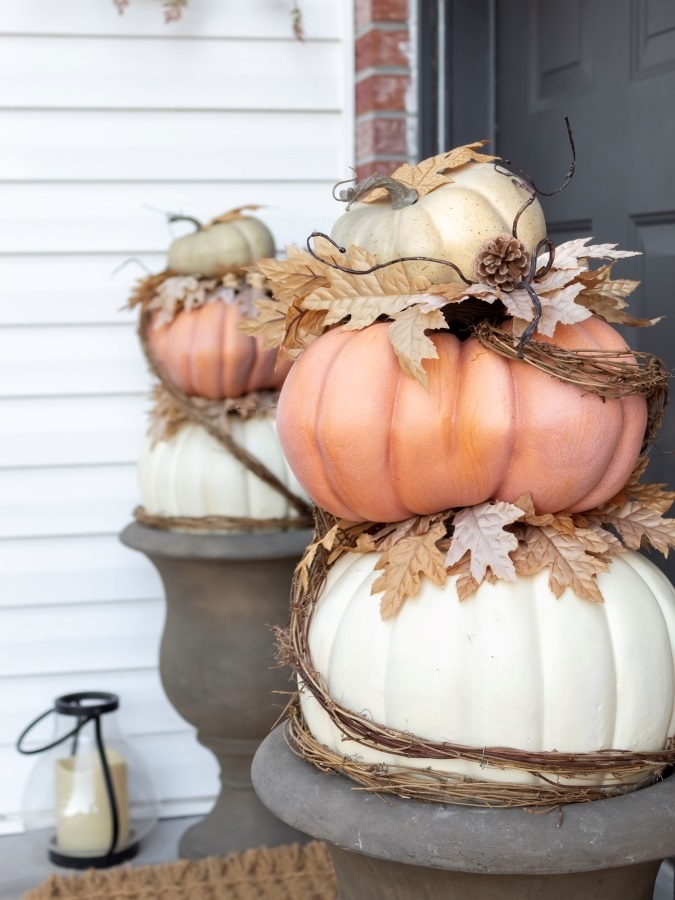
If that archway was a little too extravagant, try this DIY topiary. It will give a similar effect on a smaller scale. This is a perfect touch to a porch, especially for those who don’t have a green thumb. You can customize this project with different pumpkins, leaves, and garlands. You could even use jack-o-lanterns and spiderwebs for a Halloween theme

Materials: 

  • Urn Planters
  • Potting Soil 
  • Three Different Size Plastic Pumpkins
  • Wood Dowels 
  • Hot Glue Gun
  • Glue Sticks
  • Drill and Drill Bits 
  • Faux Fall Leaves
  • Grapevine Garland

Instructions: First, fill your planter with the potting soil. Next, you can begin preparing your pumpkins. Take the largest pumpkin and drill a hole in the bottom of it, big enough to insert the wooden dowel but not too large. You want it to fit snuggly on the dowel. Now, put the pumpkin dowel down into the soil. It’s time to add leaves! Remove the stem on the pumpkin simply by pulling or cutting it off. Then, use a hot glue gun to attach some leaves to the top of the pumpkin. You’ll want them to appear as if they’re lying on top of and falling off the pumpkin.

Now repeat! Drill another hole into the top of the bottom pumpkin so that it can hold the dowel of the next pumpkin. Drill and add the dowel to the second pumpkin, stack, add leaves, and do it a third time for the top pumpkin. Lastly, wrap the now-built topiary with grapevine garland to give it a rustic feel. Ta-da! New topiary! Make two and add them on each side of your door for a symmetrical effect.


Any of these DIYs are sure to impress. When you have guests over, and they ask, “Where did you get that?” You’ll be able to say, “Oh, I didn’t buy it. I made it!” It seems like an ideal conversation starter and something sure to boost your pride. Pick one out and work on it today!

   – Materials needed: A Mum, A Pumpkin (large enough for the Mum), Knife, Large Spoon, Sharpie Marker, Potting Soil, Ribbon.

   – Instructions: Cut the top of the pumpkin, remove the guts and seeds, add soil, plant the mum inside the pumpkin, and water it regularly.

   – Materials needed: PVC Pipe, Chicken Wire, Garland, Zip Ties.

   – Instructions: Build an arch with PVC pipe, attach chicken wire to form the arch shape, and fill it with strands of garland using zip ties.


   – Materials needed: Pine cones (preferably real), Eye-Bolt Screws, Ribbon, Stapler.

   – Instructions: Screw eye bolts into the tops of pine cones, arrange them at staggered lengths, attach ribbons to the eye hooks, staple them together, and create a hanging bunch with the pine cones.

   – Materials needed: Urn Planters, Potting Soil, Three Different Size Plastic Pumpkins, Wood Dowels, Hot Glue Gun, Glue Sticks, Drill and Drill Bits, Faux Fall Leaves, Grapevine Garland.

   – Instructions: Fill the planter with potting soil, drill holes in the pumpkins, insert wooden dowels, add leaves to the pumpkins with a glue gun, stack the pumpkins, and wrap the topiary with grapevine garland for a rustic touch.

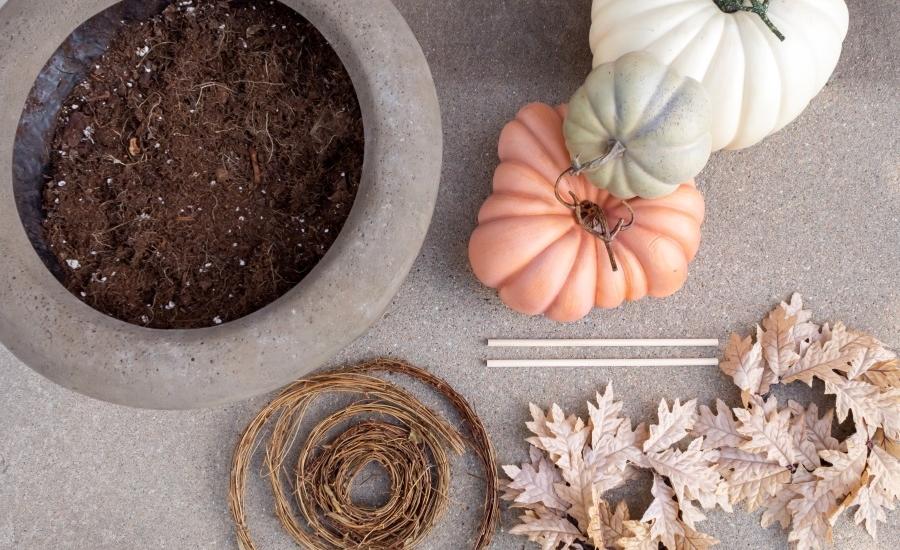
Lake Living: How to Create a Centerpiece Arrangement

Photo courtesy of Hearth and Vine

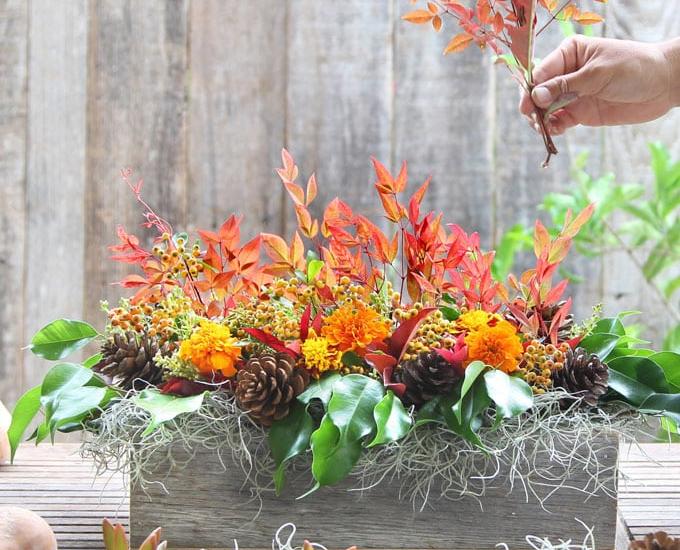
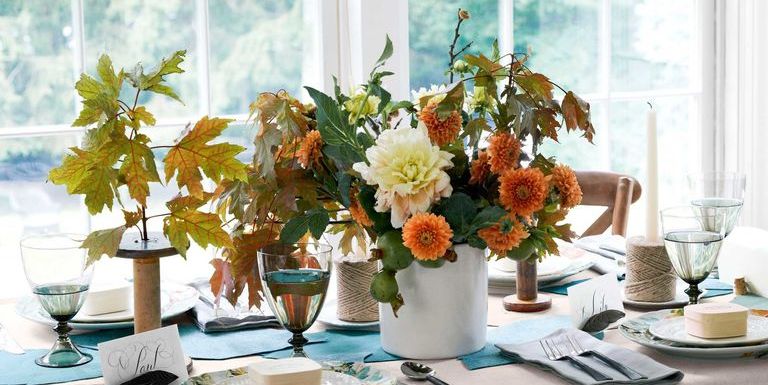
During late autumn and early winter, a beautiful centerpiece for your dining room table can add a sense of warmth to your lake home. While you can certainly buy a tasteful centerpiece, why not DIY? At this time of year, your backyard is probably chalk full of gorgeous fall foliage — golden leaves, pine cones, and other interesting pieces of nature. Check out these ideas for creating centerpiece arrangements right from your backyard!

Start with a Container

Photo courtesy of Koch Blog

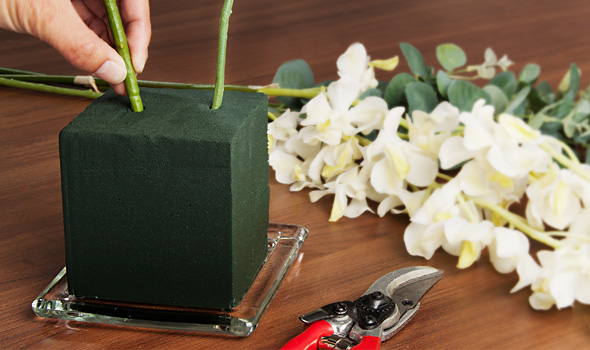
Let’s start with the basics! You’ll need a vase or other type of container to hold your arrangement. To provide the container with structure, oasis is your best friend. This wet foam acts like a sponge and absorbs water from your plants. In addition to supporting the life of these plants, it also holds them in place. Instead, you could opt for a floral frog, chicken wire, or a strong floral tape to bolster your container. Start by adding water to your vase, and incorporating the plants later!

Forage for Foliage

Photo courtesy of An Off Grid Life

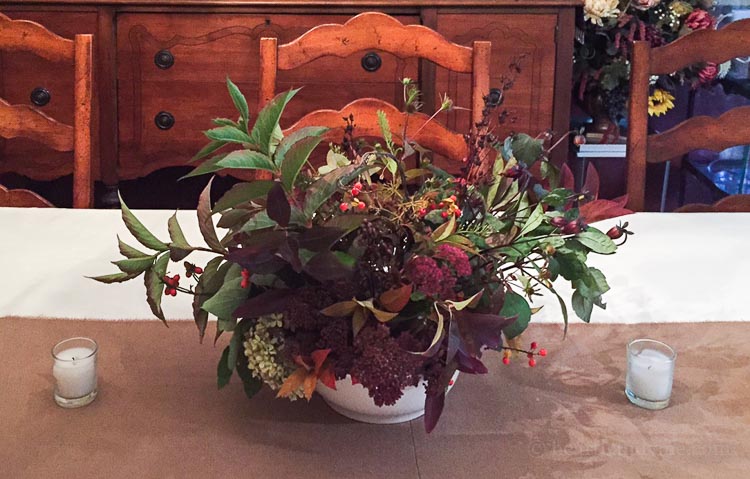
Next is the fun part — explore your backyard! With a keen eye, you’ll be able to find an assortment of interesting pieces for your centerpiece arrangement. Bring a pair of gardening scissors with you to cut pieces that you see. Flowers (wildflowers or plants from your garden), pieces of shrubbery, and even interesting weeds are all fair game. Plants with small berries will add an interesting pop of color as well. But while you continue looking at plants, don’t underestimate the added value of pine cones, sticks, and even rocks. These pieces will add texture and variety to your greenery.

Arrange Your Pieces

Photo courtesy of a piece of rainbow

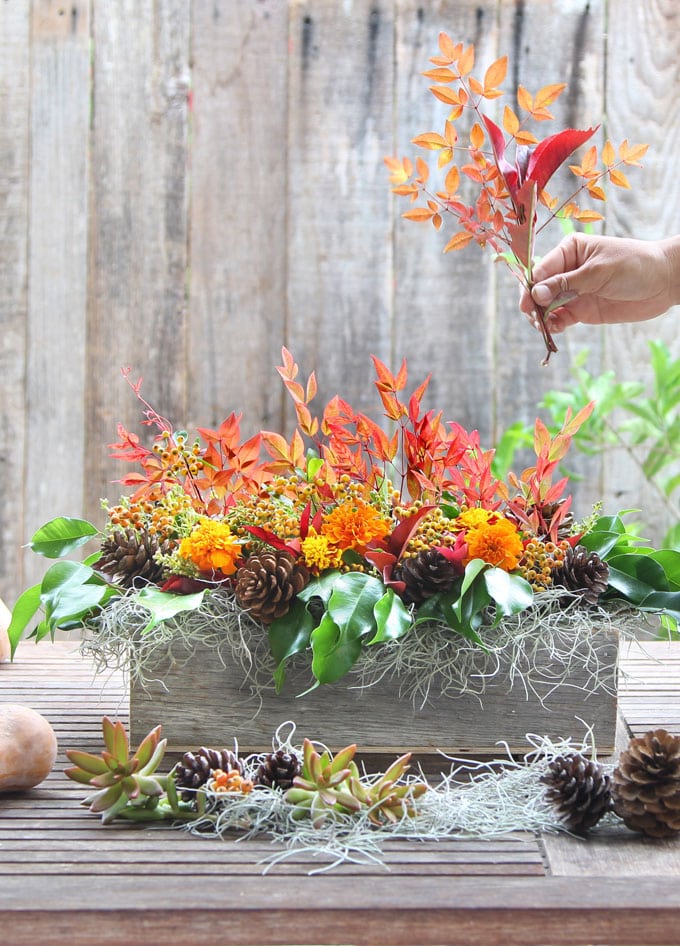
Once you’ve compiled your assortment of natural pieces from your backyard, it’s time to create the centerpiece! To start, it can be helpful to lay everything out at once and use your creative eye to imagine how the pieces may coalesce. If you’re unsure, start with the bigger pieces first. These larger leaves and branches will serve as the backdrop for your arrangement. Then, you can fill in the gaps with smaller accent pieces like berries and small shrub pieces wherever you see fit. To add sparkle to the centerpiece, try using a metallic spray such as gold or silver on a few pieces. This is an especially good idea if you’re creating this arrangement for a late Fall or winter holiday!

Show Off Your Creation

Photo courtesy of Country Living Magazine

Finally, it’s time to impress your guests! Ultimately, the choice of where to showcase your DIY centerpiece is up to you. Dining room tables, mantles, and coffee tables are all excellent choices. From a broader interior design standpoint, these arrangements are all about “bringing the outdoors in.” What better way to celebrate lake life than with an arrangement dedicated to your natural surroundings? 

We hope you create a centerpiece arrangement you’re proud of! There’s no way you can go wrong — the pieces you choose represent the beauty of your backyard.

5 DIY Lake House Signs Project

Photo courtesy of Pinterest.

When it comes to decor for your lake house, there’s no shortage of DIY projects. Whether it’s a homemade fire pitchalkboard paint, or driftwood decor, it’s empowering to take interior design into your own hands. One classic staple found in many lake homes is the lake sign. These cute “go jump in the lake” or “rules of the lake” pieces are a fun way to customize your home with lake-specific decor. But if you want a lake sign, there’s no reason to spend money on a design sold on Etsy. Plenty of bloggers have shared their secrets for creating a DIY lake house sign. Check out our top 5 favorites! 

“Go Jump in the Lake” Sign

From Uncommon Designs, this DIY lake sign has a unique vintage flair. The fire-engine red tone against cursive letters resembles a classic cola logo, evoking a familiar feel. The distressed paint especially stands out against a textured wall.  

Supplies: 

  • One canvas 
  • Chalk paint 
  • Vinyl lettering cut or pre-made vinyl stickers 
  • Acrylic craft paint 
  • 150 grit sandpaper 
  • Stain and water 

InstructionsPurchase a blank canvas or use an existing art piece that you don’t mind painting over. Cover the canvas in a base coat of chalk paint (this blogger used Annie Sloan Chalk Paint in Country Grey). Using the vinyl lettering cuts or stickers, place the letters spelling “Go Jump in the Lake” onto the canvas. Paint over the vinyl letters with a simple acrylic red craft paint and pull the letters off once they’re dry. For the vintage look, rough up the canvas with sandpaper and wipe the canvas with the 1:1 strain and water mixture. 

Rustic Lake House Sign

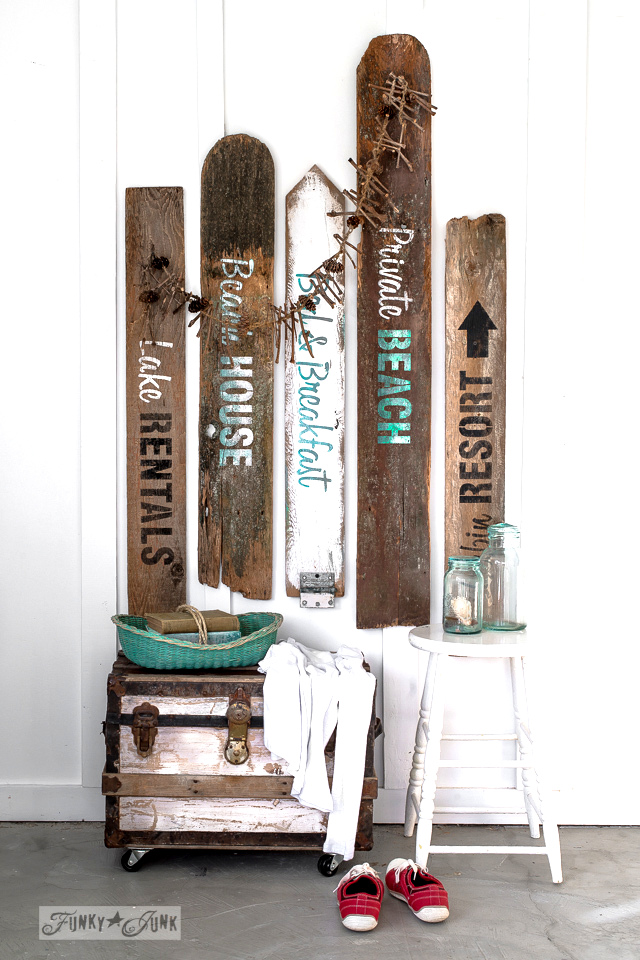
If your lake house decor has a rustic cabin vibe, this sign is perfect. From Funky Junk Interiors, Canadian blogger Donna uses old items to decorate her home. She’s all about repurposing what others may call “junk,” and this DIY lake sign is no exception. 

Supplies: 

  • Wooden boards 
  • Stencils for a word or phrase of your choosing 
  • Paint (three colors)
  • Tape 

Instructions: Lay any number of wooden boards out. Then, take your chosen stencils and tape them to the wooden boards for security. Using a paint color of your choice (this blogger used a combination of turquoise, white and black fusion mineral paints), tap each letter with a dried brush. Then remove the stencils! 

Lake House Driftwood Wreath

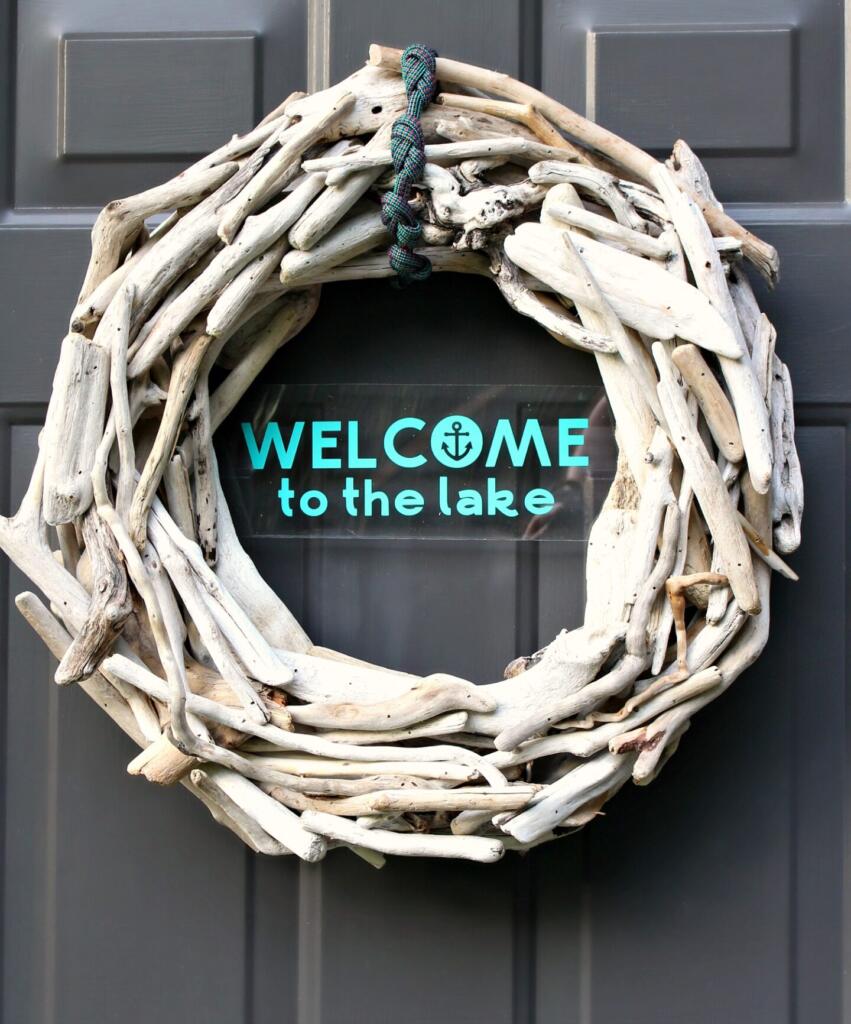
If you own a Cricut Joy machinethis DIY lake sign is the perfect excuse to dust it off. Without this appliance that prints adorable labels, you can still create the driftwood wreath to add a nautical flair to your front door. Tanya from Dans Le Lakehouse blogs about several other DIY projects you can check out, too!

Supplies: 

  • Cricut Joy 
  • Cricut Joy Smart Vinyl 
  • Other Cricut supplies (Weeder Tool, scraper tool, transfer tape, design space)  
  • Driftwood 
  • Air nailer and compressor 
  • 1” and 1.5” nails
  • Rope for hanging
  • A sheet of Lexan, plexiglass, or plywood
  • Screws and drill 

Instructions: Start by collecting small pieces of driftwood around your lake house! Once you have enough for the lake sign, set down a bucket the same circumference as your desired wreath. Create the bottom layer, then add more layers of driftwood pieces, air nailing them as you go. Then, cut a small rectangle of plexiglass and use the Cricut Joy tools to create your customized lake sign in the wreath’s center. Tie a rope at the top for hanging. 

Faux Wood Lake Sign

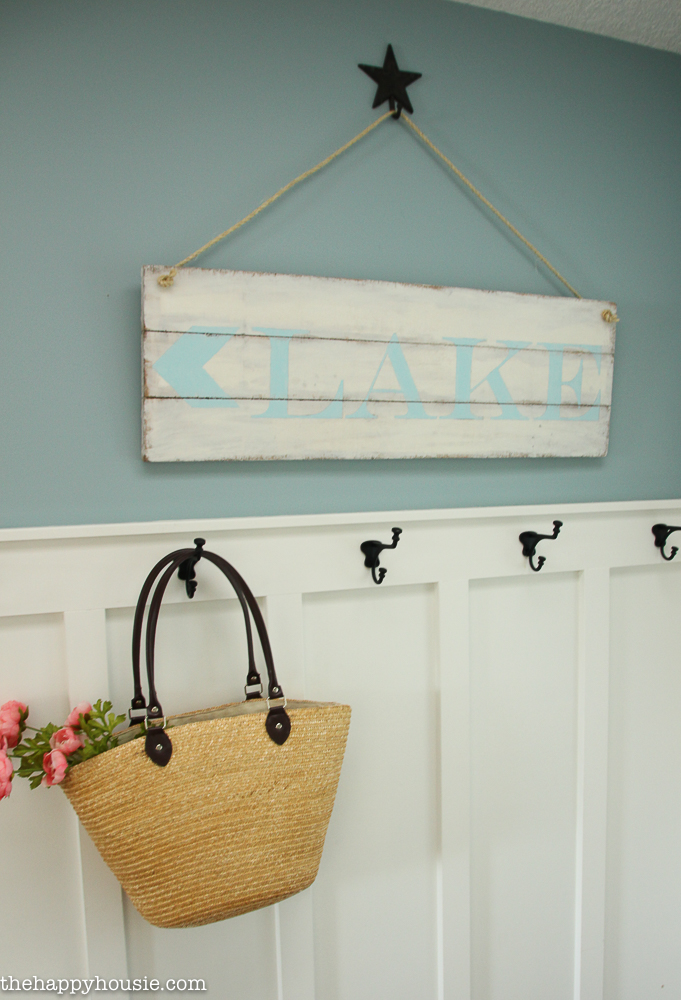
This simple DIY lake sign from The Happy Housie blog is elegant yet rustic. When Krista, the blog’s creator, noticed that most lake signs featured arrows pointing towards the road rather than the lake, she created a sign. While Krista makes her piece from faux wood, you can use either real or faux wood for yours. 

Supplies: 

  • Foam tools (foam sheet, smooth finish, foam knife, and tuck & scribe tools)
  • FloraCraft Styro Cutter Plus 
  • Putty knife 
  • High grit sandpaper 
  • Wood stain wipes 
  • Acrylic paint craft in two colors (blogger used Martha Stewart “Summer Linen” and “Summer Haze” 
  • Ruler
  • Printed lettering and arrow 
  • Carbon tracing paper 
  • Twine 

Instructions: Apply 2-3 coats Make It: Fun Crafts® Smooth Finish with a putty knife onto the foam. Allow it to dry and sand lightly with sandpaper. Measure 4” strips of foam and mark at intervals using a ruler to mimic a wood plank look. Use the “tuck and scribe” tool to smooth it out. Apply wood stain around the outside edges and faux plank edges. After it dries, apply a coat of white paint. Then, line up lettering, trace it, and fill in the lettering using the other paint shade. Hang with a rope. 

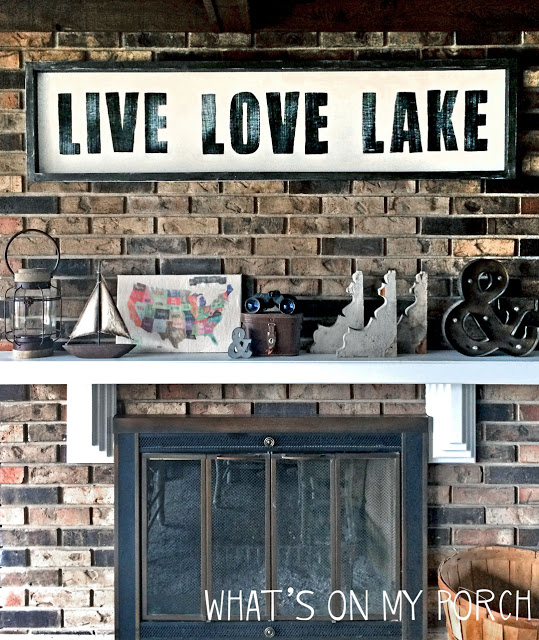
Live Love Lake Sign

You’ve probably seen plenty of ‘live, laugh, love” wall art (or even own some), but this one from My Porch Prints is more fun and a lake-specific version. If you’re looking for a simple, vintage sign that isn’t excessively colorful, this is the project for you. 

Supplies: 

  • 1×1 wooden boards (for the frame)
  • Flat pieces of wood for the sign
  • Screws, nails, or nail gun 
  • Picture hanging hardware 
  • Paint stain for the frame 
  • Acrylic craft paint for the words 
  • White latex paint for the background 
  • Paintbrushes 
  • Willow charcoal or pencil 

Instructions: Assemble the wooden frame by cutting and nailing the side pieces together. Cut the flat wood panel, but do not nail it to the frame quite yet. First, stain the frame by lightly brushing the stain across the wood. Then, use white latex paint for the panel. Using Microsoft Word or other software, print out the words “Live, Laugh, Lake” and use it as a stencil on the panel. Trace the words using a pencil or charcoal. Finally, paint the words in black using a dry brush technique. Attach the panel to the frame, and hang on your wall. 

Which DIY lake sign are you going to choose for your next project?

From Colors to Crafts: Using DIY Nautical Decor in Your Lake Home

Photo courtesy of Down East Magazine.

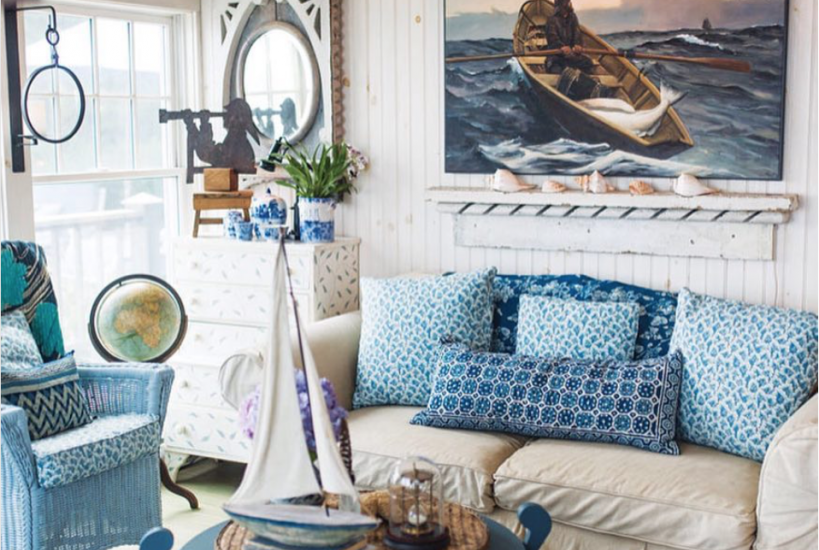
For lake homes and beach houses, decor in nautical themes is a classic look. A blue and white color scheme with boating motifs evokes a relaxed, cheerful feel. However, this style can sometimes go awry. Too often, lake homeowners go overboard– pun intended– with sailing-related paraphernalia. The result is more junky than sophisticated. When designing a nautical room for your lake house, it’s important to remember that a little boat-inspired charm goes a long way. Thankfully, achieving this whimsical, yet polished balance does not have to be complicated. There are plenty of DIY nautical decor projects that you can begin right now, in quarantine, to revamp your room in time for summer. Check out some of our tips below!

Painting Your Walls

Photo courtesy of Maine House Interiors.

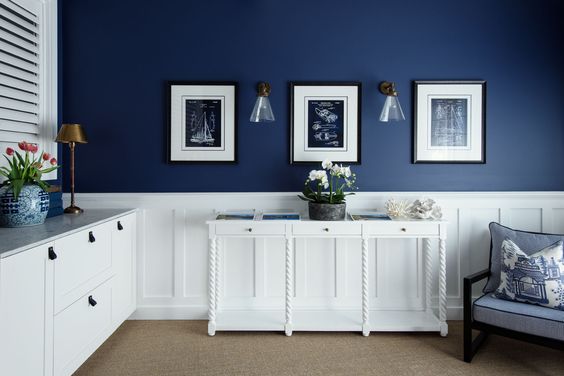
Painting — or repainting– your walls is a basic, yet often overlooked tip for designing your nautical room. Although we associate shades like blue, white, red, and yellow with boating, combining these bold colors on one wall may look chaotic. Kate Diaz, interior designer and owner of home DIY website SwankyDen.com, comments, “Stick to a simple color palette for a classic look. For a more modern look, use bolder, darker shades of blue to offset bright whites. Doing so will create a stunning contrast while maintaining an elegant appeal.” Katie Mills, a writer for Poshh Living Magazine, agrees, adding, “About 80%-90% of the space should be neutral.” Besides blue and white, you can opt for wood tones to lean into a more rustic vibe. As for those bright yellows and reds that we associate with nautical flags– they work best in smaller doses. While an entirely red accent wall could be overwhelming, painting a single chair in red can add a fun pop of color.

Picking Nautical Items

Photo courtesy of Pinterest.

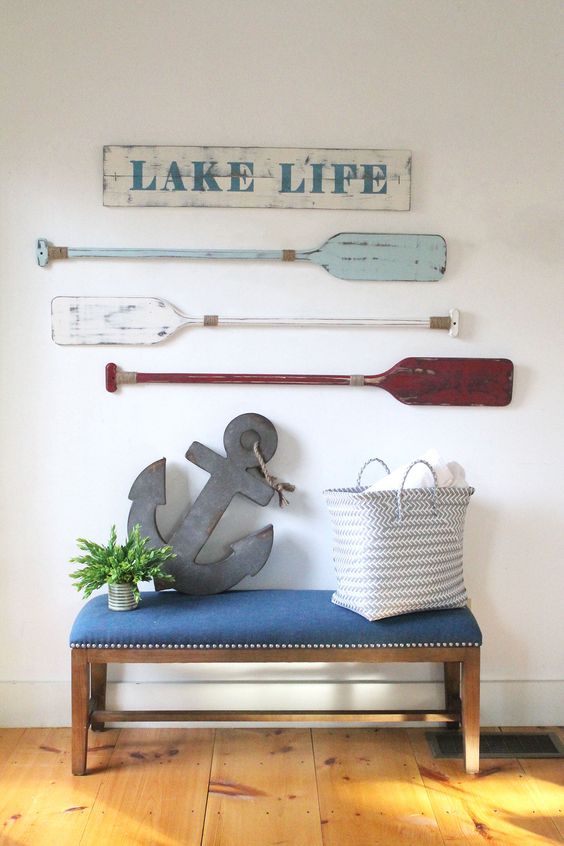
Finding nautical accent pieces is easier than you think. Often, the best sailing-inspired items are miscellaneous objects found both indoors and outdoors. Katie Mills advises, “Try finding genuine nautical items to use as decor. Oars are the obvious choice and are easy to paint and repaint.” If you have old canoe paddles, try painting a few and hanging them on your wall. While you’re at the boat dock, grab a few twists of rope or nets. Using these nautical objects, you can create plenty of designs. Kate Diaz suggests wrapping natural colored ropes around plant pots or using burlap to create a nautical footstool with glue and a stapler. You may also find nautical objects in other rooms of the house. For instance, if you have a round mirror in the foyer, try moving it to the nautical room, as the circular shape will resemble a ship’s porthole.

Choosing Crafty Projects

Photo courtesy of Tori Grant Designs.

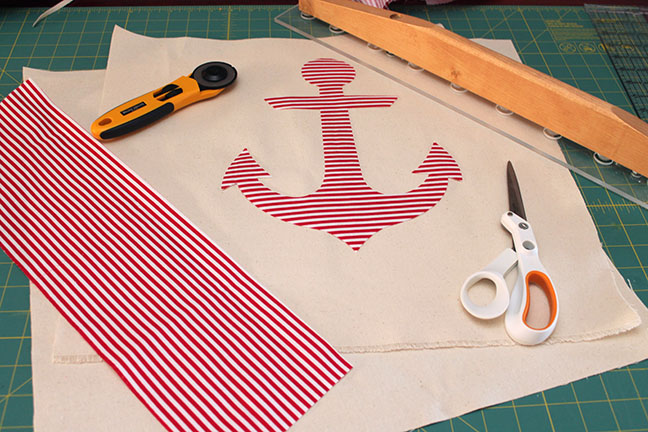
In addition to repurposing boating items as decor, you can also get crafty with everyday materials. Everything from glass bottles to pieces of wood has creative potential. If you have sewing equipment, you can create nautical pillows. With old wine and sauce bottles around the house, you can paint them, wrap twine around, and place them on a bookshelf or patio table. Using driftwood, easily found in the lake, you can make these small sailboat figures. For a more personal touch, paint a picture frame with nautical shades and feature a photo of your family on the boat. While your paints are out, consider painting a welcome sign for your house. Each of these DIY crafts will instantly add a warm, lakeside feel to your room. 

We hope these ideas help you brainstorm DIY nautical decor projects you’d like to undertake. Picking one or two projects is best. Katie Mills reminds us: “It’s fine to have the occasional ship in a bottle, decorative anchor, or painting of a ship, just keep them within reasonable limits!” So, pick the craft that interests you most and get started. You’ll be surprised at what a single DIY nautical item can add to your lake house! 

2020 Outdoor Furniture Design Trends For Your Lake Home

navy and white coastal theme - outdoor furniture decor inspiration lake house
Photo courtesy of Martha Dayton Design.

With Spring quickly approaching, revamping your lake house decor might be on your mind. Of course, warmer weather means hosting family and friends on your outdoor patio, and as such, you may be wondering if your current outdoor furniture is sufficient or if it’s time for an upgrade. If this is you, we’ve got you covered with the outdoor furniture design trends of 2020.

Leaders in the outdoor furniture industry such as Brown Jordan, Sunbrella, and Summer Classics have all shared their cutting-edge insights about these trends on their respective blogs. We’ve synthesized the top trends from these companies’ reports and are here to share with you the latest color, material, product, and design trends for the year. We hope these inspire you to get started on redecorating your outdoor area at your lake home!

Color Trend – Say Goodbye to Saturation

While bright, bold colors were in style a few years ago, the theme that’s been emerging over the past few years is color-infused neutrals. Rather than aiming to wow your guests with bright neon pillows, you’ll instead find that fabric trends are headed in a more muted direction.  These faded shades create a softer look that complements the outdoor furniture’s material, rather than overshadowing it.

neutral wicker patio farmhouse style - southern living decor inspiration
Photo courtesy of Southern Living Magazine.

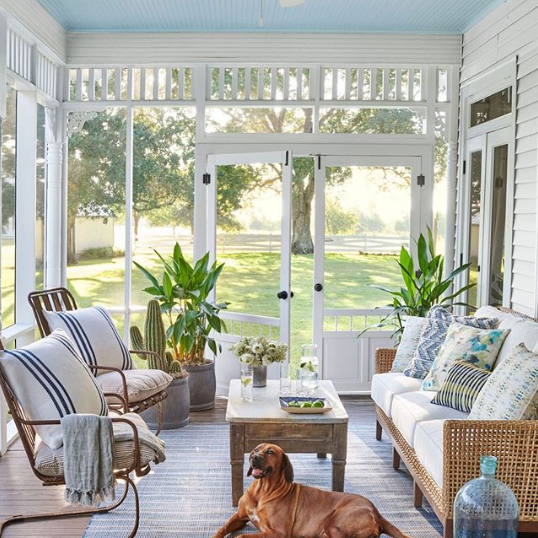
To highlight this trend, Brown Jordan named Peche (French for “Peach”)– a dusty pink color, similar to rose gold– the color of the year in 2019. This color has also featured prominently in 2020 designs. Of course, peche is not the only neutral color that’s trending this year. Blue, especially a bluish-gray color called chambray, is still a classic, can’t-go-wrong color for pillows and cushions. Further, luxury umbrella retailer Shadowspec has named dark green as another trending color in 2020. Especially at a lake house where grass and trees abound, featuring green fabrics in your outdoor designs creates a look cohesive with nature.

Material Trend – Create Texture Variety

This year, don’t be afraid to mix different materials when it comes to your outdoor furniture. Whether you’re combining a concrete dining table with wicker seats or a teak sofa with an aluminum end table, the goal is to evoke an exciting, textured look. However, it’s best to be cautious about which materials you choose to combine. To avoid a junky, haphazard situation, start by focusing on two elements and exploring different combinations.

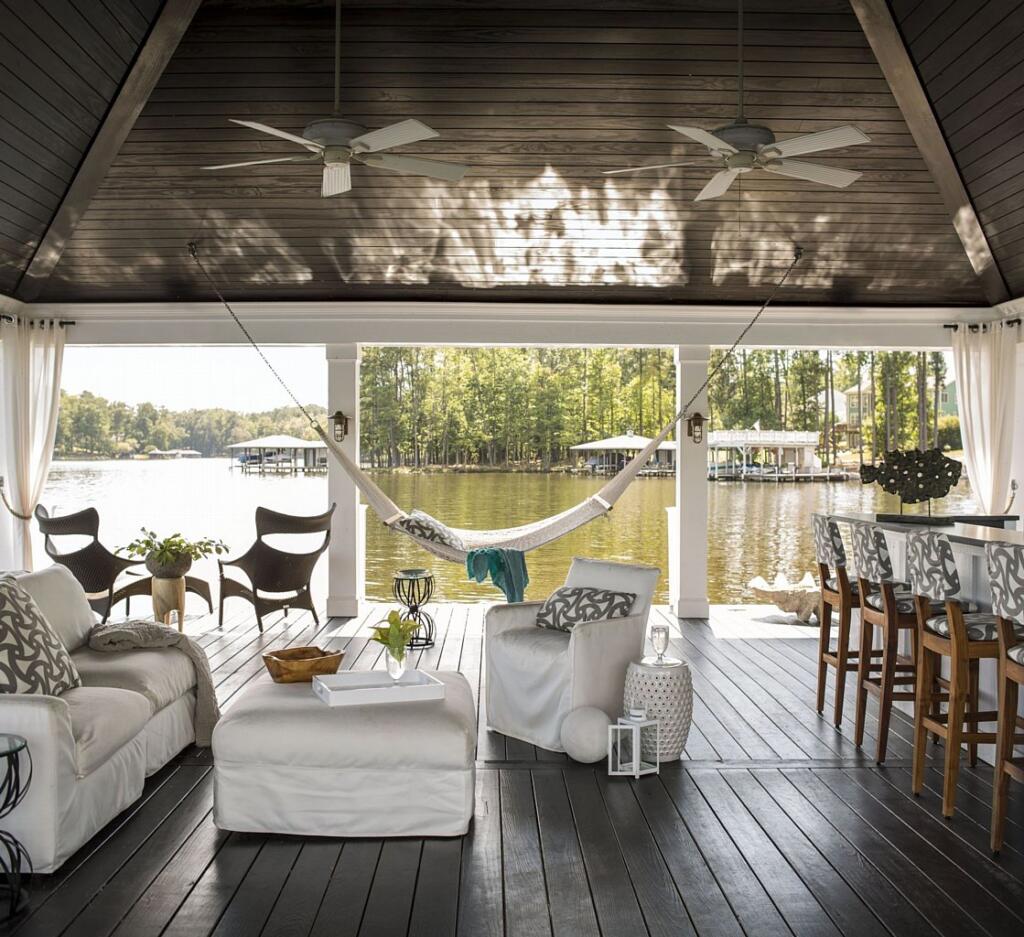
lake house boat house - outdoor furniture decor inspiration
Photo courtesy of John Bessler.

Currently, some of the most popular products in 2020 are natural materials such as wood and wicker. Lucky for lakeside dwellers, these materials fit seamlessly with the shoreline in your backyard. They also create an exciting sense of texture that already exists in nature. Another popular content to mix into your designs this year is concrete. On its own, concrete appears strictly industrial. However, when combined with contrasting materials like fabrics and wood, it takes on a more dynamic look.

Product Trend – In Keeping with Comfort

The trend of outdoor kitchens has been on the rise for the past decade, and there are no signs of this trend slowing down. As lake homeowners continue to host gatherings in their outdoor kitchens, whether it’s a small family get-together or a large party of guests, furniture manufacturers have kept up by creating large dining tables to accommodate the lifestyle of entertaining. This way, every guest can have a comfortable seat at the table.

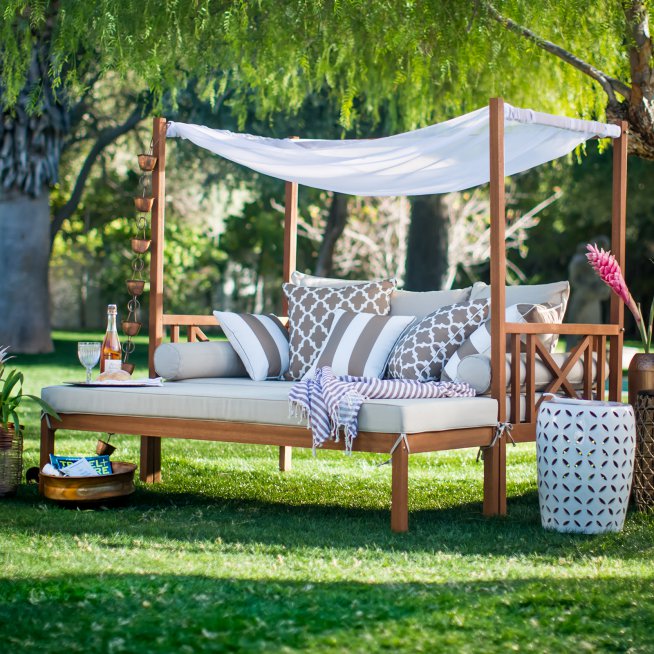
daybed hayneedle summer - outdoor furniture decor lake house
Photo courtesy of Hayneedle.

Based on this trend as well as other popular products, it’s clear that comfort is the name of the game in 2020. Luxury furniture retailer Summer Classics lists barrel chairs as a new outdoor furniture trend this year. These chairs, designed with a broad, curved back rather than a traditional box frame, are made for ultimate relaxation. If you’re looking to dive right into the comfort theme of 2020, consider investing in a daybed. Hayneedle, an online home furnishings retailer, names daybeds as one of the top outdoor furniture trends this year. What better place to relax and take a nap than on a plush daybed surrounded by your beautiful lakefront property?

Design Trend – Stick to Simple

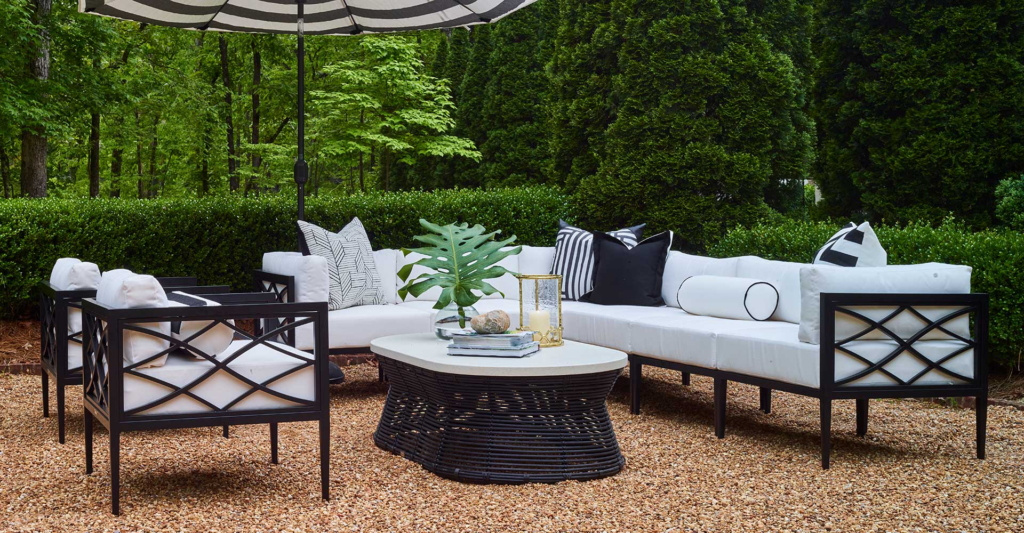
modern luxurious sofa outdoor inspiration
Photo courtesy of Summer Classics.

Quoted in the luxury lifestyle magazine Arizona Foothills, the chief brand curator for Brown Jordan notes that furniture with modern, clean lines is the trend for 2020. This simplistic style has been recently popular in interior decorating, and now, it’s making its way to outdoor designs as well. High-end retailer Summer Classics agrees, and they have incorporated this style into their 2020 collections Elegante and Claro. Both of these lines showcase unembellished elegance, underscoring the beauty of a simple, linear design. Additionally, Shadowspec names minimalism as a big outdoor furniture trend in 2020.  Especially in the outdoor space of a lake house, choosing a minimalistic style will beautifully blend with your natural surroundings rather than overshadowing them.

We hope these 2020 outdoor furniture trends give you inspiration for your lake house designs. The use of stylish color and content will add fashion to your home and your life!

Evergreen Ideas: Five Tips for Bringing the Outdoors In This Winter

Evergreen trees on lake with cloudy sky over mountains

What do the names arborvitae, white pine, fir, cedar, and cypress have in common? Depending on the region of the U.S. where you live, these are evergreen trees you might find outside the window of your lake house. At a time of year, when dreary skies are typical, these trees evoke a sense of comfort and warmth. They also can inspire holiday decorations such as wreaths and garlands that invite a sense of cheer into your home. As a general trend, lake homeowners often look for ways to bring the outdoors in.

Incorporating elements from the great outdoors into every room of your house is a great way to establish a rustic, comfortable feel. In keeping with this theme, incorporating evergreen plants into your décor is sure to bring a little extra brightness to your lake house this season. Further, according to David Ewart, director of Pavilion Broadway, “an increasing number of studies show that houseplants, flowers, and foliage improve our physical and mental environment by reducing our stress levels, encouraging relaxation and making us feel closer with nature.” So, for the sake of your tranquility, we have some tips for incorporating natural elements by bringing the outdoors into your lake house décor this Winter.

Wreaths and Garlands

A great thing about these decorations is that they can work in any area of the home. Whether you hang an evergreen wreath around your entry mirror or wrap a garland down the banister of the stairs, they are sure to liven any room. It’s also an easy DIY project. Stephanie Plymale, CEO of Portland-based Heritage School of Interior Design comments that you can “utilize leftover branches from the base of your Christmas tree or cut fresh evergreen branches from around your neighborhood. We recommend shaping your wreath around a wire base and using a natural burlap to complete the look.”

Branches

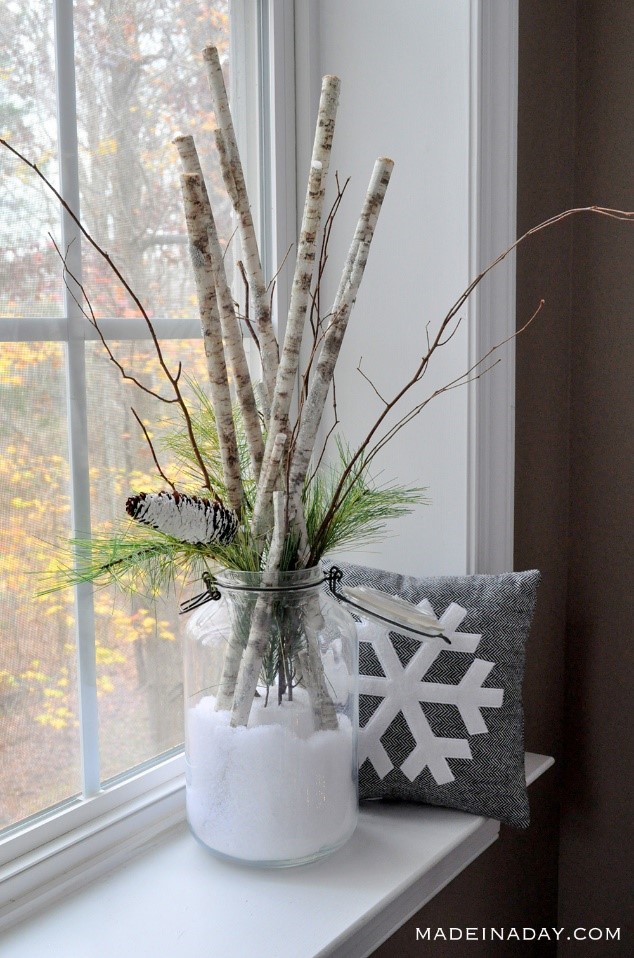
Tree branches as winter decoration
Photo courtesy of Made In a Day.

Although the vibrant, dark green color of evergreen leaves is enticing, don’t forget about the branches too. Even without the foliage aspect, branches can make great decorations by themselves. If you have small branch pieces, home décor blogger Jeneva Aaron recommends repurposing a vintage mason jar as a vase set on an end table with evergreen branches inside. “Depending on how long winter lasts in your area, you might have to swap out the branches from time to time because they’ll dry out,” she notes. “However, this is such an easy and inexpensive way to decorate your lake house during wintertime.” Kathie Emhof, a Buffalo New York-based interior designer with Transitions Home Staging Designs, also recommends incorporating branches into your look, especially driftwood and birch branches. For the latter, she recommends placing greenery behind them and tying them in a bow to dress up the house. For tips on incorporating driftwood into your décor, check out this article from our website.  

Accent Pieces

Evergreen sprigs as accent pieces in DIY vase
Photo courtesy of A Piece of Rainbow.

Not all of your winter evergreen decorations need to be large wreaths or branches. Small accent pieces can go a long way to increase a room’s vibrancy. As another way to bring the outdoors in, Plymale recommends cutting small trimmings of evergreen plants and grouping these in mason jars with sprigs of cranberries and twigs. She also suggests adding fresh evergreen swags to bookcases or mantels. “You may opt to mix in cranberries or holly for a more traditional holiday look or leave pure evergreens for understated elegance,” she offers. If you need an accent piece for a coffee table or end table, you can place small pieces of evergreen plants on table trays. Emhof adds, “on my coffee table I have a wooden tray with ornaments and use evergreens as a filler. It looks pretty and festive.”

Flowers

Dried hydrangeas on mantle christmas decor
Photo courtesy of House and Garden.

Although flowers may be the last word that we’d associate with the middle of Winter, they are certainly not off-limits for your decorating this time of year. One method of incorporating flowers into your December décor is by drying them. Emhof specifically comments that “dried hydrangeas look spectacular in your house in the Wintertime, and they typically fade to a pink, purple, or golden color.” You can also include a combination of dried plants and lowlight house plants such as amaryllis or an orchid in your arrangements. The bright pop of red or purple, depending on the flower you choose, will signal to your guests that Spring is just around the corner.

Scents

Christmas stove potpourri
Photo courtesy of A Pretty Life in the Suburbs.

Immediately after hanging up a freshly cut garland, that comforting smell will waft through your house. To enhance this homey scent that is a hallmark of the holiday season, Plymale advises making a simmering potpourri. She instructs, “In a large pot of water, simmer evergreen clippings, fresh orange peel, cloves, and cinnamon sticks for a DIY holiday diffuser.” There’s also nothing wrong with choosing a holiday candle to mimic this warm Winter scent. Whichever you choose, you’ll be bringing the outdoors in by appealing to more than one of the five senses.

We hope these tips help inspire your green thumb, even in the middle of December!

Turn Your Lake Home Into a Haunted House With Halloween Decorations

The temperature is dropping, the leaves are changing and the smell of Fall is in the air. With Fall, comes one of the most exciting times of the year: Halloween!

Trick or treating, scary costumes and apple-bobbing aren’t the only things to look forward to.

Decorate for Halloween

Halloween decorations are just as fun!

haunted lake house

If you’re looking for some advice on spooking up your lake house a bit, look no further, we have some great ideas for you!

Of course, there are the classic Halloween decorations like cobwebs and fake spiders.

Adding these too your house and dock (which may already have cobwebs on it) is a surefire way to spook up an area.

Always use jack-o-lanterns, as these are super fun to make and are great decorations. Place them on your front or back porch and dock for all to see and fear!

Scarecrows are also a frightful sight, especially this time of the year! Stick a scarecrow in your yard, and it will be sure to turn some heads!

Other Spooky Ideas

Some other spooky ideas include:

Bone Door Knocker – What better way to spook your neighborhood ghouls and goblins by having a super scary door knocker? For this decorative setup, you’ll need some fake bones and a door to place them on. Knock Knock! Trick or treat!?

Witch’s Cauldron – A great idea is having a witch’s cauldron in your front yard! Buy a large plastic black cauldron, set up three long sticks to suspend it from, add water and dry ice and you’ve got yourself one spooky decoration!

Or, if you would like to impress the neighbors across the pond, use this same setup on the lakeside of your home, and add a couple of spotlights to highlight your setup!

Gothic Wreath – Make a black wreath with sticks jutting out every which way, and place a fake crow in the mix to add a spooky atmosphere to your door.

Spooky Face in the Mirror – Remove most of the paint from a mirror and stick an old portrait photo behind it. Paint the mirror frame black, and you have yourself one spooky mirror!

Graveyard Tombstones – Use cardboard and spray paint to create ghostly tombstones and stick them in your front yard, or near your dock, and put them on display with spotlights!

Window Silhouettes – Use cardboard and a sharpie to outline the shape of a ghoulish character from one of your favorite horror movies! Cut it out, stand the silhouette in your window and let the shrieks begin!

Zombie Hands in Ground – This one is a classic and surely freaks everybody out. Buy a few fake severed hands, and bury them halfway so that they stick out of the ground. These can be purchased at any Halloween store.

They can also be placed on your dock, as if the zombies are coming out of the water. Nothing is scarier on the lake than water ghouls!

But, your main focus on Halloween should always be to just have fun with it!