

It’s no secret that home renovating is costly. According to Home Advisor, remodeling an average 2,500 square foot home costs anywhere between $15,000 and $200,000. For lake houses, there are additional considerations like flood preparations. Between material costs and contractor fees, one fact is certain — it’s easy to break the bank. But savvy lake homeowners know the insider tips and tricks to keep costs low. Whether you’re renovating to increase property value or to improve your aesthetic, we’ve got advice on saving money and simplifying the process.
For Deals, Timing is Everything
Marble backsplash tiles purchased from Floor & Decor.
Home renovating should not be an impulsive task, especially when buying large materials like flooring. “For big orders, you want to plan ahead,” says Bill Samuel, a Chicago-based real estate developer. From seven years of experience flipping homes, he’s an expert in finding the best possible materials at low prices. “Know when stores like Menards and Home Depot are running specials and buy within that window.” Besides staying vigilant about sales, he also advises buying discounted gift cards online.
For the best department store sales, a holiday weekend is a good bet. This strategy helped Ashley Buchanan, senior project manager at Obviously and Birmingham-based homeowner who recently renovated her house. By capitalizing on Memorial Day Weekend sales, she never paid full price for any of her renovation materials.
Besides holidays, seasonality affects prices. Andrew, a home improvement contractor with Contractor Advisorly, says to buy just before winter. “That’s when contractors tend to have less business. During that time, they want to get as much business as possible and are willing to reduce prices for it.”
More than Lowe’s and Home Depot
Materials from Habitat for Humanity.
If your lake home is in a remote area, a Lowe’s or Home Depot might be too far. But this doesn’t mean you can’t renovate. Is there a Habitat for Humanity nearby? This nonprofit sells used materials at lower prices. If brick and mortar are out of reach, contractors and woodworkers often post leftover materials, light fixtures, and furniture at a reduced rate on Craigslist or Facebook Marketplace. While it’s a lot to sift through, it’s a goldmine if you’re lucky. Also, be on the lookout for demolition sales from buildings in your neighborhood.
Another penny-pinching tip for home renovating is to take advantage of overstock. “When contractors buy materials for a project, there will often be a lot of leftover material,” says Andrew. “Usually this material is left for the customer, but if you’re willing to negotiate, you can get reduced costs on materials in return for letting the contractor keep leftover material.” If possible, find an overstock store in your area. For instance, in Birmingham, AL, Southeastern Salvage has plenty of surplus building materials. For a second home like a lake house, overstock stores are perfect — especially if you aren’t too picky about your designs.
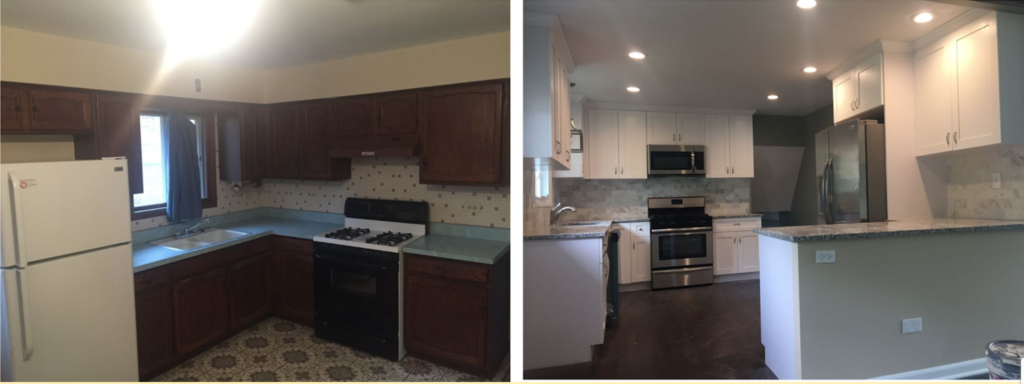
Start with the Foundation
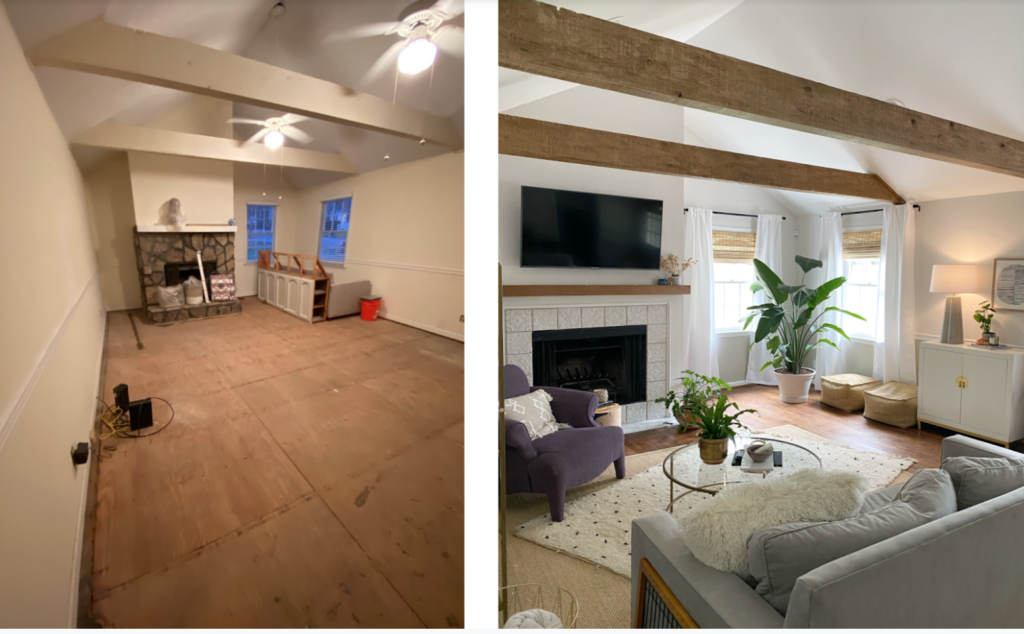
When remodeling a lake home, a complete overhaul isn’t necessary. To save money and time, focus on the most foundational components such as paint, light, and windows. The rest is just furniture, which you can always change. “The power of paint is the biggest one — it truly cannot be underestimated,” says Ashley. “Same with lighting. It’s crazy how a $40 light fixture can change the whole vibe of the space.” She also explains how her window treatment converted the living room from “clinical” to “balanced and intentional.” By adding a simple bamboo shade and tall curtains, the whole room shifted. “Now it’s my favorite room to hang out in, and it’s where everyone hangs out when they come over,” she describes. “It feels cozy, and it feels like me.”
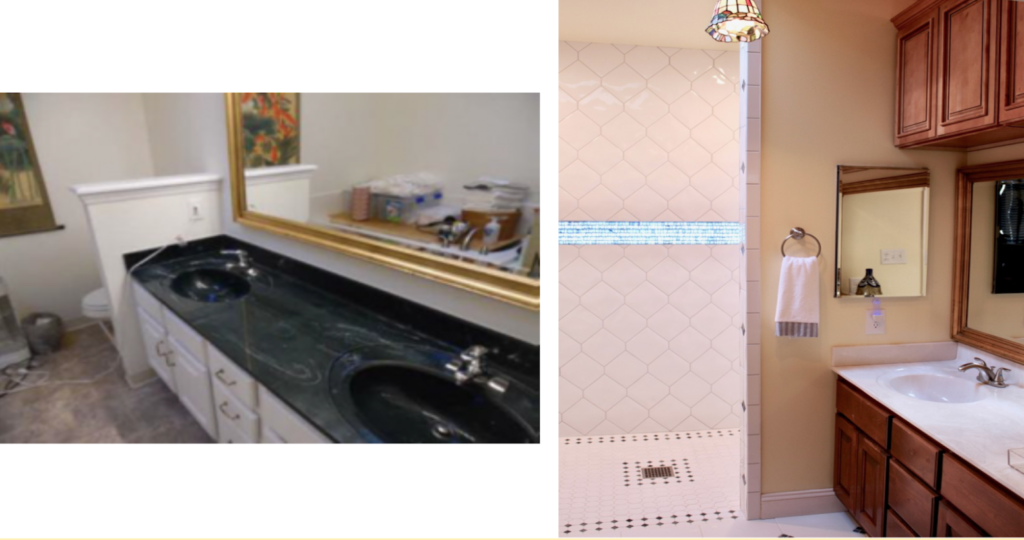
When in Doubt, DIY
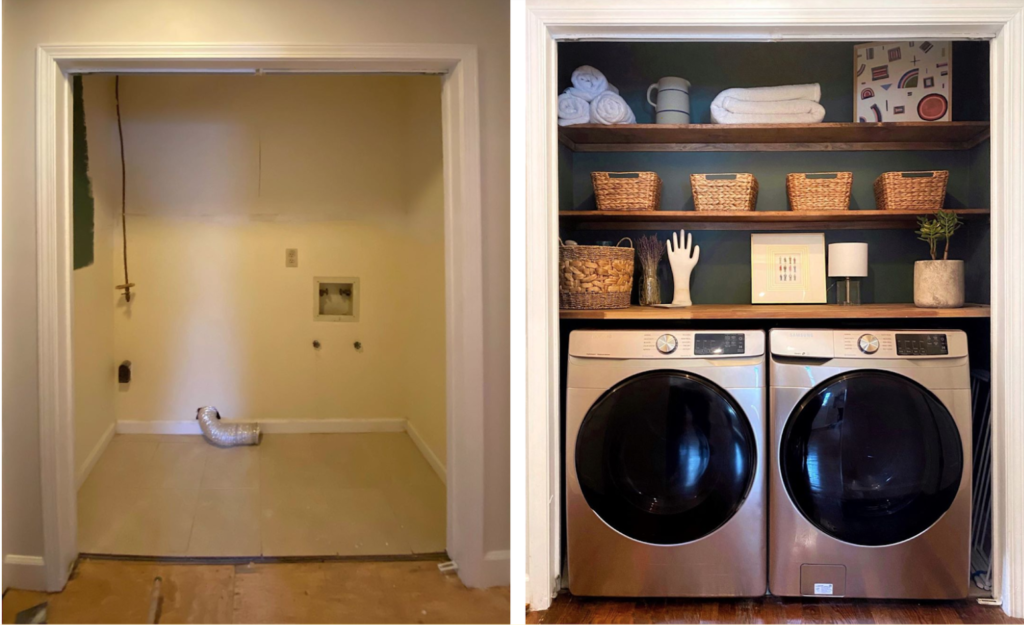
In home renovating, installation costs often surpass the cost of the materials. So, if you can endure the time, effort, and physical toll required for installing your own materials, try the DIY angle. Ashley says that installing her own bathroom tiling saved at least a few thousand dollars. With the right tools and resources, it’s certainly doable. Plus, you’ll have complete control over the renovation process.
For most DIY projects, it helps to start with existing, free resources before consulting an expert. “YouTube is great for people looking to DIY,” says Bill Samuel. He recommends House Improvement’s channel with plenty of videos for homeowners looking to fix things like tile and drywall. With enough DIY experience, you’ll be just like Ron Swanson in this scene from Parks and Recreation.
For more remodeling tips, check our previous blog posts on upgrades that can backfire, outdoor renovations, and the basics of flipping a lake home. Now let’s get to renovating!