Building and Maintaining a Seawall on the Lake

grand beautiful lake house building and maintaining a seawall on the lake

Seawalls protect the land from erosion by a body of water. If you have seen a seawall on the beach, just know that seawalls on the lake serve the same purpose. Just on a much, much smaller scale! A seawall is usually made of wood, stone, steel or concrete.

In recent years, synthetic materials have become more popular. These structures serve three distinct purposes on the lake.

First of all, they protect property from erosion, flooding or poor drainage. Secondly, a seawall helps maintain water depth. This is especially important if you enjoy boating, fishing, or other similar activities on your piece of the lake. Finally, seawalls can give your property an attractive, finished look. Especially if your property is on a slope, it can make your property much more attractive.

If you own a home on the waterfront, you may be responsible for a seawall. Don’t let this intimidate you! Seawalls typically require very little upkeep. Periodic visual inspection and minor repairs should make up the majority of your “chores.”

You may want to build a seawall on your property. If so, check your local regulations. Most lakes have requirements for any shore construction. For example, the Tennessee Valley Authority requires that you submit an application for any shore stabilization project.

Knowing regulations beforehand will help you avoid wasting money on a project you can’t finish. It can also give you guidelines on the most effective ways to construct your seawall.

Repairs and Maintenance

Inspect your seawall regularly in order to spot any problems before major issues arise.

If your seawall is new, be vigilant and make note of any sinkholes or cracks. Other defects may occur due to age.

Maintenance and repair techniques will differ depending on the materials used.

If you don’t know the local guidelines on maintaining a seawall, ask your neighbors. Most lake communities have resources available to help homeowners maintain their piece of the shoreline.

Don’t hesitate to ask for help!

Seawall Materials

Seawalls can be built from very different materials.

  • Concrete: This is typical for many different seawalls. It will last around 30 years, if built properly. Simply patch any small holes or cracks in the concrete so that they don’t spread. If you find too much damage to repair on your own, call a professional.
  • Steel: Steel sheet piling is common for both seawalls and bulkheads. The material provides a amazing strength and will last around 25 years. It should be treated properly to ensure that it lasts through being subjected to water.
  • Wood: You will see wooden seawalls in more rural and residential areas. Just like steel, it should be treated properly in order to last.
  • Riprap: Many homeowners prefer riprap for its more natural look. Riprap is a barrier of very large stones along the waterline. The stone can be granite, limestone, concrete or other materials. Repair is very basic, and typically consists of replacing any broken or scattered riprap.
  • Vinyl or Plastic: This is a newer, more economical product. It offers about 50 years of life and comes in many different colors. On the downside, synthetic materials can be difficult to install. If you choose to install this type of seawall, hire a professional.

Stopping Erosion

Erosion happens to all land. Of course, this is especially true for those properties located by the water.

Rain, wind and the elements can eat away at any property over time. This can cause complications to any home on the shore.

Planting extra grass or vegetation can give your soil extra protection. Incidental erosion just beyond the seawall can happen, as well, so keep an eye out for water pooling behind it.

For more natural seawall materials, such as riprap, encourage natural vegetation. Plant growth will actually give your seawall stability, and help it blend in to the rest of your property.

After any major storm or flood, give your seawall a visual inspection to make sure it didn’t sustain any damage.

With just a little attention, this unassuming structure can protect you and your lake home for decades to come.

For more tips on improving your home, read more articles here.

Spring Cleaning at Your Lake Home

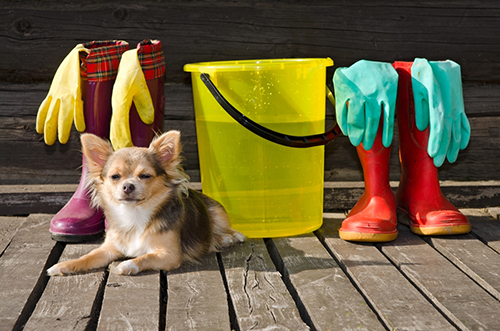
small dog on porch sitting with cleaning suppliesAs the weather warms up, homeowners everywhere are throwing open the front doors, opening the windows, and pulling on the gloves for a little spring cleaning.
Here are some tips to help you tackle that task!

Kitchens and Bathrooms

Before vacuuming, replace your vacuum cleaner bag.

Clean the dust cup, and replace or wash the filters if you can.

Snip any threads or hair snarled in the roller brush with scissors or a seam ripper.

Clean out the fridge! Spring is the perfect time to get rid of any forgotten leftovers.

Check the expiration dates on any sauces or frozen goods, as well.

For a more thorough clean, remove all the food items and wipe down all the surfaces in the fridge with a cleaning solution.

Spills, crumbs and stains will all linger indefinitely if you don’t get them out.

You can also load up the dishwasher to handle things other than dishes – light fixture globes, plastic toys, toothbrush holders, soap dishes, oven control knobs and more.

Just use the gentle cycle – and skip the heated drying!

Here’s a tip to clean the gunk out of your microwave:

Put a large, microwave-safe bowl with one cup of water and a chopped-up lemon, lime, or orange, or several tablespoons of vinegar inside.

Run it on high for several minutes, or until the mixture boils. Then let it sit for 15 minutes before wiping down all interior surfaces with a sponge.

Dust, wash and scrub

If your drapes are looking drab and dusty, remove the hooks and run them through the air fluff cycle in your dryer along with a wet hand towel for 15 minutes. This draws off the dust.

Hang them up immediately. For heavier curtains, vacuuming them with the wand from your vacuum cleaner can also work.

Banish the dust bunnies clinging to your ceiling fan blades by wiping the blades down with a coat of furniture polish.

Wipe off the excess and lightly buff them dry.

Canvas grocery bags are great alternatives to plastic, but they need cleaning like any other fabric. Run them through the washing machine to remove any lingering food bacteria.

Make sure you pay attention to the material if and when you put them in the dryer – many reusable grocery bags are a plastic composite, and could melt under high heat!

Change out your HVAC filters. Vacation homes or single occupant homes should have their air filters changed once a year.

If you live there, it should be changed every 90 days, and every 60 days if you have a pet. Your sinuses will thank you!

Spring is the perfect time to steam clean your rugs and carpets.

If a steam cleaner is unavailable, chances are your grocery store has a range of carpet cleaners. These will take care of those lingering cranberry sauce stains from last Thanksgiving.

Count it all up!

If your lake home is a vacation home, and you’ve had guests, this is the perfect time to make sure you are well stocked for the warmer months.

Inventory and wash your towels, bedsheets and other linens. Check to make sure your bathrooms are well-stocked with toiletries and other necessary items, as well.

Round up all your cookware, drinkware and silverware. Many guests leave these items behind until your cabinets are overflowing!

Contact the owners of any extras, if you know who they are. If not, you can always donate that fourth casserole dish or fifth corkscrew to the local thrift store.

Cleaning Outdoors

Wash your windows on a cloudy day. Direct sunlight can dry the cleaner before you wipe it off, leaving streaks.

Clean your barbecue grill to get ready for the cooking season.

Give the grill itself a good scrubbing with a cleaning brush and grill cleaner. If the undersides are greasy, make sure to wipe them off with a wet, soapy sponge first!

For gas grills, scrub and clean out the burners, making sure to unclog any ports. Be sure to scrub the walls of the cook box, as well.

If you have access to a pressure washer, spring is an excellent time to give any cement, stone or brick walkways a thorough cleaning.

Your exterior will not only look brighter, it will be safer and less slippery when the kids are scampering up from their dip in the lake.

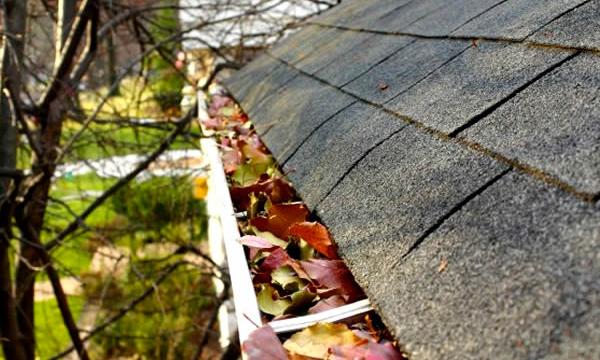
Maintaining clean gutters is crucial to your home’s exterior. Clogged gutters are not only an eyesore, they can cause the fascia board underneath to rot.

Hardware stores now carry a wide selection of gutter cleaning tools to make this process much easier than it was in years past!

Many have telescoping poles that hook up to your water hose and spray down into the gutter, so you never have to leave the safety of the stable ground.

Spring cleaning is also a great time to replace any welcome mats that look worn out. These are the first thing many people see when they arrive at your home, especially if you rent it out.

If you winterized your home by turning the water off, carefully check your water pipes for leaks upon turning it back on. Remember to let your water heater fill completely before turning on the heat. Run all faucets and flush all toilets several times.

Check the Outdoor Equipment

Dig out and test any water equipment (kayaks, life preservers, inflatable rafts) for mold or leaks well before you plan to use them!

Pull them out of storage and make sure they are in good working order. Wipe them down with an appropriate cleaner, if need be.

Setting them out in the sun for a day will also help rid them of any musty smells.

If there are trees on your property, check to see that there aren’t any broken or damaged limbs hanging down.

Contact a professional to have them removed, if necessary.

When all is said and done, pull up a chair, and enjoy a well-deserved drink. You earned it!


And while you’re at it, take a look at these “7 DIY Natural Cleaning Solutions for Your Home”


Repairing a Hole in Drywall

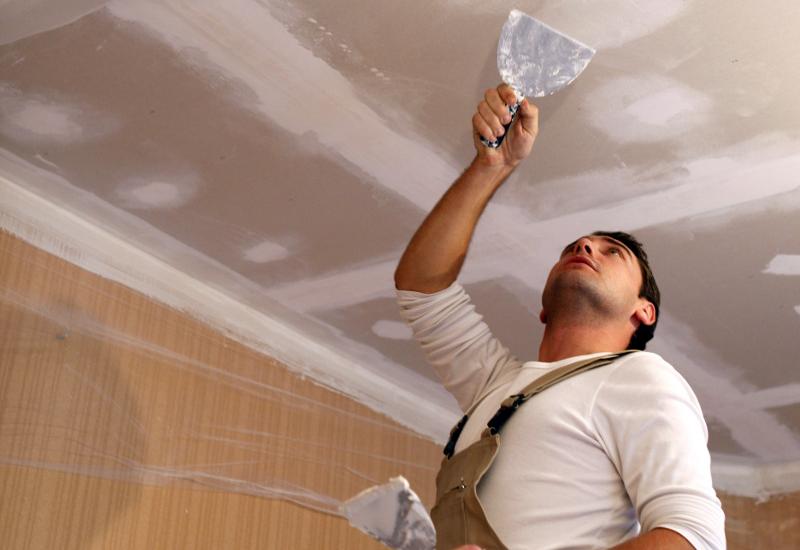
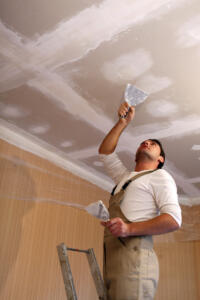
man repairing drywall on ceiling

Holes in drywall can be repaired fairly easily, with a minimal amount of equipment and work. Most homeowners can accomplish this with just a few tools.

Drywall is also referred to as plasterboard, wallboard or sheetrock.

Follow these steps in order to repair and conceal drywall holes of all different sizes.

Repairing a Large Hole: 4 to 6 Inches

You can get ready-made patches for drywall. These are available in different home supply centers and hardware stores.

Most offer a “peel-and-stick” type and most patches also have metal backing for additional strength.

If the hole was caused by door knob or other high-speed object, a patch can certainly hide it. However, it may not be strong enough to hold up if there is another impact. If that is the case, then you will need to get a new piece of drywall.

To install a drywall patch, follow these steps.

  1. First, clean the edges around the hole. Trim away any loose or frayed pieces using a utility knife.
  2. Shape or cut the patch carefully in order to fit your hole. Be sure to leave a border of extra backing around the patch in order to attach it to the wall that surrounds the hole.
  3. Clean and then dry the hole, to allow for maximum adhesion. If there are any greasy areas, you can clean them with some tri-sodium phosphate, found in the paint section of a hardware store. You can also just use soapy, warm water. Get the drywall damp enough to clean, but not soaking wet.
  4. Apply the patch to the wall, and smooth out the taped edges with a putty knife.
  5. Use a wide blade putty tool in order to spread a very thin layer of compound over the area.
  6. After it is dry, gently sand the patch to blend it into the wall and repaint.

Repairing Medium-sized Holes: 2 to 4 inches

If the hole is small, you may not need to use a patch. Instead, you can just use some joint compound, also found at a hardware store.

To apply:

  1. Clean up the area using a utility knife, and then trim away or press back any loose bits that are hanging down.
  2. Wet the repair area using a spray bottle. This will help the compound stick to the wall. This step can be skipped if you are using a non-water-based compound.
  3. Once your wall is clean and just a bit damp, apply a good amount of the compound onto a putty knife. Using a wider putty knife will produce a smoother result. Fill the hole and make sure there aren’t any gaps. It’s fine it it sticks out a little – that’s what the next step is for.
  4. Smooth out the compound using a putty knife. Hold the blade at roughly a 30 degree angle from the drywall, and pull it towards you in just one steady motion.
  5. Sand gently afterward, and repaint the section of wall if necessary.

Repairing Small Holes: Less than 2 inches

Smaller holes are very easy to repair, and can be unnoticeable if done correctly. You can use either non-shrink drywall compound or spackle.

  1. Clean up the area that needs to be repaired. Trim away the edges.
  2. Wet the area very lightly.
  3. Using a liberal quantity of the compound or spackle and a putty knife, cover the small hole and fill it in.
  4. Ensure that you smooth out the edges to blend it to the wall.
  5. Sand it down and paint over as needed.


Home Gutter Maintenance

Cleaning rain gutters is not normally at the top of a homeowner’s to do list, but it should be.

Gutters clogged with leaves and other debris can overfill and crack. When damage like this is sustained, rain water spills in undesirable places causing unforeseen damage.

A single leak in the gutters can result in foundation cracking, mold and mildew growth, flooding in basements and crawl spaces, soil erosion under a home’s foundation and more.

Structural damage to homes can be costly to fix; while, mold and mildew can even increase the risk of respiratory illnesses and home deterioration.

Properly maintained gutters and downspouts are an important part of household maintenance that help to prevent costly renovations.

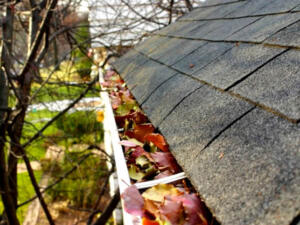
gutters

Install Some Downspout Extensions and Schedule Regular Maintenance

The first step in protecting your home from water damage is to schedule regular maintenance on gutters, downspouts and extensions.

At least twice a year, all areas need to be checked for clogs, leaks, holes, rust and any fungal growth. Any of the aforementioned issues in your gutter system need to be fixed as soon as they are discovered.

If your home does not already have them, installing downspout extensions will allow you to redirect rain water away from your home, landscaping and areas prone to erosion.

Water can be redirected up to 50 feet away from your property.

Think About Installing Gutter Guards

One way to cut down on clogs inside your gutters is to install gutter guards. These guards can be mesh, grated metal or thin metal sheets.

Installed over the open tops of the gutters, they keep leaves and other debris from clogging up the drainage system.

If you install gutter guards be sure they are easy to remove for occasional, but necessary, cleaning.

Seal All Leaks Using Gutter Seal

If a portion of the gutter is leaking, it is not necessary to replace the entire system. There are products available to seal such leaks and help to avoid potentially expensive repairs.

Products used for this purpose can be found at most hardware stores.

Take note that it will be necessary to completely clean the gutter system and allow it to dry prior to applying the product. Most include strips of plastic and adhesive to repair torn areas.

Inspect and Re-position the Splash Blocks Frequently

Splash blocks are plastic, ceramic or concrete ramps that are seen in many yards under the downspouts.

Occasionally these are pushed out of position by the water coming down from the gutters. When this happens, rain water could potentially flow under the foundation and into crawl spaces of your home.

Heavier splash guards are more stable. Decorative blocks are also available for homes. Click here to search your favorite on Amazon.

Gutter Cleaning Reminders

Always remember to keep on top of your gutter maintenance to protect your home from damage by setting quarterly reminders.

If you do not have the capability to do the maintenance yourself, there are professionals that you can hire to do the maintenance for you.

5 Easy Home Maintenance Tips for Fall

Many people assume that major preparations are needed for winter, and every other season is mild enough that your house can wait until temperatures drop. However, if you want to keep your workload down and prevent expensive repairs or damage, here are some things that should be on your home maintenance checklist this fall.

Lake home on the water during autumn | Lake Homes Realty

Image courtesy of Cindy Etta via Pinterest.

Gutter Snipe

Fall is obviously synonymous with leaves falling, raking, leaf blowing and general yard upkeep.

While you’re focusing on your yard, the first thing on your fall home maintenance checklist should be to look up at your house and ensure that your gutters and downspouts are cleared of leaves, debris and any blockages.

If you leave the leaves in the gutters until it starts to snow, your gutters won’t be able to do their job.

Do yourself a favor, grab a ladder and some gloves, and clear the detritus from the gutters and downspouts.

Leaf It

Fallen leaves in front of home during fall | Lake Homes Realty

Image courtesy of Angie’s List.

When you rake up all those leaves, and feel like you want to scream, keep in mind that those leaves serve a purpose.

If you have a garden, you can chop the leaves and spread them as mulch, providing a lot of nutrients for next year’s soil.

If you don’t have a garden, and want nothing to do with the leaves that clutter your yard, put them on the curb or take them to a community garden.

Someone could use them!

Pack It Up

As the end of the season approaches, you won’t be needing to water your lawn, and there will be several times where frost coats your lawn and car in the morning.

The next thing on your home maintenance checklist should be to turn off the water spigot, unwrap your hose, and put it away.

Also make sure you blow your sprinklers out, or call the landscapers to do it. You don’t want water in the pipes when your area has its first freeze.

Heat Things Up

Lake home living room with burning fireplace | Lake Homes Realty

Image courtesy of OneKindDesign.

Before winter truly arrives, test out your furnace, and make sure nothing is wrong with it.

Few things are worse than waiting until it’s freezing outside, only to realize that your furnace is out of order.

If you have a fireplace, make sure it’s structurally sound, and make sure nothing is inside the chimney that would prevent smoke from clearing out.

Hunker Down

In general, use autumn as preparation for winter.

If you live in an area full of wildlife, make sure your house, and outbuildings, are sealed up tight as many creatures will begin seeking refuge when temps are still tolerable.

Stock up on food if you live in a very intense climate.

Make sure your windows and doors are sealed tightly, so you can conserve energy and heat!

Sure up the Shoreline

Vermont Lake Home on Shoreline during autumn | Lake Homes Realty

Image courtesy of BucketList127.

Many lakes have seasonal draw downs, meaning the water level will be significantly lower in the cooler months.

This makes for the perfect time to work on any seawall damages that may need repairs.

Many times this is best left to a professional, and since this is the optimal time to make repairs be sure to book their services ASAP.

While this list is far from exhaustive, it should serve as a good reminder to never leave your house unsupervised until winter.

By the time you realize there is a problem, it will be too late, and all the service pros will be booked until the beginning of spring!

Save yourself time and money now, and get ready for fall and winter the right way.

Long Term Pool Maintenance: What You Should Expect

Child in pool

Having an in ground pool can be something really fun for you and your family. You can have loads of summer outings and fun events at your home when you have one.

It can add almost 10% to your home’s value if you ever decide to sell. It is important to keep your pool clean and well-maintained.

However, a lot of people do not know proper in ground pool maintenance. Adding a task here and there to your list of chores is not going to do anything but make your pool easier to maintain in the future.

Check levels of chlorine

Checking your pools chlorine and pH levels twice a week will help keep your pool save to swim in.

Most experts recommend that the pH range stay at 7.6 and the level of chlorine stay at about 1.0-3.0 parts per million. When you do check these levels, make sure you do this at dusk and several hours after someone has been swimming in the pool.

Cleaning

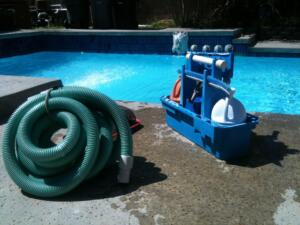
Pool cleaningYou should clean your swimming pool at least once a week to ensure cleanliness every time a swimmer enters the pool. The skimmer baskets must be emptied and any leaves, grass, or other debris also needs to be removed.

Make sure you put surface cleaner in your pool to keep waterline stains from forming; it will keep your in ground pool looking as good as new.

Filtration System

You definitely need to run your filtration as often as you can, but only during the months over the summer. This will rid your pool of dust, pollutants, dirt, and bacteria which nobody wants inside of their pool.

Off season maintenance

There are some things that you may need to do during your off-season to keep your pool in excellent condition. Make sure you clean your pool and check all of the settings before you close it for the fall and winter.

Check all of your levels beforehand so you know everything is where it should be. Make sure all items are out of the pool such as ladders, slides, or diving boards.

You must drain all of the water from the pool pump and then cover your pool with a heavy cover in order to keep the elements out of the pool. Check your pool cover once every couple of weeks to make sure there are no holes or tears.

It is crucial that you keep your pool in excellent condition no matter what the season is. Some of these tasks may be inconvenient, but the luxury of having a pool definitely outweighs all of that.

If you need to, you can hire an individual or a company to take care of your pool maintenance needs. This will eliminate one of your biggest chores of the summer. The cleaner it is, the more fun you will have in the long run.

Tips for Maintaining Your Lake Home in The Off Season

It’s getting to be that time of year when the days are shorter and the shadows are longer. That means it’s time to start planning to seal up and begin maintaining your lake home for the offseason.

This is one of those cases where effort spent in the late summer and early fall will save time and money as the season changes and the temperatures start to drop.

If you’d like making the house maintenance during the off-season a little bit easier, we have several tips that can really simplify maintaining your lakefront home in the winter months:

Continue reading “Tips for Maintaining Your Lake Home in The Off Season”

Easy and Inexpensive DIY Options to Refresh and Rejuvenate A Room

Nothing will boost your spirits or improve the look of your home quite like a new decorating project will. Many people have the notion that decorating has to be an extensive project in order to make a difference. The truth is that there are plenty of easy, do-it-yourself techniques you can use to liven up any room of your home.

Here are five inexpensive DIY options to use the next time you need a pick-me-up for a room but don’t want to spend a great deal of time or money on home improvements: Continue reading “Easy and Inexpensive DIY Options to Refresh and Rejuvenate A Room”