DIY Coasters

Estimated reading time: 4 minutes

When it comes to DIY projects, homemade coasters are one of the most simple, fun endeavors to take on! They’re excellent for beginners, appropriate crafts for kids, and they leave plenty of room for creativity. Functionally, coasters are also important to have at the lake house — especially if you’re often hosting guests for dinner parties or game day events. You can protect your furniture from spillage and stains from hot or cold drinks while showing off your style and creativity. Check out these fresh ideas for DIY coasters from several different bloggers!

Sharpie Coasters

Photo courtesy of Jessica Welling Interiors

Who would have thought Sharpie markers created these beautiful, abstract designs? To get started, all you need is a few Sharpie colors of your choice,  isopropyl alcohol, and peel-and-stick black felt. First, color the tile to your heart’s desire with whatever mix of colors you choose. If you follow these instructions from One Little Project, the alcohol will create abstract swirls in your design, while the top coat seals it in. Other methods such as Jessica Welling Interiors involve an extra step, putting it in the oven.

Wood Slice Coasters

Photo courtesy of DIY Candy

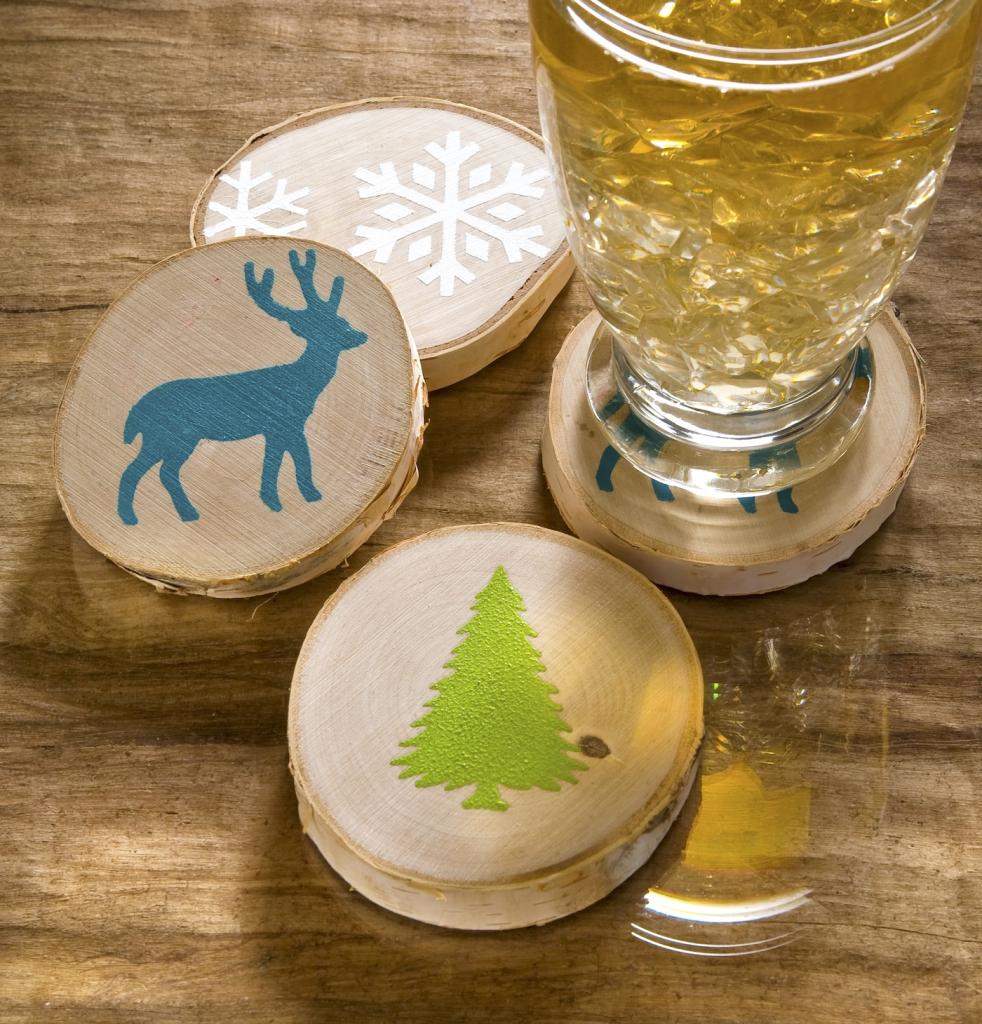
These DIY wooden coasters are perfect for any lake house since they integrate elements of nature into your decor. If you already have facets of biophilic design in your lake house, these wooden coasters will fit right in. After buying wooden slices at a crafts store like Michaels, the rest is up to you. In this outline from DIY Candy, the authors used acrylic paint to make cute winter-themed designs on each coaster. If you want to make DIY wooden coasters from planks of wood, check out these instructions from Fix This Build That. This method requires access to a saw, sander, and drill press planer, but the result is a series of sophisticated, matching coasters that integrate different shades of wood.

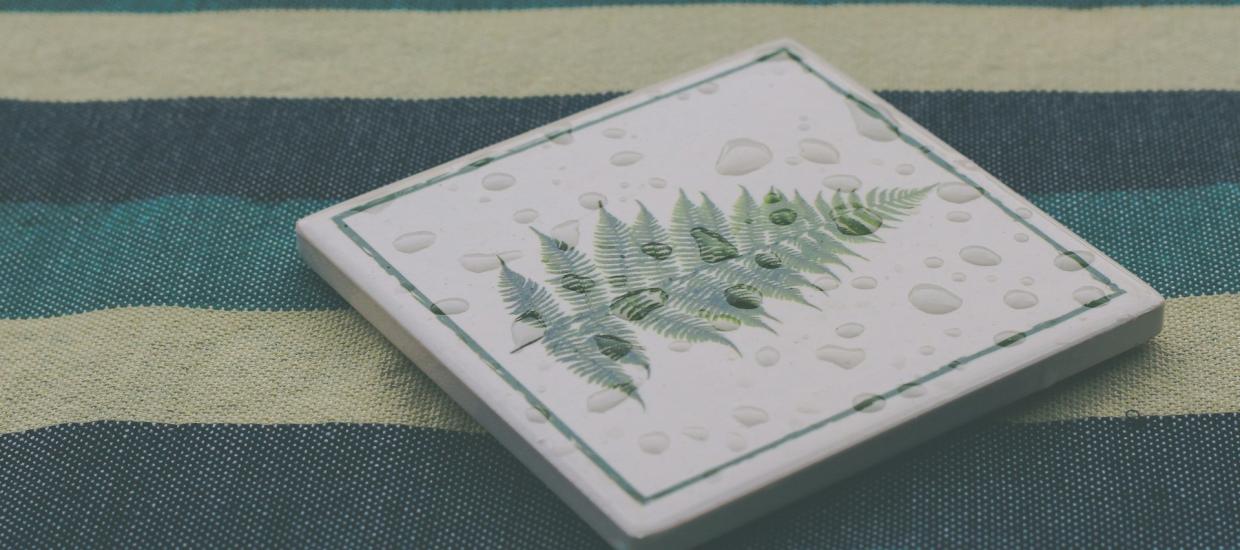
Mod Podge Map Coasters

Mod Podge Rocks Map Coasters
Photo courtesy of Pinterest

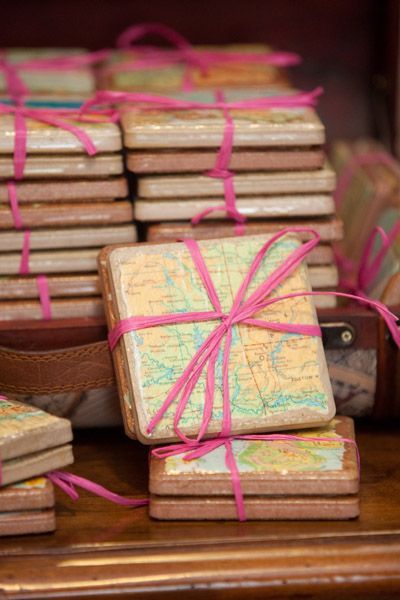
ModPodge is an essential ingredient for any crafter. Essentially a glue, finisher, and sealant in one, there’s no shortage of crafts you can make with this medium. One idea from the Mod Podge Rocks website involves applying paper to tiles using a paintbrush and Mod Podge. You can put anything you want on the surface—scraps of paper, maps of your lake area, magazine cutouts. It’s up to you to get creative! Just remember, you’ll want to use a resin spray as a final coat since Mod Podge is not waterproof.

Wine Cork Coasters

Photo courtesy of diys.com

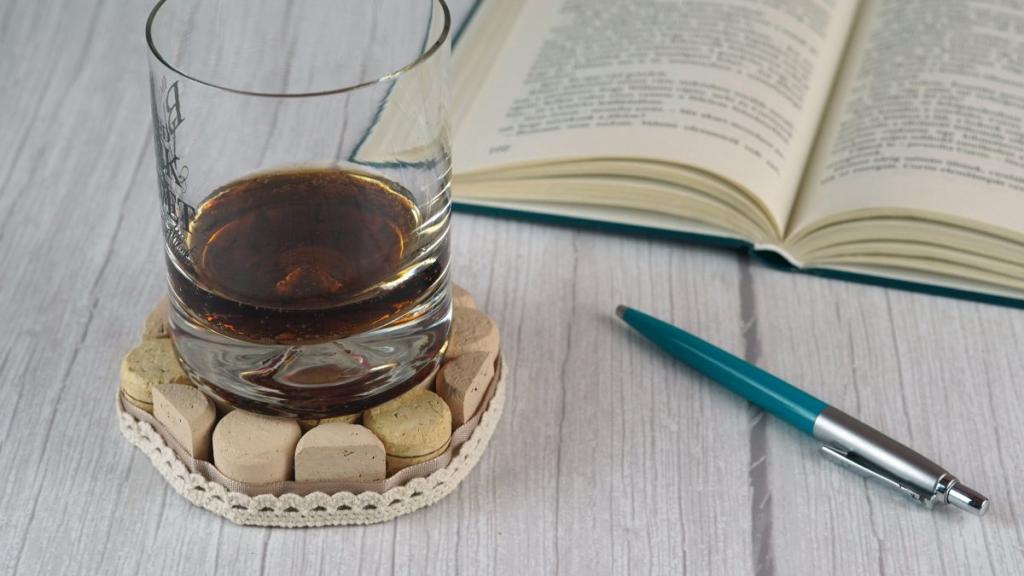
Do you ever have wine corks sitting around from a house party at the lake? Maybe you’re saving them in a drawer, or you have been meaning to recycle them. Now is the time to repurpose these cold corks for a DIY coaster. Using these instructions from Diys.com, you can create a chic set of coasters for your home. Besides several wine corks, all you need is a silk ribbon, glue gun, paintbrush, and cream acrylic. The end result is a set of coasters that looks both homemade and sophisticated

Watermelon Coasters

Photo courtesy of diys.com

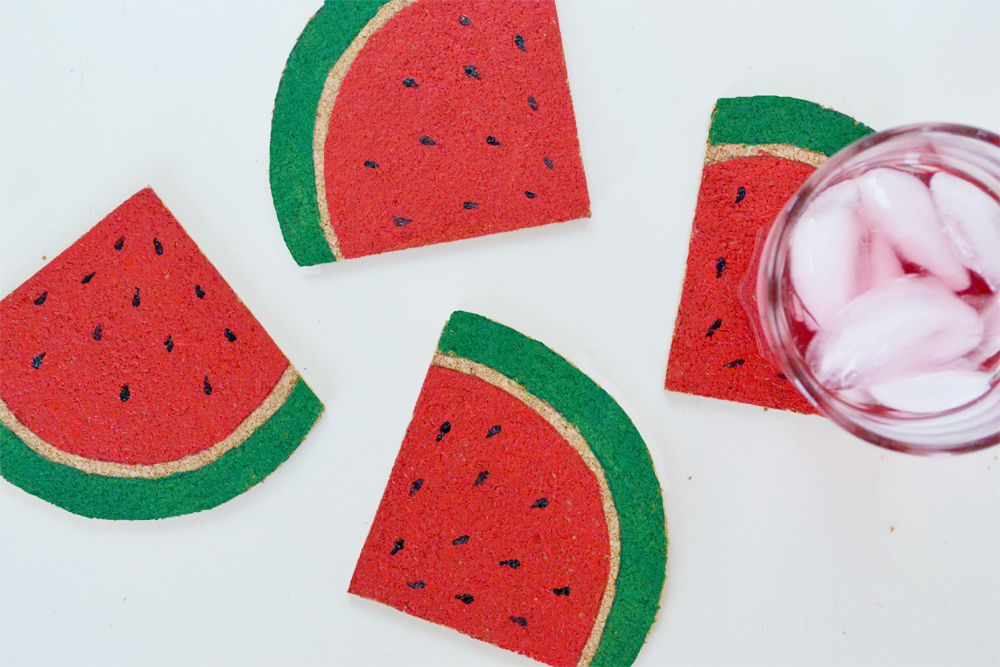
These adorable watermelon coasters are perfect for summer! By following these directions from Diys.com, you’ll spend less than $10 on materials. It only requires cork boards, red and green acrylics, and a few other simple tools. The simplicity of this DIY project also makes it perfect for kids. Using this same basic method, you could also create coasters specific to other seasons. Perhaps a cutout Christmas tree or dreidel over the winter holidays? Or a pumpkin at Halloween? Either way, you’re in for a charming new addition to your living room. 

Overall, DIY coasters make fun projects, great gifts, and decorative pieces for your lake home. What’s not to love?

DIY Bird Feeders

Photo courtesy of House Beautiful

During the summer, birdwatching is a popular lake house activity. With more time outdoors, lake homeowners everywhere are looking for ways to attract birds to their lake house. Of course, a key way to do this is through bird feeders. While you can easily find these at Home Depot or another similar store, you can also go down the DIY route. Check out some ideas for creating your own bird feeders at your lake house!

Photo courtesy of Mama.Papa.Bubba

We’ll start off with the most simple, no-frills craft. Especially if you’re looking for a bird feeder to create with young children, this option is perfect! With gelatin as a glue for the bird seed, plus cookie cutters to create fun shapes, this is the ideal family project. Depending on which cookie cutters you have, you can customize this project to the season! (Think Holiday shapes during winter, flowers in Spring).

Coke Bottle Bird Feeder

Photo courtesy of Kelly Leigh Creates

Do you have a stack of leftover coke bottles? A DIY bird feeder might just be the perfect use for them! This easy project simply involves cutting a few holes in a plastic coke bottle, inserting wooden spoons into it, and filling the container with bird seed. Talk about a sustainable way to recycle plastic!

Log Branch Bird Feeder

Photo courtesy of House of Hawthornes

If you’re specifically looking to attract birds that cling to trees, this wooden bird feeder is a perfect project. At the lake, there’s always fallen branches scattered around your backyard, so why not put them to use? For this DIY bird feeder, you’ll need a trip to the hardware store for some twine and rope, an eye hook, a prepackaged suet, and a drill. Soon, the woodpeckers and chicadees will come flocking!

Glass Bottle Hummingbird Feeder

Photo courtesy of Lovely Indeed

Before you throw that glass bottle in the recycling, think again. With this craft project, you can repurpose that bottle into a hummingbird feeder. Besides the bottle, you’ll just need scissors, wire hook, and macrame cord. As for the bottle’s contents, a mixture of sugar and water is guaranteed to attract these birds.

Paper Plate Bird Feeder

Photo courtesy of happy hooligans

During the summer, we often have paper plates lying around from various barbecues and picnics. But did you know you can turn these into a DIY birdfeeder? With these instructions, you can easily create a contraption that will attract birds to your backyard. This simple combination of bird seed and peanut butter is a great project to do with kids if you choose. 

DIY bird feeders are a great way to stay crafty and to enjoy the wildlife in your backyard. No matter which one you choose to create, we hope you enjoy your summer of bird watching at the lake!

DIY Dried-Flower Crafts

Photo courtesy of Design Sponge

On the Lake Homes Realty blog, one of our most popular DIY posts is about brightening your lake home with dried flowers. Repurposing withered blooms can spruce up your home in a simple yet sophisticated way while adding a touch of biophilic design. Although hanging dried flowers create an elegant look (it’s incredible what you can do with a little twine and hairspray), it isn’t the only option for your lake home. This week, we’re thinking outside the box. There are many ways to incorporate dried flowers into your crafting projects, including decor, utilities, and accessories. From wall art to coasters, you can’t go wrong with these DIY dried-flower crafts.

Pressed-Flower Monograms

Photo courtesy of DIYS.com

Once flowers begin to dry, pressing them is a great idea to preserve the natural colors. This involves using a book or another heavy object to push the remaining moisture out of flowers so the flat pieces can be used to create a design. These framed monograms made from delicate dried flowers add an element of creativity to your lake home. Plus, they’re easy to DIY. Check out this video for the instructions.

Dried-Flower Terrarium

Photo courtesy of The Smart Local

Need a new centerpiece for your table? Or a flowery decoration for your mantle? This simple, DIY dried-flower craft is a perfect addition to your lake home. The geometric glass container with a stylish brushed metal accent will add a contemporary feel to your living room. All you need are dried flowers and sand to complete the look. At Afloral.com, you can get the full tutorial.

Dried-Flower Sachets

Photo courtesy of DIYS.com

While driving to your remote lake house, you’re spending plenty of time in the car. And nothing is worse than an unpleasant smell on a long road trip. Rather than buying an air freshener from the gas station, try using some leftover dried flowers to create these beautifully scented sachets. You’ll need a few other materials, such as wax molds, but this elegant end product is well worth the effort. Hearth & Vine’s blog features more detailed instructions on these DIY dried-flower sachets.

Dried-Flower Bath Salts

Photo courtesy of Almost Makes Perfect

Looking to repurpose those dried roses you’ve been saving? Mix in some Epsom salts, sea salt, baking soda, and essential oils for a decadent bath-salt mixture. Using this tutorial from Almost Makes Perfect, you’ll be able to make dozens of batches at once. Besides treating yourself to a bubble bath at the lake, these bath salts also make excellent gifts!

Floral Phone Case

Photo courtesy of LotusWei

For this craft, all you need is a clear phone case. You can even coordinate the color of your phone to compliment the flowers you choose. To create this easy DIY phone case, as outlined by LouisWei, just take a few dried flowers and press them on the inside of a clear phone case. Then, snap it onto your phone and — voila! For a more involved version, check out these instructions that incorporate a clear resin to hold the dried flowers in place.

Dried-Flower Coasters

Photo courtesy of Frankie Magazine

When dining at your lake house, these coasters are the perfect accessory to showcase your connection to nature. Plus, the brushed metal and glass look is fresh and stylish. Ideal for a friend who loves the lake, they make an easy and thoughtful gift. You can even pick their favorite flowers to use in your coaster creation.

Pressed-Flower Lanterns

Photo courtesy of A Practical Wedding

During the pandemic, we’ve become experts at hosting guests outdoors. When gathering friends around a fire pit, this collection of DIY dried-flower lanterns evokes an elegant ambiance. Especially around dusk, this soft lighting will bring out a sense of warmth at your lake house. To create them, you need pressed flowers and greenery, wax paper, a cutting board, and an iron. These instructions from A Practical Wedding will help guide you! 

We hope these crafts inspire you to put those dried flowers to use this spring!

From Colors to Crafts: Using DIY Nautical Decor in Your Lake Home

Photo courtesy of Down East Magazine.

For lake homes and beach houses, decor in nautical themes is a classic look. A blue and white color scheme with boating motifs evokes a relaxed, cheerful feel. However, this style can sometimes go awry. Too often, lake homeowners go overboard– pun intended– with sailing-related paraphernalia. The result is more junky than sophisticated. When designing a nautical room for your lake house, it’s important to remember that a little boat-inspired charm goes a long way. Thankfully, achieving this whimsical, yet polished balance does not have to be complicated. There are plenty of DIY nautical decor projects that you can begin right now, in quarantine, to revamp your room in time for summer. Check out some of our tips below!

Painting Your Walls

Photo courtesy of Maine House Interiors.

Painting — or repainting– your walls is a basic, yet often overlooked tip for designing your nautical room. Although we associate shades like blue, white, red, and yellow with boating, combining these bold colors on one wall may look chaotic. Kate Diaz, interior designer and owner of home DIY website SwankyDen.com, comments, “Stick to a simple color palette for a classic look. For a more modern look, use bolder, darker shades of blue to offset bright whites. Doing so will create a stunning contrast while maintaining an elegant appeal.” Katie Mills, a writer for Poshh Living Magazine, agrees, adding, “About 80%-90% of the space should be neutral.” Besides blue and white, you can opt for wood tones to lean into a more rustic vibe. As for those bright yellows and reds that we associate with nautical flags– they work best in smaller doses. While an entirely red accent wall could be overwhelming, painting a single chair in red can add a fun pop of color.

Picking Nautical Items

Photo courtesy of Pinterest.

Finding nautical accent pieces is easier than you think. Often, the best sailing-inspired items are miscellaneous objects found both indoors and outdoors. Katie Mills advises, “Try finding genuine nautical items to use as decor. Oars are the obvious choice and are easy to paint and repaint.” If you have old canoe paddles, try painting a few and hanging them on your wall. While you’re at the boat dock, grab a few twists of rope or nets. Using these nautical objects, you can create plenty of designs. Kate Diaz suggests wrapping natural colored ropes around plant pots or using burlap to create a nautical footstool with glue and a stapler. You may also find nautical objects in other rooms of the house. For instance, if you have a round mirror in the foyer, try moving it to the nautical room, as the circular shape will resemble a ship’s porthole.

Choosing Crafty Projects

Photo courtesy of Tori Grant Designs.

In addition to repurposing boating items as decor, you can also get crafty with everyday materials. Everything from glass bottles to pieces of wood has creative potential. If you have sewing equipment, you can create nautical pillows. With old wine and sauce bottles around the house, you can paint them, wrap twine around, and place them on a bookshelf or patio table. Using driftwood, easily found in the lake, you can make these small sailboat figures. For a more personal touch, paint a picture frame with nautical shades and feature a photo of your family on the boat. While your paints are out, consider painting a welcome sign for your house. Each of these DIY crafts will instantly add a warm, lakeside feel to your room. 

We hope these ideas help you brainstorm DIY nautical decor projects you’d like to undertake. Picking one or two projects is best. Katie Mills reminds us: “It’s fine to have the occasional ship in a bottle, decorative anchor, or painting of a ship, just keep them within reasonable limits!” So, pick the craft that interests you most and get started. You’ll be surprised at what a single DIY nautical item can add to your lake house!