How To Replace a Ceiling Fan

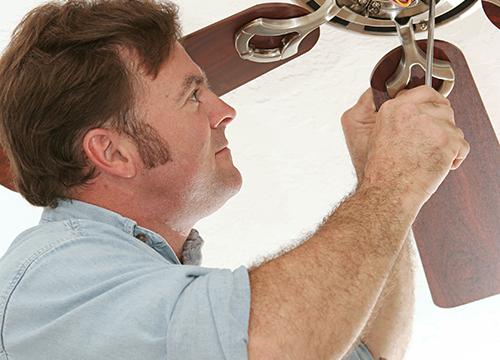
man installing ceiling fanAs the weather warms up, many of us will be reaching up to turn on your ceiling fan.

These are good for dispersing cool air throughout a house, adding air flow to a room and more, but contrary to common perception, ceiling fans don’t actually make a room cooler.

A thermostat under a fan going full blast will read the same temperature after the fan is turned off.

However, the wind chill effect can make a room feel as much as seven or eight degrees cooler.

Ceiling fans use a fraction of the energy an HVAC system uses, as well.

Ceiling fans can actually help warm rooms in the winter, too. Most ceiling fans have a directional switch on the fan housing.

If you reverse a fan’s rotation and run it at low speed, it will gently draw warm air upwards from floor-based heat registers. Just be sure to flip the switch and reverse direction again once the weather warms up!

Installing a fan can be very easy, but only if you follow the directions included with your new fan kit and keep a few safety tips in mind.

Light or no light?

This is a very important factor to keep in mind when shopping for, and installing, your new ceiling fan. There are four possibilities here.

Please note that these are general guidelines – always follow the installation instructions on your new fan package.

If your old ceiling fan has a light fixture attached, but your new fan does not: during the attachment process, simply cover the light wires and tuck them back in the housing.

On the other hand, if the old ceiling fan has a light fixture, and your new fan does: connect the old light wires to the new light kit, and secure it to the housing with screws.

If your old ceiling fan does not have a light, and your new fan does not: you don’t have anything to worry about!

If it does not have a light, and your new ceiling fan does: check the assembly and housing of your old fan as you remove it. Often, there is already clearly labeled wiring for lighting in the fixture, even if it is not used.

This may be wound together with the fan wiring.

If there is not wiring clearly labeled for a lighting kit, you will need to ask someone with experience for help, or hire an electrician.

Turn the Power Off

This means more than turning off the switch. You will need to cut the power off to the entire appliance.

Turn off the circuit breaker or fuse panel, depending on what your home has. It is only safe to remove the light fixture once you have done this.

You can test to see if the electricity has been cut off by turning the wall switches on and off, or even using a circuit tester on the light fixture.

You can then remove the light fixture and disconnect the fan’s wiring.

Remove the old fan

If the fan has a light, remove the light shade and light bulb(s). Remove the fan blades by removing the screws holding them in place.

If there is a light fixture on your old fan, remove the housing by removing the screws holding it in place.

Disconnect all of the old wires as you remove the housing, and remove the mounting bracket.

Remove the ceiling fan mounting bracket by removing the screws holding it in place.

Add the new fan

Screw in the new mounting bracket according to the directions on the package.

Connect the new wires, making sure the metal wires are in solid contact. Secure them with twist-on wire connectors, also known as “wire nuts.”

These small plastic caps twist electrical wires together, while protecting your fingers from the electricity while handling them.

Attach the central rod or canopy of the fan to the mounting bracket. This is the part of the fan that actually rotates.

Attach the fan blades to the mounting brackets with the screws included with the fan.

If there is a light on your new fan, connect the light kit and secure it with screws. Attach the light fixture as the instructions dictate.

Attach the included pull chains, if applicable.


Turn the circuit breaker or fuse back on, then turn on your new ceiling fan!

How Energy Efficient Upgrades can Increase Your Home’s Value

brightly light home exterior

Energy efficiency upgrades can not only shrink your utility bill; they can also increase the value of your home.

Homebuyers are becoming increasingly aware of the benefits of energy-efficient homes.

In fact, they’re often willing to pay more for homes with “green” upgrades, says Sandra Adomatis, a specialist in green valuation with Adomatis Appraisal Service in Punta Gorda, Florida.

Just how much your home will increase in value depends on a number of factors, Adomatis says, like where you live, which upgrades you’ve made and how your home is marketed at sale time.

The length of time to recoup the costs of green upgrades also depends on the energy costs in your area.

In 2014, upgraded homes in Los Angeles County saw a six percent increase in value, according to a study from Build It Green, a nonprofit based in Oakland, California, that works with home professionals.

Upgraded homes in Washington, D.C., saw a two to five percent increase in 2015, according to a study Adomatis authored.

While upgrades like a gleaming new kitchen or a finished basement may give you more bang for your buck than energy-saving features, going green has its benefits. Here’s where you can begin.

Compare Current Mortgage Rates

Find out how much energy your home uses

Getting a quick energy assessment or a more thorough energy audit can determine how much energy your home uses, as well as which upgrades would make the most sense for your home and your finances.

An audit may include an energy rating, a number that indicates how energy efficient your home is and how much it will increase if you make recommended upgrades.

The Department of Energy website lists ways to find assessors in your area. The Environmental Protection Agency’s Energy Star program offers assessor and advisory services to help you determine what to upgrade.

Your utility provider may also offer energy audits.

The cost varies depending on location and who’s providing the service. Your utility company may offer an assessment for free or at a discount.

A full audit may run $300 to $500 depending on the complexity, according to Don Knapp, senior marketing manager with Build It Green. You may not want to pay for a full audit unless you’re planning to take advantage of it with major upgrades.

Once you know where you can improve your energy use, begin by making the changes that are most affordable and have a quicker payoff, Adomatis advises. Then consider whether the costlier ones are worth the investment.

Keep in mind that tax credits and financing options are available for energy efficiency improvements.

Here are some common energy upgrades, from least expensive to most.

  1. Insulation. A 2016 Cost vs. Value report from Remodeling magazine found that the average attic air-seal and fiberglass insulation job costs $1,268, with an added value to the home at resale within a year of completion of $1,482. That amounts to a 116 percent return on investment. And according to Energy Star, homeowners can save $200 a year in heating and cooling costs by making air sealing and insulation improvements
  2. Appliances. Your appliances account for about 15 percent of your home’s energy consumption, the DOE says. Certified clothes dryers can save you $245 over the life of the machine, according to Energy Star. A certified dryer from General Electric can run from $649 to $1,399.

When upgrading, look at the kilowatt-hour usage of a new appliance and compare it to your current one — a good Energy Star rating doesn’t necessarily mean it will use less energy than your existing appliance, Adomatis says.

  1. Heating and cooling systems. These systems account for about 43 percent of your energy bill, according to the DOE. Replacement costs for an entire HVAC system — heating, ventilation and air conditioning — vary widely depending on equipment brands and sizing but may run several thousand dollars. Energy Star estimates you can save 30 percent on cooling costs by replacing your central air conditioning unit if it’s more than 12 years old.

While addressing your home’s heating and cooling systems, bear in the mind that leaky duct systems can be the biggest wasters of energy in your home, according to Charley Cormany, executive director of Efficiency First California, a nonprofit trade organization that represents energy efficiency contractors. The cost of a professional duct test typically runs $325 to $350 in California, he says.

  1. Windows. Replacing the windows in your home may cost $8,000 to $24,000, and could take decades to pay off, according to Consumer Reports. You can recoup some of that in resale value and energy savings. Remodeling’s Cost vs. Value report found that installing 10 vinyl replacement windows, at a cost of $14,725, can add $10,794 in resale value. Energy Star estimates that certified windows, doors and skylights can reduce your energy bill by up to 15 percent. If you’ve already tightened the shell of your home, installing a set of new windows may not be worth the cost. But the upgrade may be worth considering if you live in a colder climate.
  2. Solar panels. EnergySage, a company offering an online marketplace for purchasing and installing solar panels, says the average cost of a solar panel system is $12,500. The payoff time and the amount you’ll save will vary depending on where you live. Estimated savings over a 20-year period in Philadelphia, for example, amount to $17,985, while it’s more than twice that amount in Seattle: $39,452, according to EnergySage.

Last: Let Buyers Know

When it comes time to sell, your real estate agent can help you market your home as energy efficient.

Provide your agent with utility bills or your energy rating, if you received one with your audit, to include when describing the house on a multiple listing service, or MLS.

There’s a growing trend in the real estate industry to make energy upgrades visible, Knapp says; energy disclosures are now a common practice in cities like Berkeley, California, and Chicago. “If it’s reflected on the MLS,” Knapp says, “it’s more likely to be reflected in the resale value.”

Bottom line: If you weigh the costs and savings carefully, going green can be worth the investment.

Michael Burge is a staff writer at NerdWallet, a personal finance website. Email: mburge@nerdwallet.com

This article was written by NerdWallet and was originally published by The Associated Press.

NerdWallet is a Lake Homes Realty / LakeHomes.com content partner providing real estate news and commentary. Its content is produced independently of Lake Homes Realty and LakeHomes.com.

Deciding Whether Home Repair Warranties Are Worth the Cost

Say it’s the fifth day of temperatures over 98 degrees in South Carolina during a summer of record heat.

Your air conditioning system has kept you cool through it all — until now. The unit is still spinning, but the air coming out isn’t cool. The temperature in your house starts to climb.

hands over tiny house, protecting it

What do you do?

If you are like most people, you Google “AC repair” and start making calls. But you don’t want to pay service fees to three different companies just to come see what the problem is, so getting comparative estimates won’t work.

Besides, the whole family insists they are “dying” from the heat. You quickly pick a company to fix the AC and that’s that.

Once you get through the AC crisis, you start to wonder if maybe you should get home repair warranty insurance. But is it a good deal?

My family has had a home repair warranty on our 28-year-old home for about 10 years. Initially it ran us about $300 a year with a $35 fee per repair visit.

The premium and the visit fee increased every year until recently, when I took the time to shop around and find a better deal. However, even with lower rates, looking at the math over the last 10 years, the numbers alone don’t support the wisdom of that purchase.

So why do I buy a home warranty?

Peace of mind

What the numbers don’t show is the peace of mind the warranty gives me.

When something breaks, the home repair warranty company (let’s call it “Fictional Warranty Co.”) sends a repair company to my house to fix it. I pay $45 each time I schedule a visit, but there is no cost for the rest of the repair.

I don’t think this saves us money on repairs overall, but I like the fact that Fictional Warranty Co. calls a repair firm (“The Repair Shop”) and then monitors how much is charged.

So if my refrigerator breaks, for instance, I am protected from Bob of The Repair Shop trying to inflate the price. Instead of telling me it will be $400, when it’s really only $200, Bob has to report the price to Fictional Warranty.

Fictional Warranty also helps me resolve a situation in which The Repair Shop doesn’t do the work correctly, handling the additional cost and repairs on my behalf.

Appliance and system repairs are rarely necessary at my house, so I don’t have a network of contractors I know and trust. But Fictional Warranty vets the companies for me, manages what is charged, and resolves any problems.

That’s worth the yearly warranty cost to me.

Warranties get mixed reviews

But when I did some research, I found no consensus on whether home warranties are a good idea for older homes (all the sources I read said to avoid them for new homes).

Consumer Reports recommends avoiding warranties because of the hundreds of dollars these contracts can cost.

“It makes much more sense to buy reliable products and maintain them as the manufacturer recommends,” it says. Instead, Consumer Reports suggests placing the money you would have spent on a service contract into a savings account or repair fund.

However, other personal finance experts also point to the added benefit of peace of mind, which can make a home warranty worth the cost for some people. And your personality and risk tolerance will, of course, factor into your decision-making, as will your existing network of repair companies.

From a risk standpoint, if you typically avoid risk, you’ll probably feel more comfortable knowing your maximum out-of-pocket yearly repair costs.

Also, if you don’t know much about appliance repair and don’t know whether to trust the repair companies in your area, you may like having a home warranty.

On the other hand, if you are kind of handy and can do some work on the house yourself, or you are confident you can find service providers you like and trust, you may want to forgo the warranty.

Shop around

If you decide you want a home warranty, shop around and compare options.

Consumer Affairs provides a useful comparison of features, costs and companies that offer home warranties. Call the companies you like and ask for the price of each home visit and the yearly cost.

Then you can buy the warranty of your choice online or over the phone. Revisit your choice each year to make sure you keep getting the best deal.

  *    *    *

Kathryn Hauer is a certified financial planner and fee-only investment advisor with Wilson David Investment Advisors in Aiken, South Carolina. Learn more about Kathryn on NerdWallet’s Ask an Advisor.

This article originally appeared on NerdWallet.

NerdWallet is a Lake Homes Realty / LakeHomes.com content partner providing real estate news and commentary. Its content is produced independently of Lake Homes Realty and LakeHomes.com.

What is a Reverse Mortgage and Who Should Consider One?

Reverse mortgages have begun to gain in popularity. It was introduced in the year 1989, and such loans began to enable seniors of the age 62 or high to access a certain portion of the home equity without being forced to move.

The bank offers payments to the borrower throughout their lifetime, which is based on the percentage of the home equity. The loan balance will not have to be paid back until the borrower is deceased, sells the property, or moves out of the dwelling permanently.

Reverse Mortgage Breakdown Points:

  • The bank will make payments to the borrower, which is based on the accumulated equity of the home.
  • Once the borrower dies, sells the property, or moves out; the loan is then repaid.
  • Those of the age 62 or higher who own their homes with no balance or have small mortgages can apply for the reverse mortgage.
  • The money can be used for any purpose. Typically those who have retired use the money to survive.

How much money are you able to receive?

Retired CoupleStated by the National Reverse Mortgage Lenders Association, also referred to as the NRMLA, there are several factors that can determine the amount of money you are eligible for through a reverse mortgage. These factors include:

  • Age
  • Value of the Property
  • Interest Rate
  • Lending Limit

In order to be eligible for a reverse mortgage, you will need to either own the home outright or have a very low mortgage balance that is able to be paid in full at the closing during the proceeds of obtaining the reverse loan.

You will also need to use the home as your primary residence. Typically, the older that you are, the more valuable the home is, which means the more money you are able to receive.

There are no restrictions on the borrower can use the money when obtaining the reverse mortgage. This means those with medical bills, those that have retired, or those who have lost their jobs are able to use the money any way they see fit.

Things to Consider

You will need to keep in mind that reverse mortgages can be costly at times. This is a wonderful tool to have at your disposal should you need extra funds, but it is crucial to be aware that the funds can make an impact on your Medicaid and your Supplemental Security Income Benefits.

Due to this factor alone, those who look to take out a reverse mortgage are required to take a counseling class that is free. It is conducted by the Department of Housing and Urban Development or another national counseling agency like AARP.

The potential borrower will be able to learn the insides and the out to receive all necessary information that may not be clear before they decide to go this route. They will be shown other routes of opportunities to help aid them in the issue that has led them to wanting a reverse mortgage.