Lake Home Tips: Keeping Your Kitchen Energy Efficient

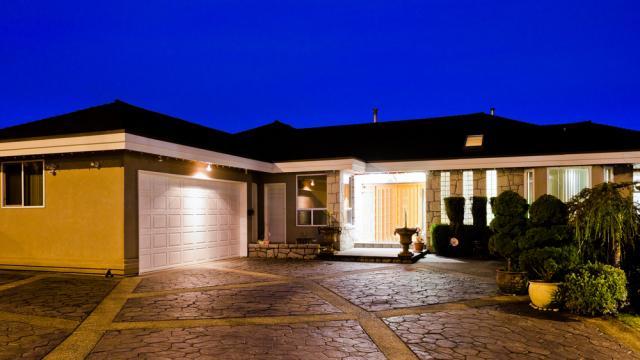
Energy efficiency helps the environment, but did you know investing in energy efficient home appliances and best practices can add value to your lake home?

According to Zillow’s Consumer Housing Trend’s Report 2017, 48 percent of buyers list energy efficiency as one of the most desirable features a prospective home can have.

But even if you’re not selling just yet, practicing energy efficiency and upgrading your space with energy efficient appliances can help save you big money.

So, take a look at how you can save money and save the world with these helpful tips:white and wooden kitchen with lake sign

Refrigeration

Refrigerators are the biggest source of wasted energy in your kitchen.

According to the U.S. Energy Information Administration, this appliance alone uses 100 billion kWh, and is responsible for 7 percent of your home’s energy use.

Some tips for keeping your fridge efficient include:

  • Ensuring that the refrigerator is in good repair and the seal around the door(s) is undamaged. An improperly sealed fridge door requires the appliance to work overtime, thus using more energy and wearing out it out more quickly.
  • Keeping lots of food in your refrigerator will help the appliance maintain its proper temperature.  The less empty space in your fridge, the less air needs to be cooled.
  • Allow foods to cool off before putting them into the refrigerator.

To upgrade your kitchen, buy a new refrigerator that is “Energy Star” certified. Certified appliances can help save more than $270 in energy costs over a five-year span, according to the Energy Star website. The site also reminds consumers that a fridge more than 10 years old could be costing owners close to $110 per year.

At the lake, you can avoid over using your refrigerator by having a cooler outside with drinks and snacks in it. That way, there’s no need for your guests to keep going in and out for refreshments.

Cooking

The next energy waster in your kitchen is your stove and oven unit.

Mindful cooking may help you save money in the long-run as well as conserve some of your home’s energy.

Some tips for keeping your range energy efficient include:

  • When you are cooking on a range, use only burners that you absolutely need. Use as few as possible.
  • Turn down the heat once water has reached its boiling point. Normally, you do not need the full heat in order to maintain a boil.
  • Do not open the door of the oven too often. Instead, use the oven light (if your model has one) to check on food.
  • Do not preheat your oven unless you absolutely have too.

Energy Star does not currently certify stove and oven units, as they consume significantly less energy than refrigerators. In fact, cooking units only account for roughly 2 percent of a home’s entire energy use.

It’s easy to avoid using your range at the lake: just fire up the grill! You might be surprised how much you can cook outside, like grilled veggies, baked beans, grilled potatoes and more.

Washing the Dishes

Dishwashers also consume about 2 percent your home’s energy, however, this might be the easiest area in which to conserve energy in the whole kitchen.

Some tips for keeping your dishwasher energy efficient include:

  • Rinse your dishes to avoid having run them through the dishwasher multiple times.
  • Wait until your dishwasher is completely full before you operate it.
  • Consider hand drying your dishes. The dishwasher’s drying cycle uses a tremendous amount of energy.

Energy Star-certified dishwashers can save an average 3,870 gallons of water over its lifetime and cost an estimated $35 a year to operate.

Depending on the number of guests at your lake home however, you might be able to avoid using the dishwasher all together. Instead, hand-wash your dishes or use biodegradable disposable plates and utensils.

Smaller Kitchen Appliances

Even if the appliances in the kitchen are turned off, they may still be using energy for no purpose.

Things like coffee makers, microwaves and even bread makers use energy. This is a slow type of energy drain, but it adds up quickly.

Unplug your appliances when they are not being used. Especially if your lake home is a seasonal residence.

Even when you aren’t there, you are still paying for this unused electricity.


For more tips on how to make your lake home energy efficient, read our “Inexpensive Quick Tips to Save on Energy Costs” and other efficiency-related articles here!

How To Replace a Ceiling Fan

man installing ceiling fanAs the weather warms up, many of us will be reaching up to turn on your ceiling fan.

These are good for dispersing cool air throughout a house, adding air flow to a room and more, but contrary to common perception, ceiling fans don’t actually make a room cooler.

A thermostat under a fan going full blast will read the same temperature after the fan is turned off.

However, the wind chill effect can make a room feel as much as seven or eight degrees cooler.

Ceiling fans use a fraction of the energy an HVAC system uses, as well.

Ceiling fans can actually help warm rooms in the winter, too. Most ceiling fans have a directional switch on the fan housing.

If you reverse a fan’s rotation and run it at low speed, it will gently draw warm air upwards from floor-based heat registers. Just be sure to flip the switch and reverse direction again once the weather warms up!

Installing a fan can be very easy, but only if you follow the directions included with your new fan kit and keep a few safety tips in mind.

Light or no light?

This is a very important factor to keep in mind when shopping for, and installing, your new ceiling fan. There are four possibilities here.

Please note that these are general guidelines – always follow the installation instructions on your new fan package.

If your old ceiling fan has a light fixture attached, but your new fan does not: during the attachment process, simply cover the light wires and tuck them back in the housing.

On the other hand, if the old ceiling fan has a light fixture, and your new fan does: connect the old light wires to the new light kit, and secure it to the housing with screws.

If your old ceiling fan does not have a light, and your new fan does not: you don’t have anything to worry about!

If it does not have a light, and your new ceiling fan does: check the assembly and housing of your old fan as you remove it. Often, there is already clearly labeled wiring for lighting in the fixture, even if it is not used.

This may be wound together with the fan wiring.

If there is not wiring clearly labeled for a lighting kit, you will need to ask someone with experience for help, or hire an electrician.

Turn the Power Off

This means more than turning off the switch. You will need to cut the power off to the entire appliance.

Turn off the circuit breaker or fuse panel, depending on what your home has. It is only safe to remove the light fixture once you have done this.

You can test to see if the electricity has been cut off by turning the wall switches on and off, or even using a circuit tester on the light fixture.

You can then remove the light fixture and disconnect the fan’s wiring.

Remove the old fan

If the fan has a light, remove the light shade and light bulb(s). Remove the fan blades by removing the screws holding them in place.

If there is a light fixture on your old fan, remove the housing by removing the screws holding it in place.

Disconnect all of the old wires as you remove the housing, and remove the mounting bracket.

Remove the ceiling fan mounting bracket by removing the screws holding it in place.

Add the new fan

Screw in the new mounting bracket according to the directions on the package.

Connect the new wires, making sure the metal wires are in solid contact. Secure them with twist-on wire connectors, also known as “wire nuts.”

These small plastic caps twist electrical wires together, while protecting your fingers from the electricity while handling them.

Attach the central rod or canopy of the fan to the mounting bracket. This is the part of the fan that actually rotates.

Attach the fan blades to the mounting brackets with the screws included with the fan.

If there is a light on your new fan, connect the light kit and secure it with screws. Attach the light fixture as the instructions dictate.

Attach the included pull chains, if applicable.


Turn the circuit breaker or fuse back on, then turn on your new ceiling fan!

Tips for Energy Efficient Lighting

hand screwing in an energy efficient light bulb 
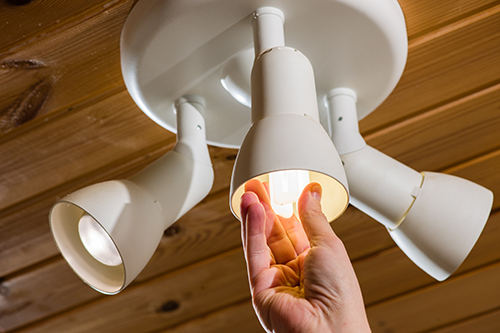
Upgrading the lighting in your home with energy efficient bulbs or other types of lighting can cut your monthly power bill dramatically.

It may take some time, but even the more expensive energy efficient bulbs pay for themselves, and then some.

In this article, you will discover lighting options that offer you a way to be green and save money on your utilities at the same time.

Energy Efficient Light Bulbs

  • Compact Fluorescent Bulbs: These energy efficient lights are far more commonplace than they used to be. Replacing any incandescent light bulbs with these will give you the largest boost in light at the lowest energy costs. They typically use 70 percent less energy, generate less heat, and last years longer than incandescent bulbs.
  • LED Lights: These are LED lights made for the home. LED bulbs have rapidly dropped in cost in recent years, and save a tremendous amount of energy. These bulbs often last a whopping 50,000 to 100,000 hours before they need to be replaced! They are more expensive than compact fluorescent bulbs, but are even more energy-efficient and long-lasting.
  • Outdoor LED Lights: These offer great lighting outdoors, as well. They can offer huge savings over traditional halogen bulbs, especially if you have a spacious yard or porch.
  • Solar Light Tubes: Also known as sun tunnels, these channel the sunlight from the roof into any room, even a roof that receives very little light at all. Once you have purchased these lights, there is no more cost. They run off of sunlight, even on cloudy days, so they are totally free. Depending on your level of skill, these may require a professional to install.

Energy Star Certified Bulbs

  • These use approximately 70 to 90 percent less energy than traditional bulbs.
  • They meet strict efficiency and quality standards that have been tested by the accredited labs, as well as third party testers.
  • Energy Star Certified Light Bulbs generate approximately 70 to 90 percent less heat as they operate, keeping your cooling bill smaller as well.
  • To find out more, click here to visit the lighting page at EnergyStar.gov.

Alternatives to the On/Off Switch

  • For exterior lights, try linking them to motion detectors. This way, your lights will only turn on when they are needed, and turn off after a set time. They also function as both a security and safety feature. Visitors will never have to approach your house in the dark.
  • Solar powered pathway lights are becoming very popular. These small lights mount on stakes next to a walkway, and spend the day soaking up the sun’s rays so they can light up your path at night.

Light usage

Factors such as wall color and window treatments also affect your energy costs. The darker the color palette, the more lighting you will need. Lighter colors reflect light better, which means the room will need less wattage to light up.

Here are some more tips that will also save you money to go along with your money saving bulbs.

  • Turn the lights off: When you leave a room, turn the lights off. If you’re not careful, it’s easy for one person moving about the house to leave the lights on in three, five or ten rooms!
  • Keep the lights clean: Many bulbs can get dirty or dusty, reducing their effectiveness. This is especially true for lamps. Wipe them down periodically, and you won’t have to turn them up as high.
  • Turn it down: Lights that use a dimmer switch typically use about 50 percent less electricity than lights with a simple on/off switch.
  • Use natural lighting: Use natural lighting as much as possible. If it is daylight out, then you should not turn on as many light bulbs indoors. Open the curtains and allow the sun to light up the rooms. Skylights make for a great addition to your home, as well, if you are building an addition.
  • Prioritize lighting upgrades: If you can only upgrade a bit at a time, then concentrate your upgrades to the rooms where you use the most lighting first.

Upgrading your lights will help keep your energy costs low.

The larger your house, the more you stand to save by switching to energy efficient bulbs and light fixtures.

This doesn’t just help you out as a resident, either. Click here for tips on how energy efficient upgrades can increase your home’s value on the market!


How Energy Efficient Upgrades can Increase Your Home’s Value

brightly light home exterior

Energy efficiency upgrades can not only shrink your utility bill; they can also increase the value of your home.

Homebuyers are becoming increasingly aware of the benefits of energy-efficient homes.

In fact, they’re often willing to pay more for homes with “green” upgrades, says Sandra Adomatis, a specialist in green valuation with Adomatis Appraisal Service in Punta Gorda, Florida.

Just how much your home will increase in value depends on a number of factors, Adomatis says, like where you live, which upgrades you’ve made and how your home is marketed at sale time.

The length of time to recoup the costs of green upgrades also depends on the energy costs in your area.

In 2014, upgraded homes in Los Angeles County saw a six percent increase in value, according to a study from Build It Green, a nonprofit based in Oakland, California, that works with home professionals.

Upgraded homes in Washington, D.C., saw a two to five percent increase in 2015, according to a study Adomatis authored.

While upgrades like a gleaming new kitchen or a finished basement may give you more bang for your buck than energy-saving features, going green has its benefits. Here’s where you can begin.

Compare Current Mortgage Rates

Find out how much energy your home uses

Getting a quick energy assessment or a more thorough energy audit can determine how much energy your home uses, as well as which upgrades would make the most sense for your home and your finances.

An audit may include an energy rating, a number that indicates how energy efficient your home is and how much it will increase if you make recommended upgrades.

The Department of Energy website lists ways to find assessors in your area. The Environmental Protection Agency’s Energy Star program offers assessor and advisory services to help you determine what to upgrade.

Your utility provider may also offer energy audits.

The cost varies depending on location and who’s providing the service. Your utility company may offer an assessment for free or at a discount.

A full audit may run $300 to $500 depending on the complexity, according to Don Knapp, senior marketing manager with Build It Green. You may not want to pay for a full audit unless you’re planning to take advantage of it with major upgrades.

Once you know where you can improve your energy use, begin by making the changes that are most affordable and have a quicker payoff, Adomatis advises. Then consider whether the costlier ones are worth the investment.

Keep in mind that tax credits and financing options are available for energy efficiency improvements.

Here are some common energy upgrades, from least expensive to most.

  1. Insulation. A 2016 Cost vs. Value report from Remodeling magazine found that the average attic air-seal and fiberglass insulation job costs $1,268, with an added value to the home at resale within a year of completion of $1,482. That amounts to a 116 percent return on investment. And according to Energy Star, homeowners can save $200 a year in heating and cooling costs by making air sealing and insulation improvements
  2. Appliances. Your appliances account for about 15 percent of your home’s energy consumption, the DOE says. Certified clothes dryers can save you $245 over the life of the machine, according to Energy Star. A certified dryer from General Electric can run from $649 to $1,399.

When upgrading, look at the kilowatt-hour usage of a new appliance and compare it to your current one — a good Energy Star rating doesn’t necessarily mean it will use less energy than your existing appliance, Adomatis says.

  1. Heating and cooling systems. These systems account for about 43 percent of your energy bill, according to the DOE. Replacement costs for an entire HVAC system — heating, ventilation and air conditioning — vary widely depending on equipment brands and sizing but may run several thousand dollars. Energy Star estimates you can save 30 percent on cooling costs by replacing your central air conditioning unit if it’s more than 12 years old.

While addressing your home’s heating and cooling systems, bear in the mind that leaky duct systems can be the biggest wasters of energy in your home, according to Charley Cormany, executive director of Efficiency First California, a nonprofit trade organization that represents energy efficiency contractors. The cost of a professional duct test typically runs $325 to $350 in California, he says.

  1. Windows. Replacing the windows in your home may cost $8,000 to $24,000, and could take decades to pay off, according to Consumer Reports. You can recoup some of that in resale value and energy savings. Remodeling’s Cost vs. Value report found that installing 10 vinyl replacement windows, at a cost of $14,725, can add $10,794 in resale value. Energy Star estimates that certified windows, doors and skylights can reduce your energy bill by up to 15 percent. If you’ve already tightened the shell of your home, installing a set of new windows may not be worth the cost. But the upgrade may be worth considering if you live in a colder climate.
  2. Solar panels. EnergySage, a company offering an online marketplace for purchasing and installing solar panels, says the average cost of a solar panel system is $12,500. The payoff time and the amount you’ll save will vary depending on where you live. Estimated savings over a 20-year period in Philadelphia, for example, amount to $17,985, while it’s more than twice that amount in Seattle: $39,452, according to EnergySage.

Last: Let Buyers Know

When it comes time to sell, your real estate agent can help you market your home as energy efficient.

Provide your agent with utility bills or your energy rating, if you received one with your audit, to include when describing the house on a multiple listing service, or MLS.

There’s a growing trend in the real estate industry to make energy upgrades visible, Knapp says; energy disclosures are now a common practice in cities like Berkeley, California, and Chicago. “If it’s reflected on the MLS,” Knapp says, “it’s more likely to be reflected in the resale value.”

Bottom line: If you weigh the costs and savings carefully, going green can be worth the investment.

Michael Burge is a staff writer at NerdWallet, a personal finance website. Email: mburge@nerdwallet.com

This article was written by NerdWallet and was originally published by The Associated Press.

NerdWallet is a Lake Homes Realty / LakeHomes.com content partner providing real estate news and commentary. Its content is produced independently of Lake Homes Realty and LakeHomes.com.

Lower Electric Bills – How to Beat the Summer Heat

Electricity bills skyrocket in the summer as air conditioners run longer hours. This is especially true at homes near a lake.

Make sure you know all of these tips to lower electric bills during the summer.

Home Maintenance 

large multi-story white house with two car garage on the waterfront

Check for cracks around doors and windows. Cracks that cause cool air to leak can increase energy cost 15 to 30 percent.

Make sure to seal any cracks with caulk or weather stripping to lower electric bills.

Air Conditioning Maintenance

Do not forget to change your filters regularly throughout the year and have your system assessed by a professional prior to hot summer months.

A clean, properly running system will lower electric bills by using less energy to produce cold air.

Unplug Appliances and Electronics

Everything from televisions to toaster ovens use electricity – even when not in use. Cell phone charges left plugged in still pull some electricity when the phone is disconnected.

To lower electric bills be sure to make everyone in the family aware that electronic devices and appliances should be unplugged when not in use.

Adjust Timing of Usage

Ovens, dryers and other heat producing appliances cause the AC unit to work harder. Using these items early in the morning and late at night keeps the unit from having to fight appliance and midday heat at the same time.

Adjusting use of washing machines and other electronic devices can also helper lower electric bills. Power companies charge higher fees for electricity used during daylight peak hours than off-peak hours.

Most state companies such as Alabama and Georgia have their daily, seasonal and peak rates posted online.

Utilize Shade and Fansman installing ceiling fan

Keeping blinds and curtains closed helps to lower electric bills by keeping the heated rays of the sun out of the house.

Having window plants and shady trees will help cut down on power usage as well as brighten up your yard.

Adding fans to the rooms in your home aids in the circulation of cool air.

Shade from the sun and better air circulation prevent the AC unit from having to run on high all day.

Benefits of Lower Electric Bills

Lowering your electrical bills saves money and helps the environment by conserving energy.

Utilizing these tips will keep your house, AC and landscaping maintenance on a regular schedule which protects the value of your home.

Lastly, not allowing electronics to be used during peak hours means your family will spend the day outside splashing in the lake.

For more cost-saving tips, read our “Inexpensive Quick Tips to Save on Energy Costs” and “10 Energy Saving Tips for the Hot Summer Months” articles!