Many real estate agents enjoy spending their spare time engaged in activities unrelated to the industry.
But for Tony Luna, a Lake Homes Realty agent on Tennessee’s Center Hill Lake, he can’t get enough of the lake real estate scene, his newest hobby combining his love of the water and passion for real estate: building tiny homes along the lakeshore.
“I’d watched enough TV to know tiny homes were gaining popularity across the country,” Luna said about how he was introduced to the tiny home niche. “No one around here was doing it, so I decided I would give it a try.”
Luna explained one of the reasons the area had so few tiny homes, or properties smaller than 1,000 square feet in size, is because of the restrictions many of the lake’s communities and subdivisions have regarding minimum square footage. Most, he said, have a minimum 1,800-square-foot rule.
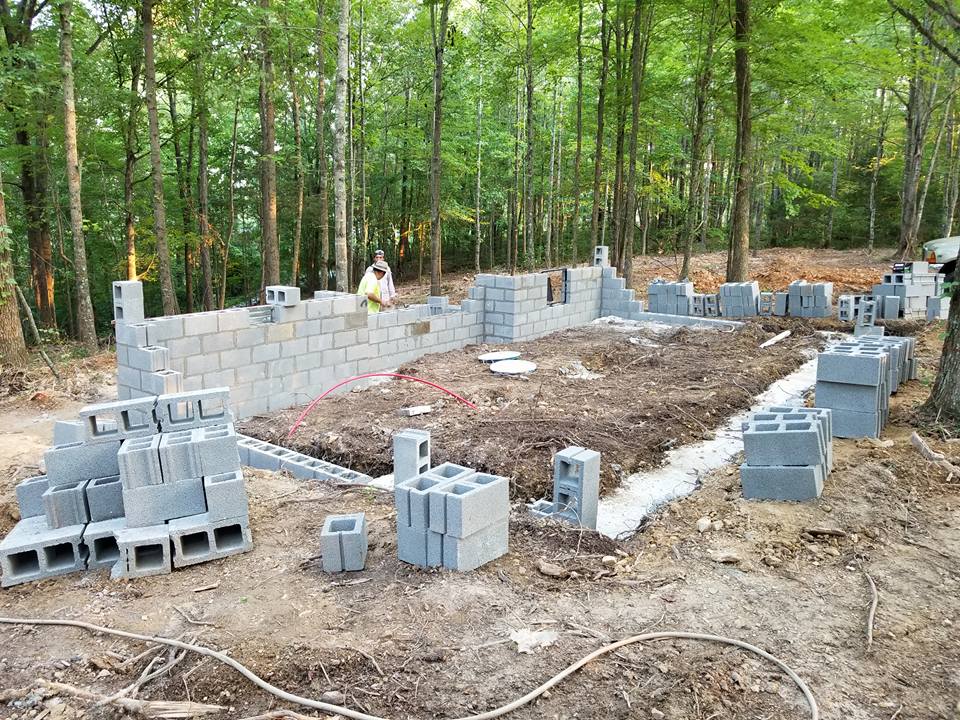
Photo courtesy of Tony Luna
Casa Luna, as the project was dubbed, would be 600 square feet when completed, which meant finding a place to build could prove difficult.
However, as fate would have it, a friend had the perfect property for sale, and Luna was able to purchase a piece of land near the lake’s Sligo Marina with no size restrictions. Even better, the property had a beautiful, year-round view of the Center Hill Lake waterfront.
But soon thereafter, the real estate agent ran into another snag in his plans.
Many of the contractors he spoke with weren’t interested in such a small build, citing the multi-thousand square foot jobs were where the money was.
In Tennessee, property owners are permitted to build one home without having a contractor’s license. So, without an outside contractor to build his tiny abode, Luna committed to taking on the challenge himself.
Growing up, Luna’s family owned a marina much like the one in Sligo where his tiny home would be located. Both places were dotted with “shed-roof” style rental cabins that Luna incorporated into Casa Luna’s design.

Photo courtesy of Tony Luna
“I drew-up the floorplan on a napkin,” Luna said, “and then I taped the whole house out in a parking lot so I could get a better sense of the layout’s flow. I knew where I wanted the kitchen, bedroom and living area to be, but I found out on my walk-through that I didn’t like the bathroom placement.”
“I knew I wanted to build a shed-roof tiny home as a sort of homage to Sligo Marina’s original cabins and to my roots,” he explained.
He had no intention of selling, at least not initially, he confessed.
Ground broke in June 2017 and construction continued for roughly seven months before Casa Luna was complete.
All the while, Luna chronicled the building’s progress on his social media accounts and immediately gained attention from lake lovers across the state looking to buy his finished project.
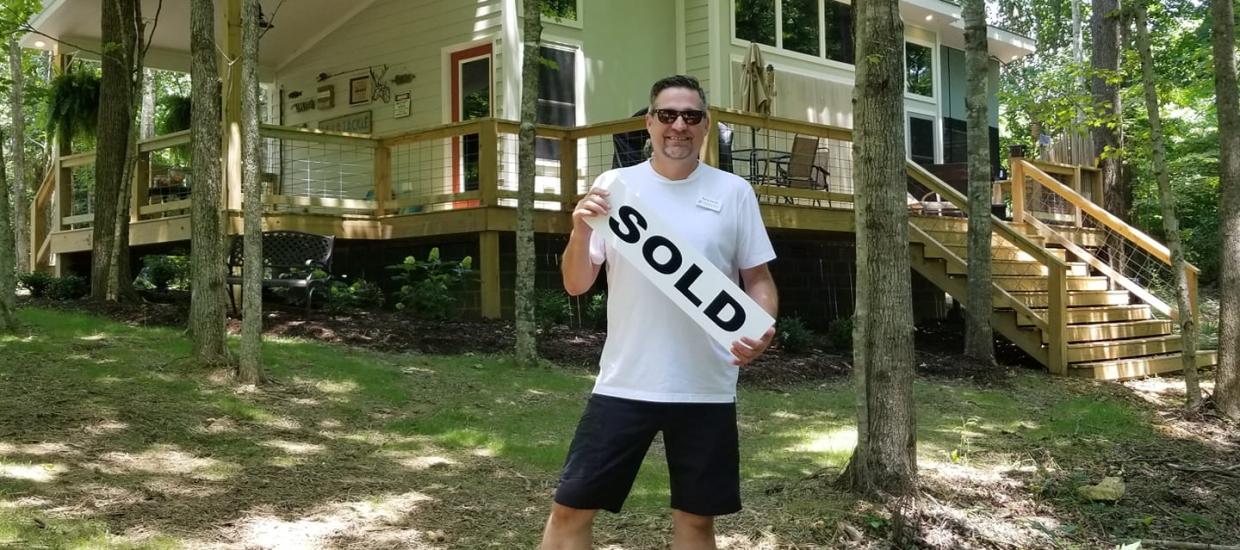
“I lived in the house for about six months and had several people ask me about selling. I finally thought, ‘well I’ll list it and see if anything comes of it,’” Luna said.
Within 30 minutes of listing the property, he had a bite, and within 12 hours, Luna had accepted an offer from a financial advisor who had been following his story online.
Today the property’s new owner uses the Center Hill Lake tiny home as an Airbnb, which she tells Luna has been one of the best investments she’s ever made.
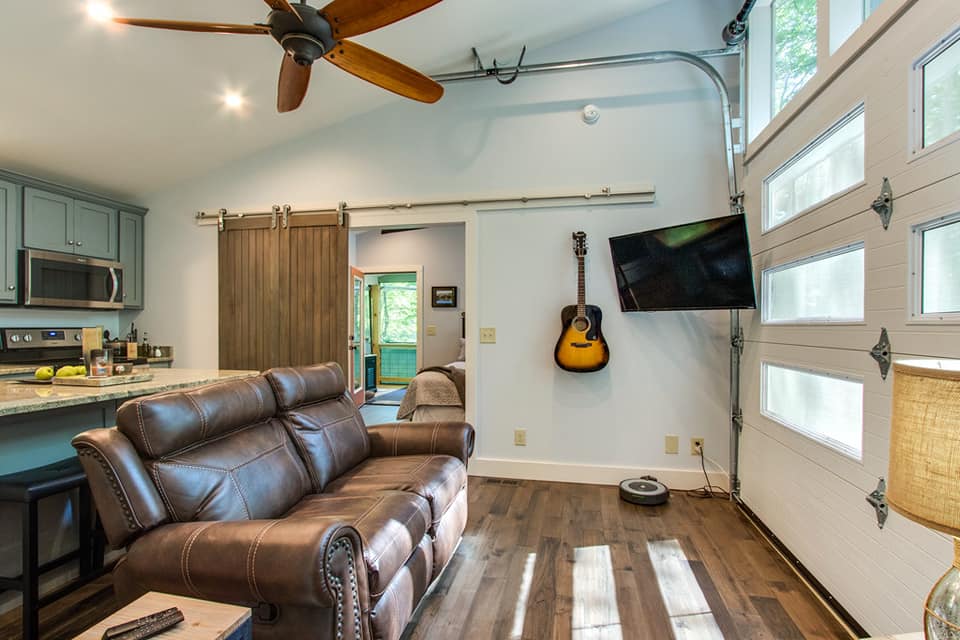
Photo courtesy of Tony Luna
As for the potential for more tiny home builds across Center Hill Lake, Luna said a tiny home boom is unlikely.
He explained, “even though we do have a lot of land listings on the market here, many of them are located within subdivisions where you can’t build tiny homes, or they are in old fishing camps from the 1970s that were originally divided into small lots. Today, you have to buy multiple lots to have a space big enough to build, and in those cases, it becomes a big undertaking to contact multiple owners of individual lots just to build one tiny home.”
However, that’s not stopping Luna from continuing with his hobby. In fact, “Casa Luna II” will be completed by the end of August.
“I think the tiny home trend will continue to grow. Younger generations are starting to buy on our lakes, and these minimalist homes are exactly what they are looking for,” he said.
In addition to their compact design and less severe impact on the environment, Luna also said tiny homes are attractive because they are so much like the lake’s luxury properties, but on a smaller scale.
“My tiny home projects are on permanent foundations, just like the homes on the lake now. And I build these homes with the highest quality materials,” he continued. “I use high-end hardwoods, all custom cabinets, real granite counter-tops… the panoramic door on Casa Luna II costs $8,000 alone.”
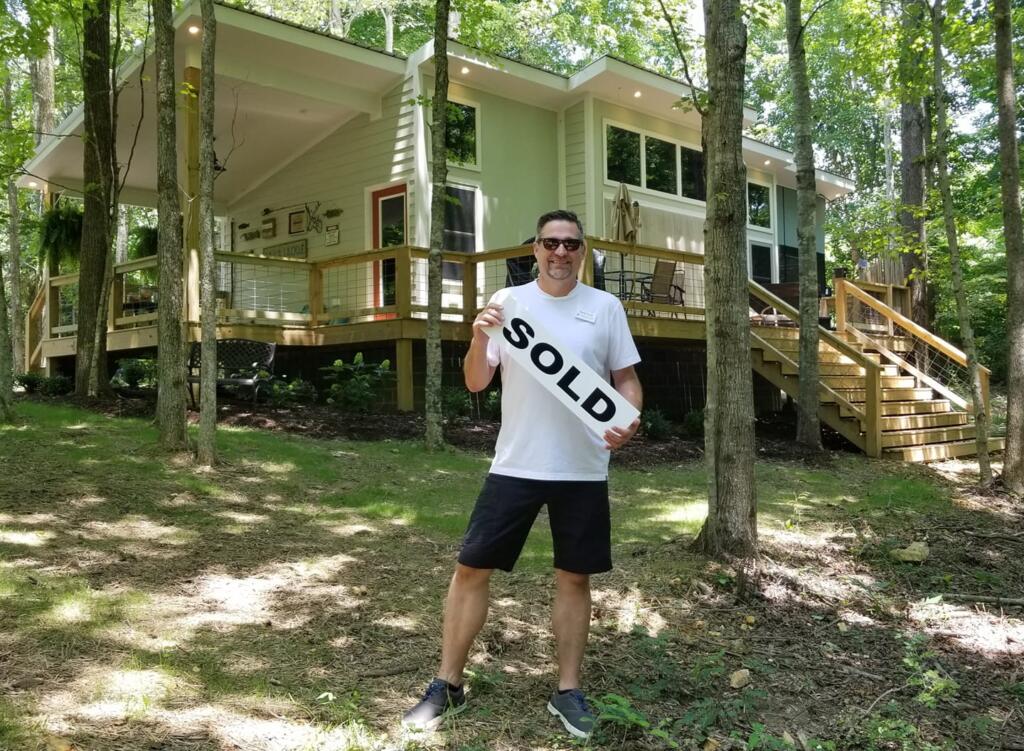
Photo courtesy of Tony Luna
Luna plans to list his second tiny home in about two weeks, and will then take a break from building for the next year, but he assures his followers this is not the end of his tiny home journey.
Until his return to the construction scene, Luna will continue serving the Center Hill Lake community as the area’s lake real estate expert, developing new designs and searching for land where he can embark on his next not-so-tiny adventure.